Nice touch
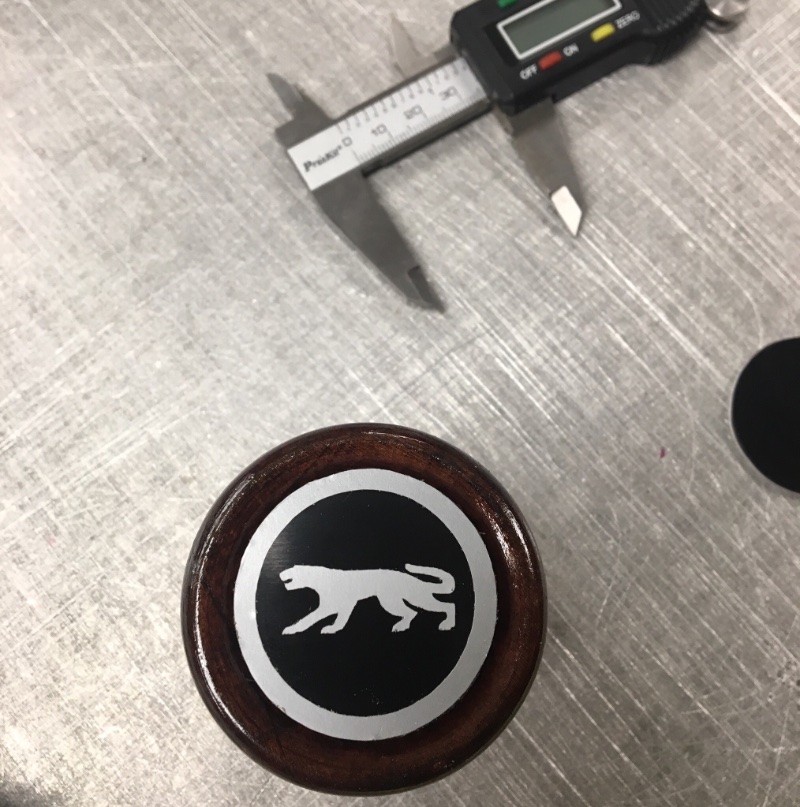
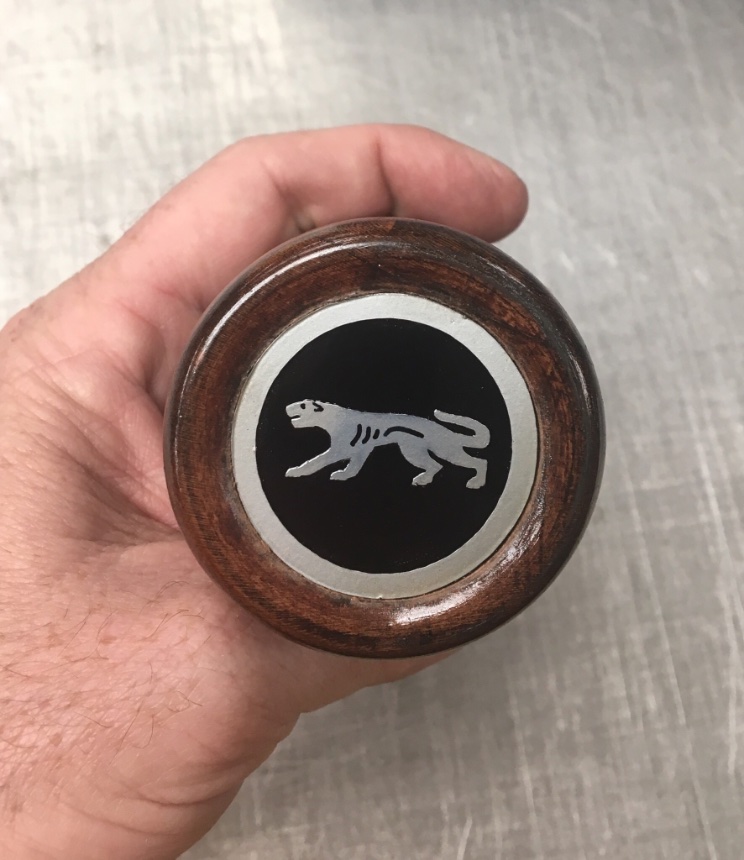
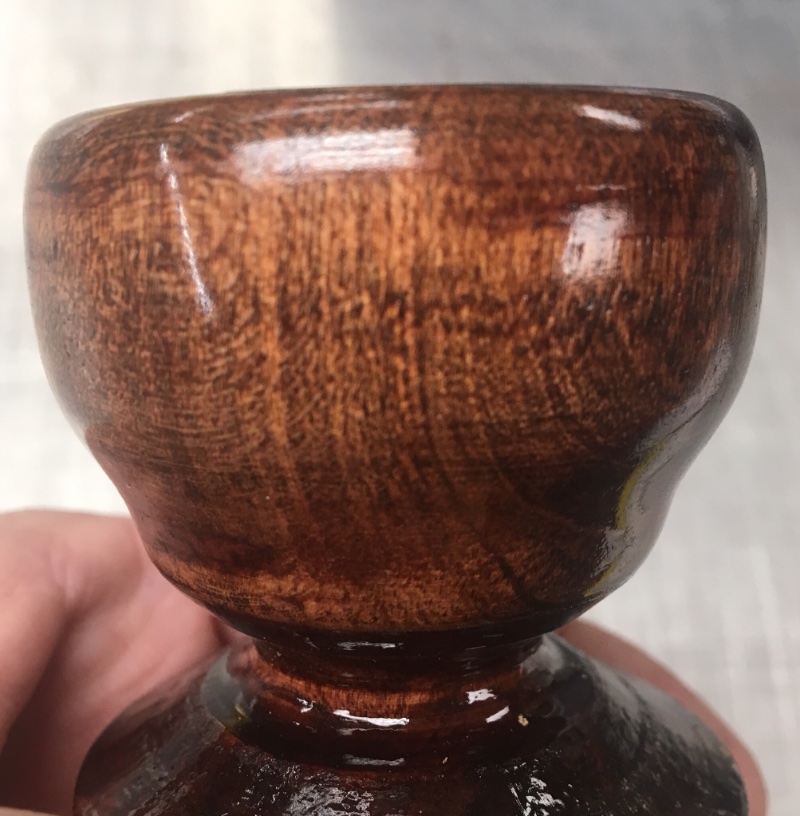
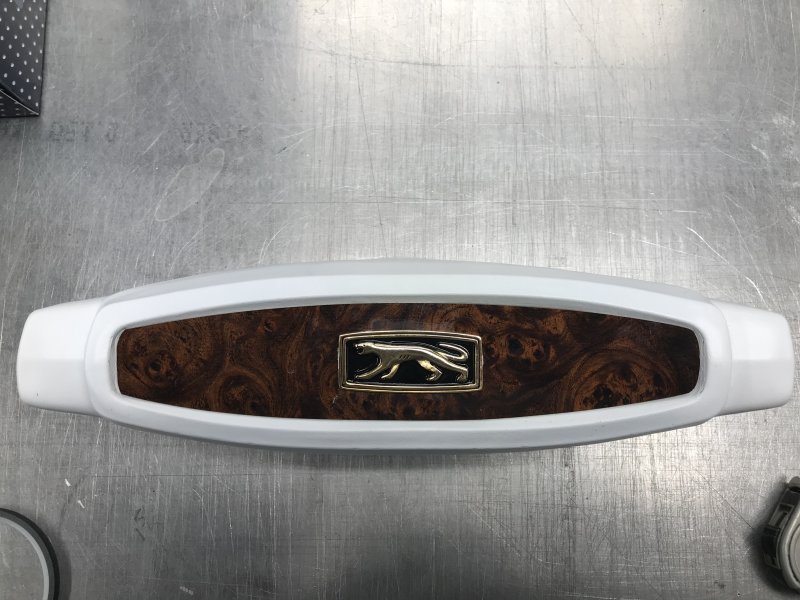
I made the insert for the shift knob this morning. I had to add a little detail by hand with the eye and ear. Overall I’m pleased with how it turned out. I sat it on top of the shift knob but it will be a couple of days before I mount the insert because I have more polishing and coats of tung oil to apply.
Steven
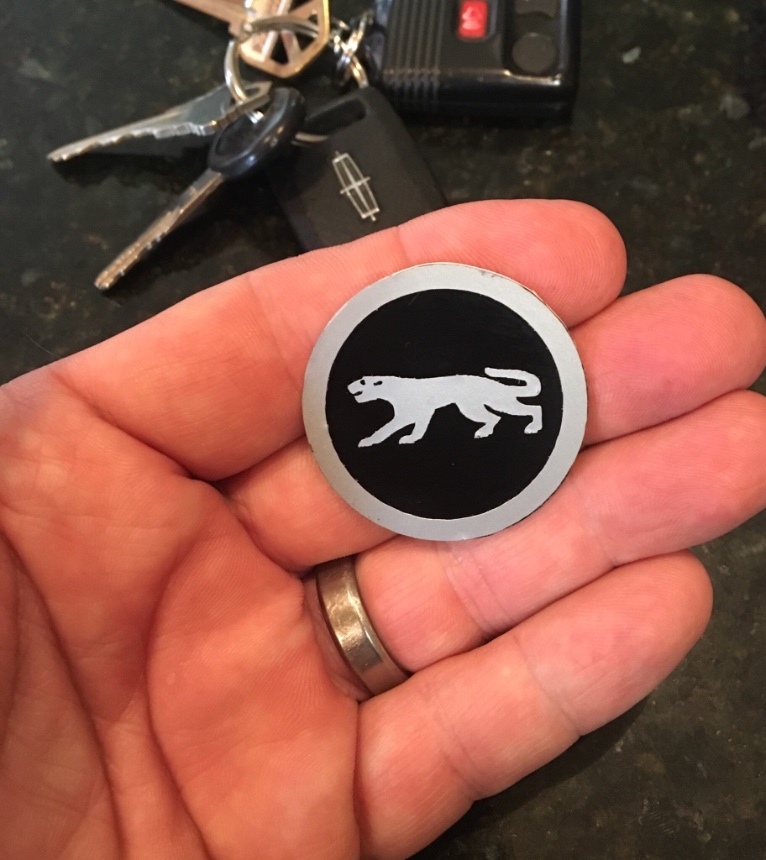
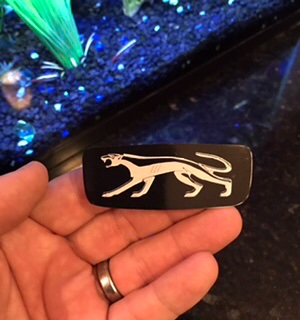
I added more detail to the Cougar on the insert. I used a Forstner Bit to countersink the emblem insert. All I have to do now is cut the lathe base off and tap the threads for the shifter handle.
Steven
It’s looking good.
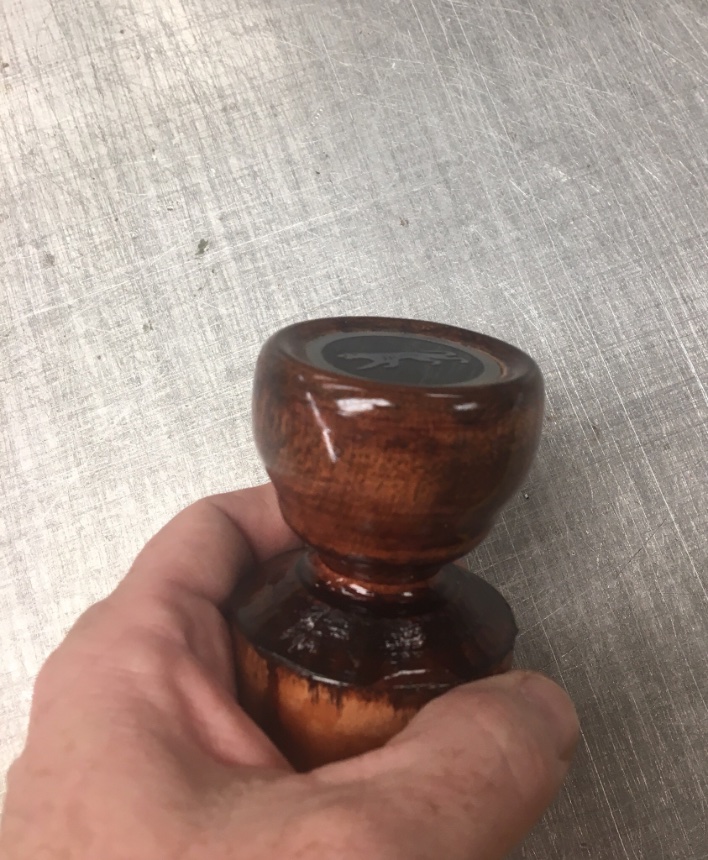
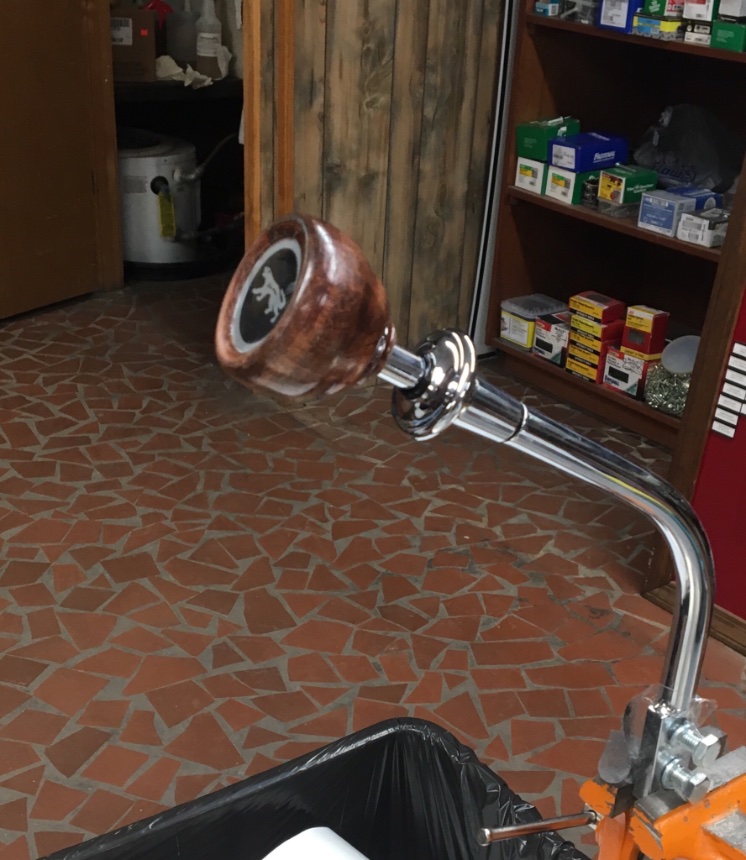
Here are a couple of pictures of my custom walking Cougar shifter knob mounted to my T5 reproduction 1968 shifter handle.

Steven
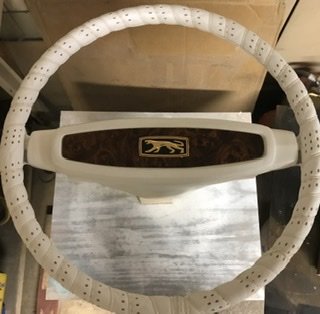
It’s been a while since I posted an update. Family, work, and school have been keeping me really busy. I have finished working on my steering wheel. It was in pretty bad shape, I had a lot of repair work to get it to this point. I made the repairs with Dyna-Glass body filler.
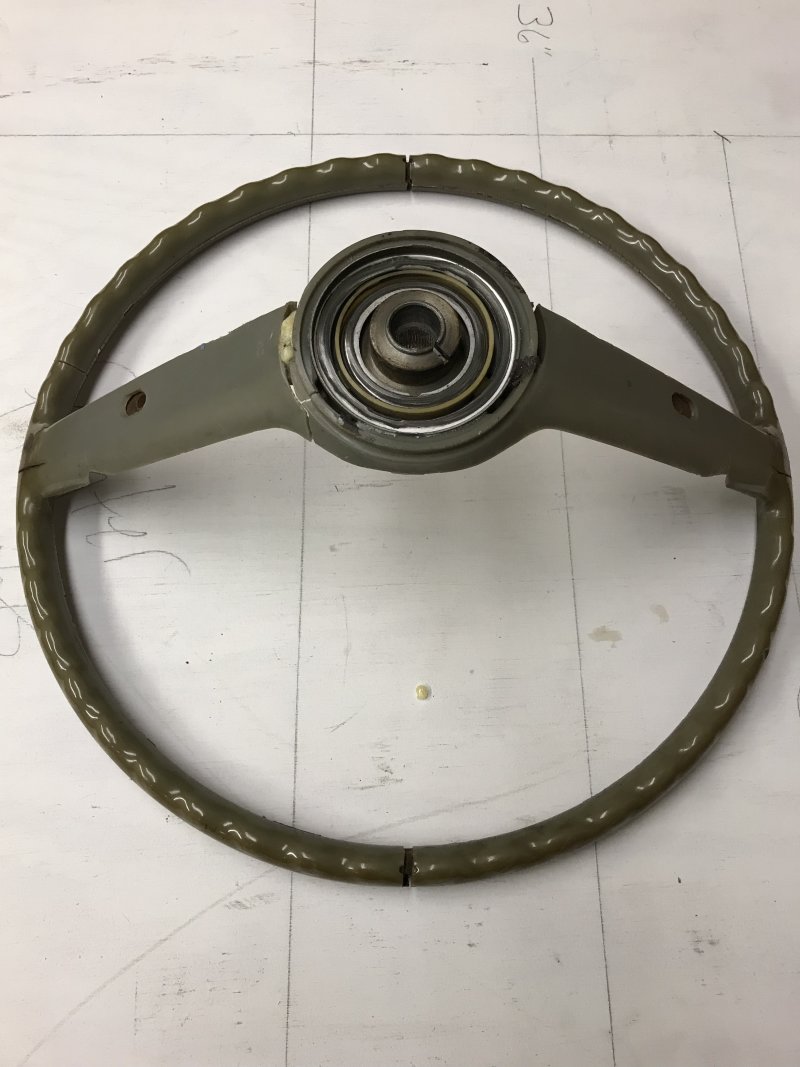
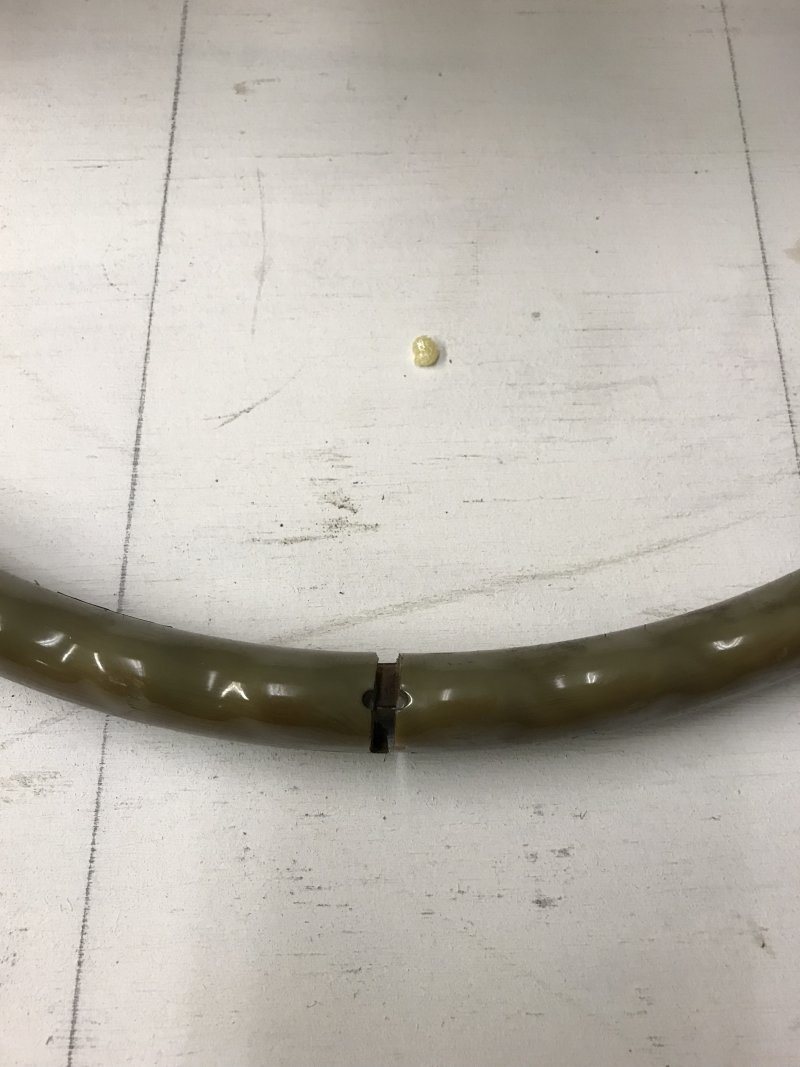
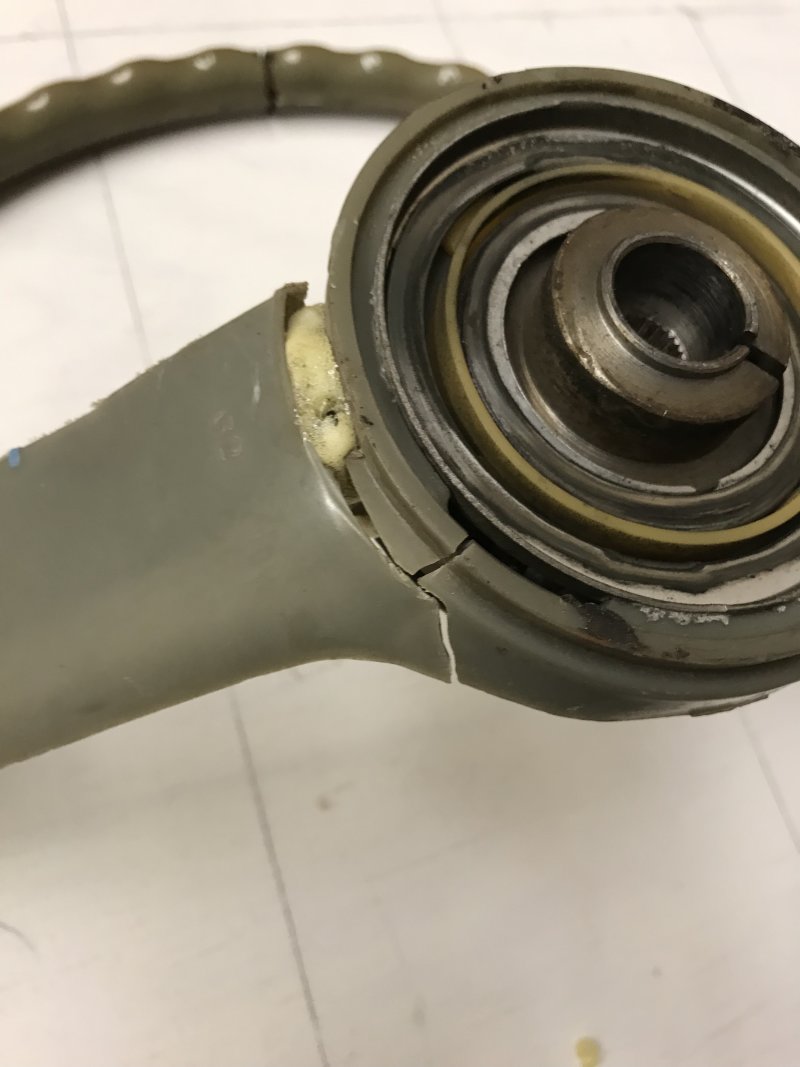
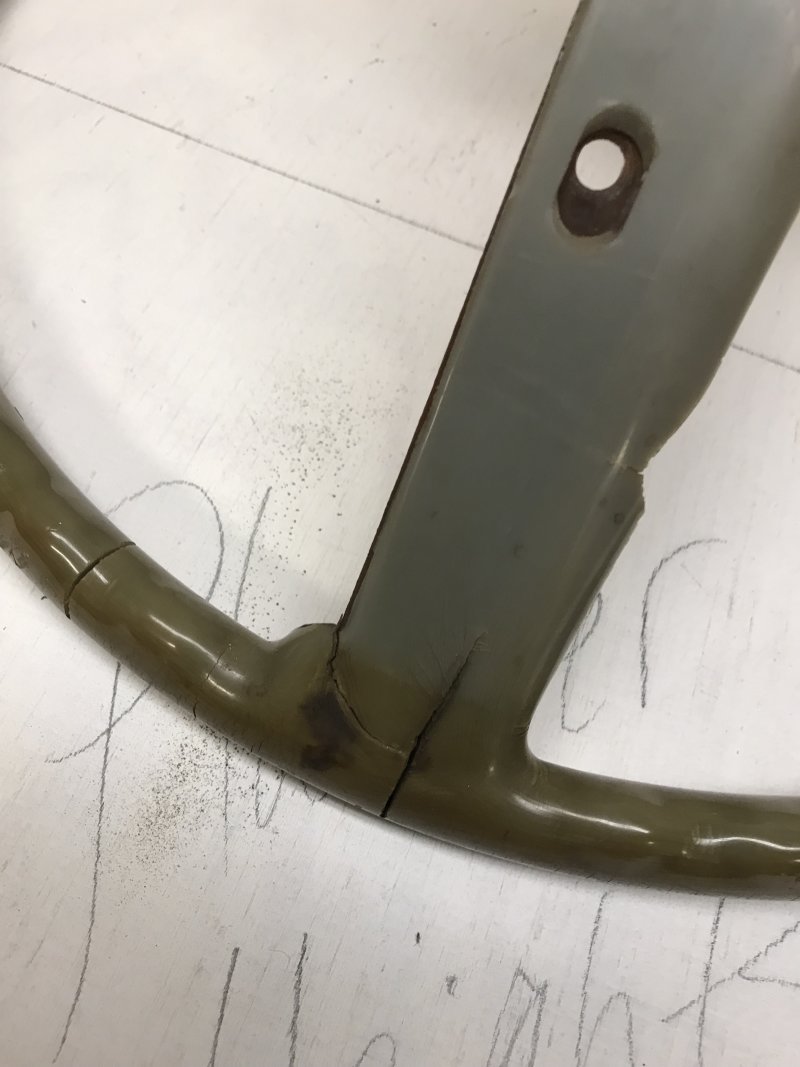
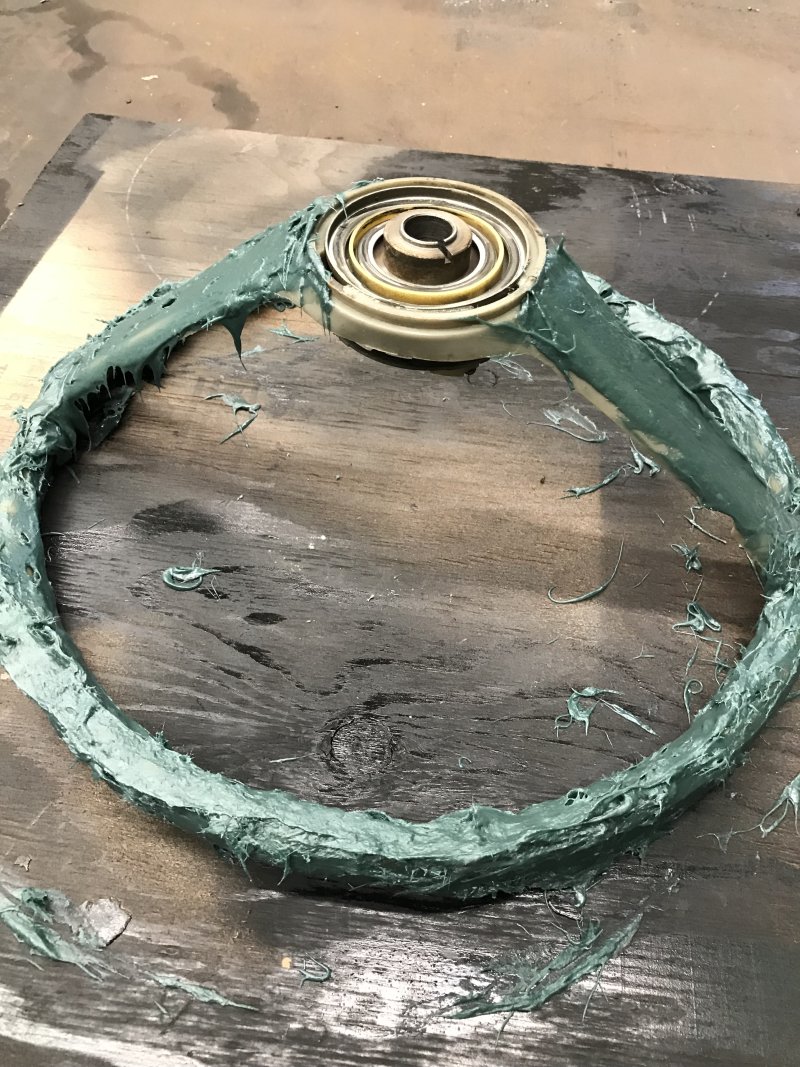
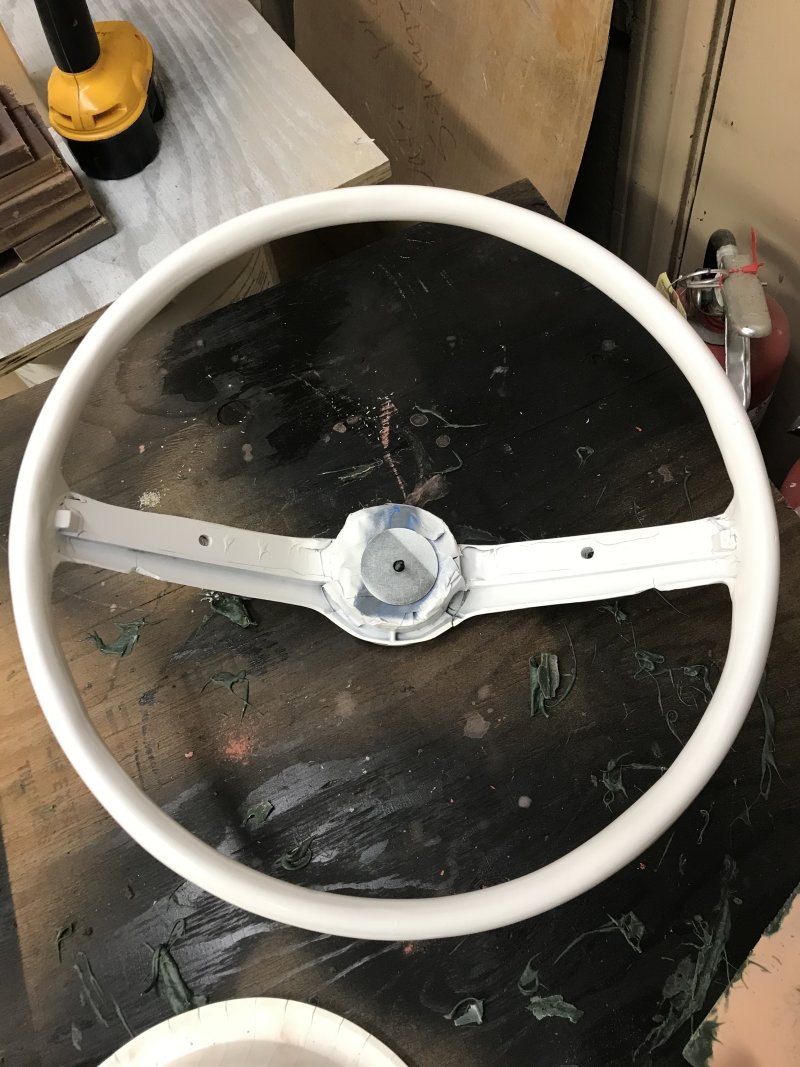
I’m waiting on white “sports grip” to arrive in the mail. I think that the sports grip will give the steering wheel a nostalgic XR7G look and feel.
Steven
Really looking forward to seeing this car done. I love that shift knob.
DUDE how many hours do you have in sanding that steering wheel back down? Kudos
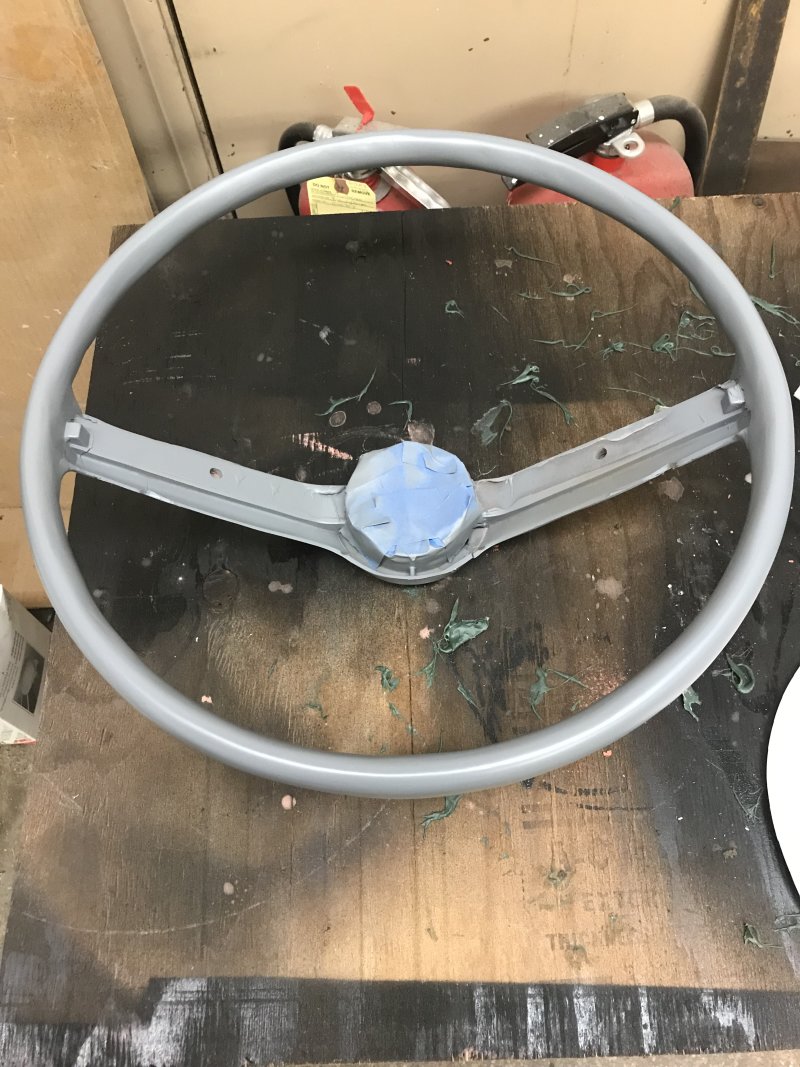
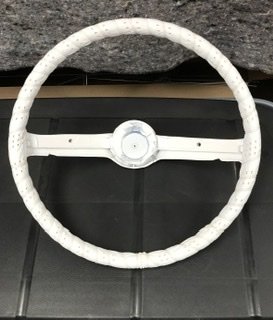
I received the Sports Grip and installed it on the steering wheel. I really like the way it turned out. Next on the to do list is installing the horn bar.
Steven
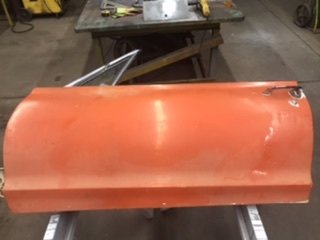
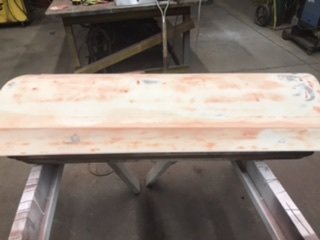
Progress is slow but still moving along. I’ve stripped, primed, and sealed some parts. If the weather warms up I’ll be able to get some painting done.
Drivers door before:
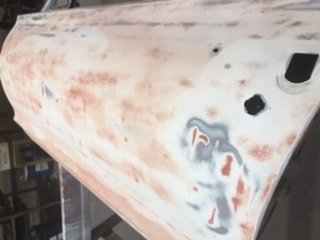
Glove compartment before:
After:
Steven
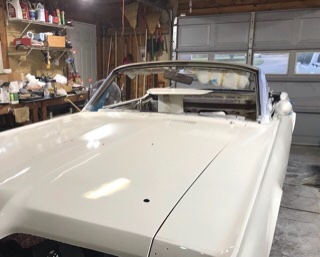
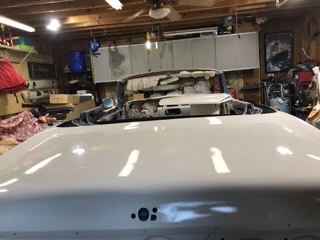
It’s been a while since I posted an update. I made a big change to this project. I had originally intended to paint the car black (onyx) and I did. As I started reinstalling the body panels, I just wasn’t feeling the black. I felt that black didn’t compliment the Cougar’s classic line as much as I had hoped.
As a result, I disassembled everything again for a paint change. I chose this Cougar’s original color of white to show off the classic lines. I plan on keeping the two tone GTE inspired paint scheme. Thank God I’m doing all the work on this project and changing my mind isn’t costing me a lot of money. ![]()
I’m pleased with the color change and I’m sticking with it.
Steven
When I was about 16 or 17 a local car-lot got in a '66 Mustang fastback. It had been built up but with, what appeared to my eyes, a lot of sophistication. In a time when hot cars were jacked up in back and ran sidepipes and N50 rear tires that stuck well out of the fender wells, this car was none of that. But it sounded like World War II. It wasn’t that loud, and it didn’t have ridiculous lope to it, it just sounded like it was open for all comers. There wasn’t a chance in hell that we would get to drive it, and only my five-years-older brother was even allowed to ride in it. So I got to watch. It was one of those cars that has instantaneous throttle response: punch it while idling around the parking lot and it launched like a rocket. So I got to watch it as they cruised the lot, and then left down the street. I liked it a lot. Afford it, I could not…
But what really caught my eye was the paint. It was white which seemed better suited to station wagons and delivery vans. The hot setup back then was Candy Apple or huge metal flake metallics that would make a bass boat envious today. But it wasn’t ordinary white: it was white pearl. Those glints of blue and pink brought out every curve in the Mustangs sort of flat-panel body. Suddenly the Mustang had curves that I had never seen before in the way that Sophia Loren could make a bulky sweater look good. I haven’t seen paint quite like that in many years.
So in my long winded way let me just say I completely agree with the color choice… now can you top it off with a little pearl, just for old times sake?
When I bought my White 70 XR-7 I had thoughts about doing a paint job on her(and she could use one). At that time I was thinking about a color change. But the longer I have her the more I love the White.
I think color is a very personal thing, and the same color on different year Cougars do not necessarily feel the same if you get what I’m saying.
Thanks guys, I really struggled with the color change but I’m glad I decided to go with white.
I ordered the convertible top kit. I decided on dark blue. I wanted a complimentary contrast to the white body and interior. I’m going to install a dark blue dash pad and carpet. In order to keep my color choices consistent, I will restore the XR7G console I have for this project with dark blue leather. The current leather top pad and armrest are cracked and worn.
The top is custom made, so it will take 4-6 weeks before it’s I’m my hands. I still have plenty of work to do but the project is slowly making its way towards completion.
Steven
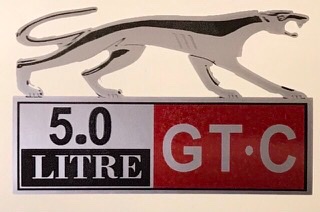
I finished my GTE inspired fender emblems with the Blitz walking Cougar. I changed them slightly from my last rendition. After some input from board members here at the Classic Cougar Community, I changed the lettering to GT-C. I also darkened the colors for more contrast with the white body.
Steven
Outstanding!
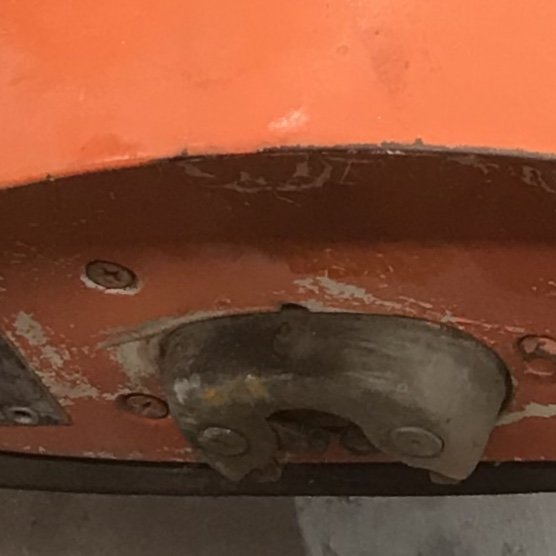
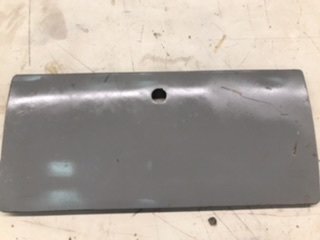
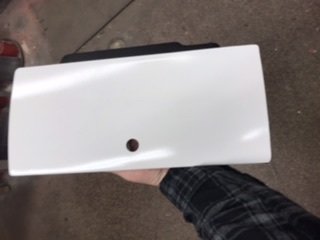
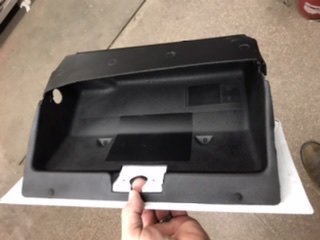
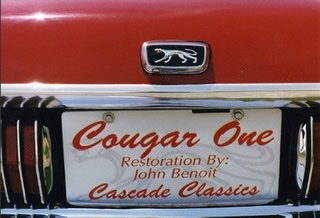
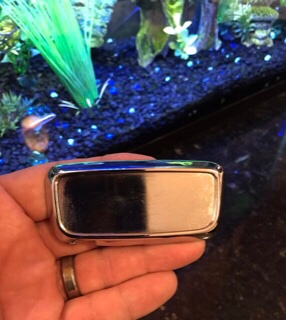
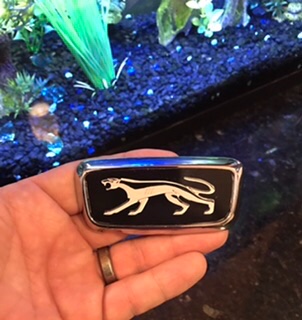
I received my new truck latch cover from Desert Classic Parts. The quality of the chrome is outstanding. Thanks Bill for bringing great quality Cougar parts to the market. I’m going to use my custom “Blitz” walking Cougar insert on the latch cover. My insert is inspired by the latch cover on Cougar, serial number one.
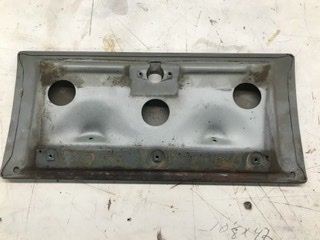
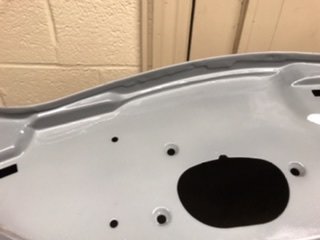
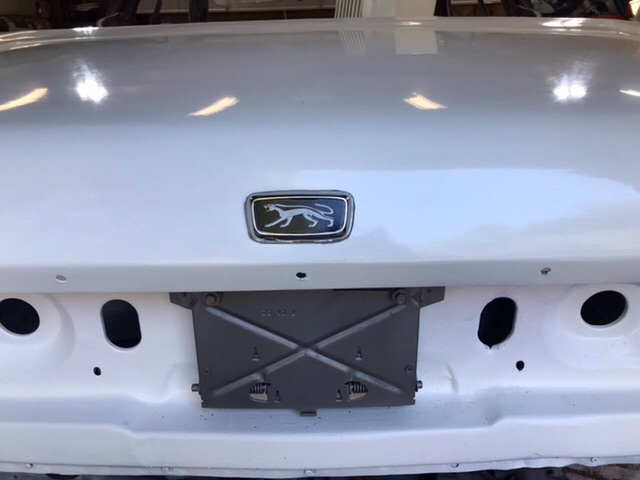
It is such a wonderful feeling to start putting finishing pieces back on this project. I had a heck of a time getting the lock assembly re-installed. I watched WCCC’s video (thanks Don) when I disassembled the lock assembly. The deck lid was off the car at the time, just like shown in Don’s video. I installed the deck lid on the car after paint and adjusted the gaps. I didn’t want to do that job twice, so I installed the lock assembly with the deck lid in place. The issues I encountered showed themselves quickly. I’m 53 years old and I wear bifocal glasses ![]() . Leaning over backwards, looking through a small hole and holding a flashlight. How hard can that be, I asked myself? It was a challenge to say the least. After an hour of work my lock assembly was finally installed.
. Leaning over backwards, looking through a small hole and holding a flashlight. How hard can that be, I asked myself? It was a challenge to say the least. After an hour of work my lock assembly was finally installed.
Your trunk lock cover looks awesome!
An hour ain’t bad, and it looks great. Keep the updates coming. I’m excited to see this one (been following it for years)
Maybe you need to invest in one of those ‘headlights’ My wife got me one quite a while back, and I just used it for the first time recently working on a ceiling fan switch. Got the same problems with the eyeballs as you. They just don’t let light in like they used to.