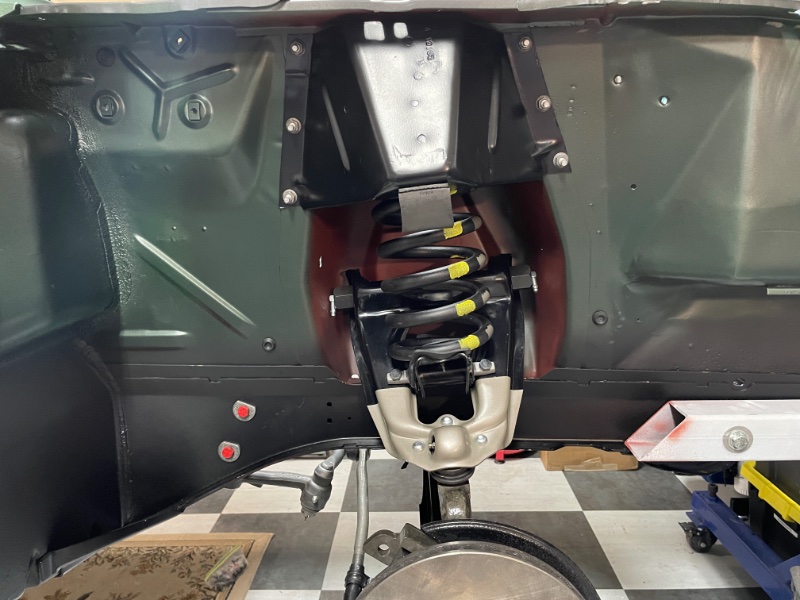
Just an observation, the coil mounting strap looks to be a small block, the big blocks I thought did not have the rolled up sides at the base, I know there are different variants so I could be wrong?
Good catch on the coil bracket, I appreciate that. I have been using the Cobra Jet component identification from the CJ site to try to get all of the correct pieces however it did not detail that part. I did find it on the CJ detailing guide though. If anyone has I nice one out there please let me know. Thanks again for the heads up!
Hi Kerry, looks like great progress so far nice to see you tackeling the P+O process your parts look good, were the color stripes you reproduced for your front coil springs the colors that were found before refinishing ?
Thank you for the comments on the parts, this is the second or third time I’ve done the process and it seems to go smoother each time as you learn new tricks. As for the springs I duplicated the factory color codes based on Royces two builds as well as information from the master parts catalog and from the Jim Pinkerton‘s GTE parts guide. The coil numbers, free height, and wire diameter were consistent with the master parts catalog and these were the original springs to the car.
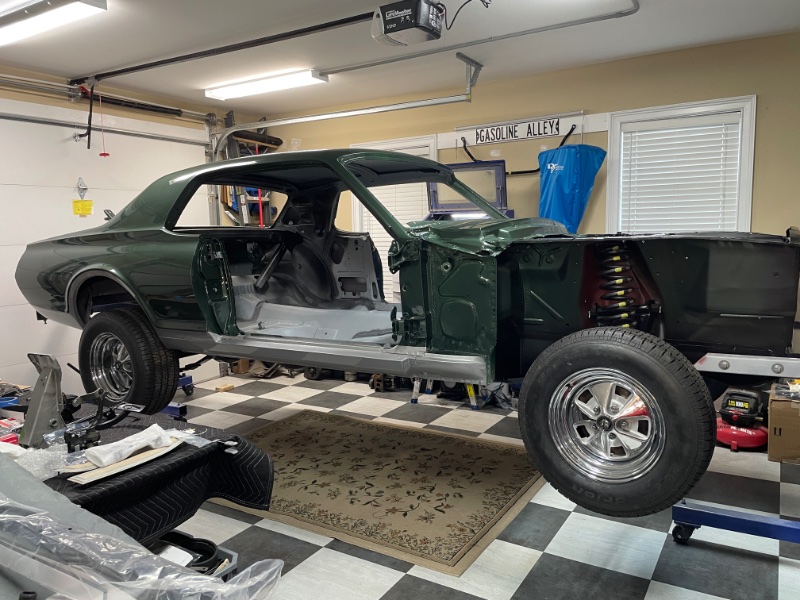
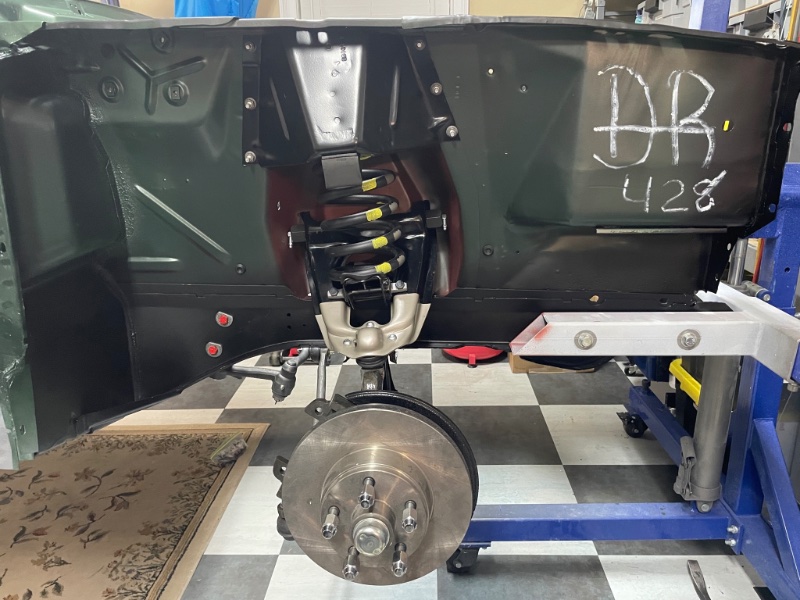
The car made its’ trip safely home from the body shop last week. It took most of Saturday to get it back up on the rotisserie since I had to shorten a couple brackets to be able to close the garage door. The suspension components had been “temporarily” installed to facilitate the move so once the car was back up in the air I began with torquing all of the fasteners to factory specs, installing the cotter pins and greasing all of the joints.
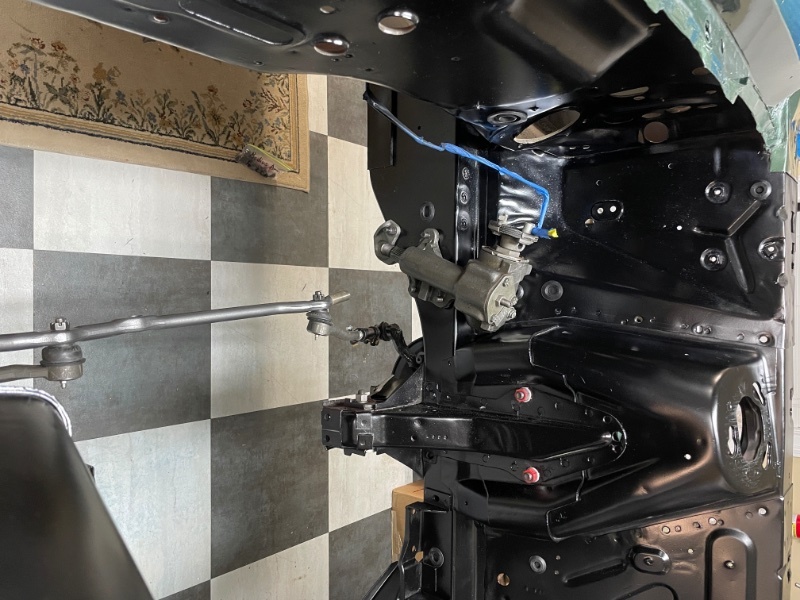
The steering box was next on the list. The original gearbox was in great condition with little to no play and turned smoothly but I felt it would be best to freshen it up before installation. I apologize in advance for not detailing the rebuild with photos. The shop manual does a great job of walking you through the tear down, inspection, reassembly and adjustments. The rebuild kit includes the two ball bearings for the worm gear, two needle bearings for the output shaft and the required seals. After tearing the box down I completely cleaned all of the old grease from the box and soaked it overnight in evaporust. I have found that oil or grease seem to neutralize evaporust so be sure to remove any prior to soaking. The box came out looking brand new the following day with the factory paint marks still intact.


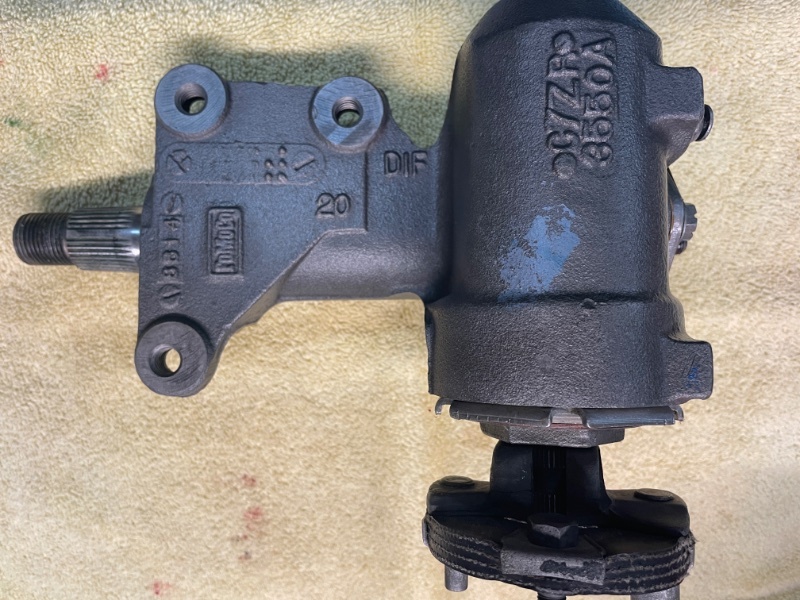
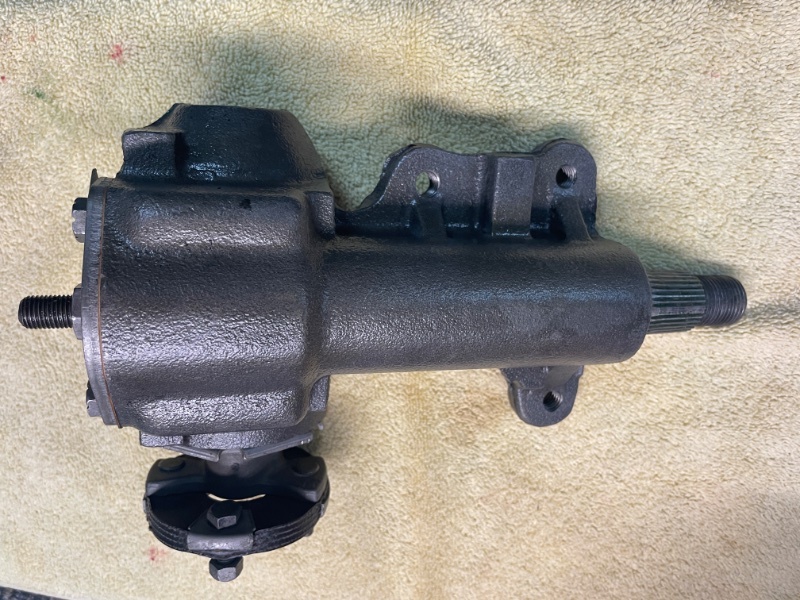
Once the box adjustment was was made it was time to install. I forgot to index the pitman arm prior to removing so I created a little extra work for myself. First having to find the midpoint of the box turn’s from stop to stop, then centering the drag link tie rod points between the frame, finally installing the pitman arm.

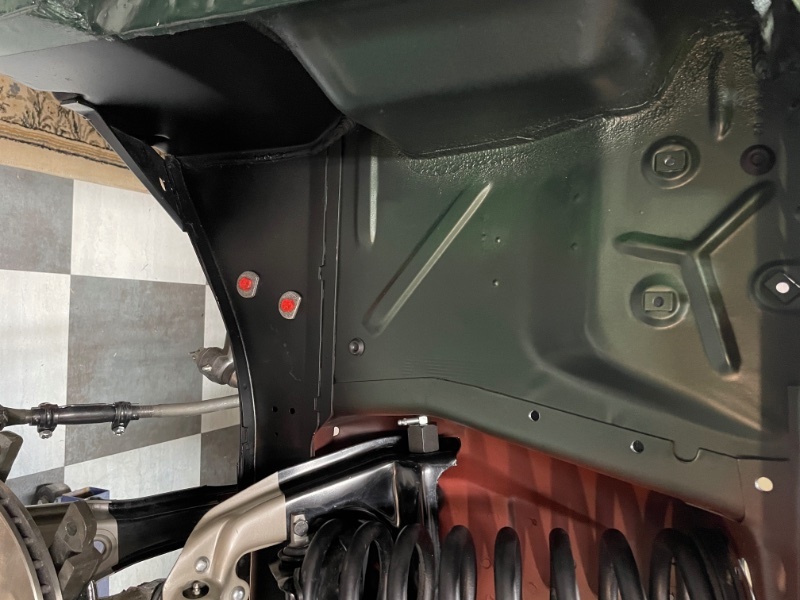
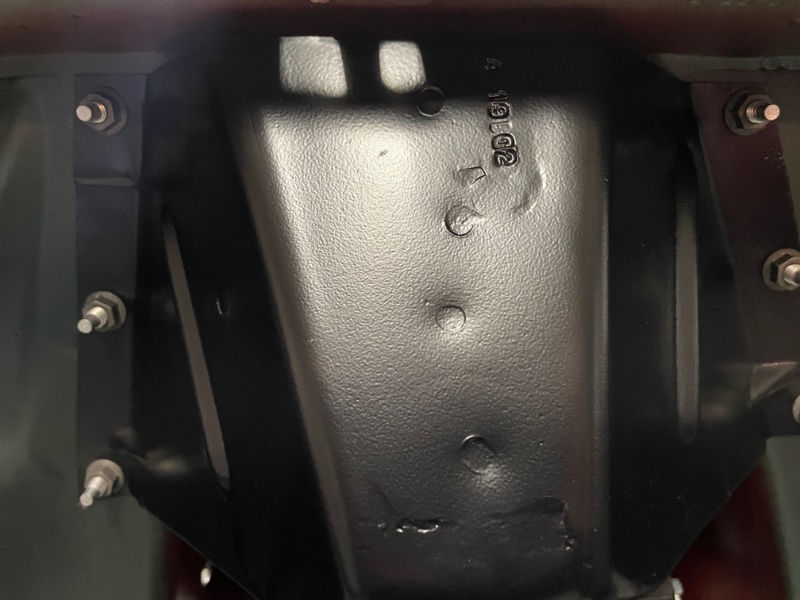
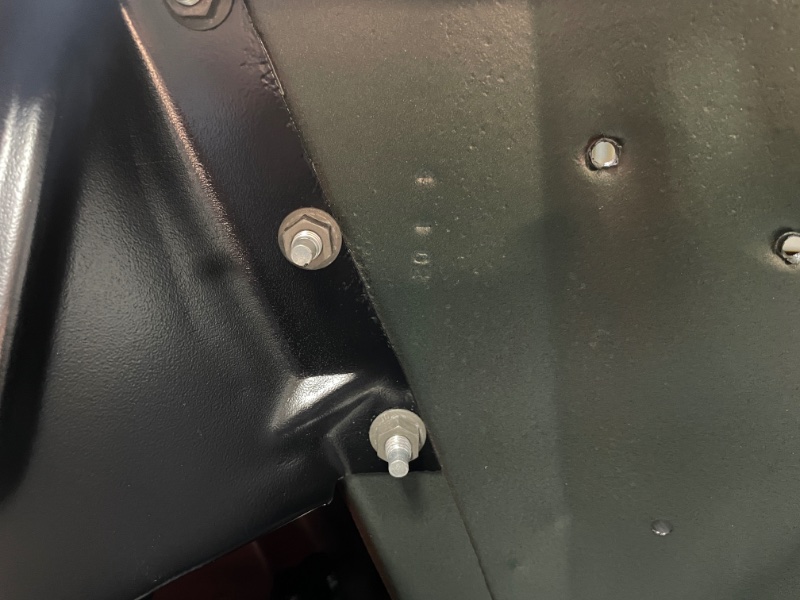
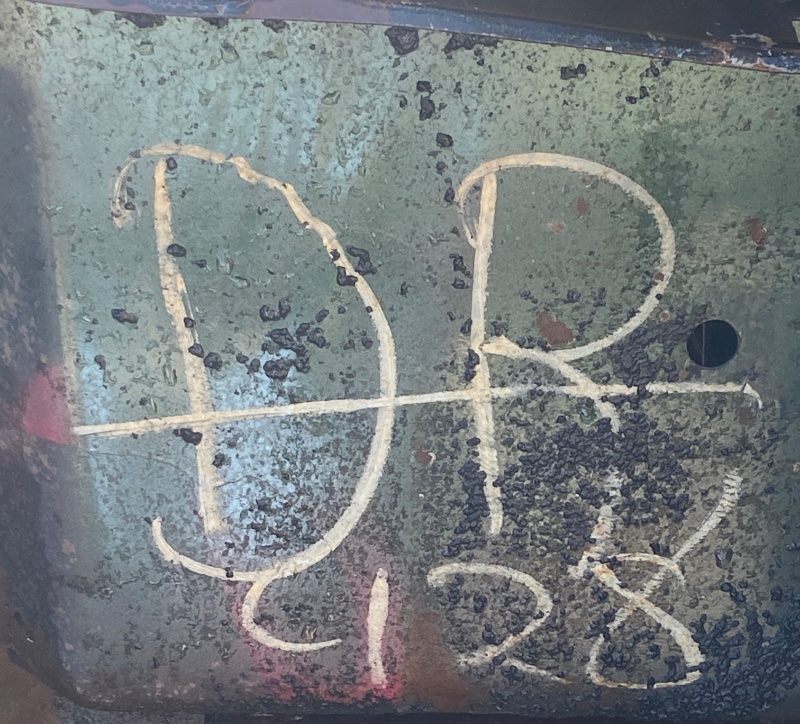
The shock tower covers came back from the powder coated Saturday night. Most coaters don’t deliver however he hadn’t seen the car yet and since he has done almost all of the suspension, pulleys, brackets, smog system and ram air he wanted to know what all of his hard work had been for. We installed the covers while he was here then replicated the factory markings on the fender apron.
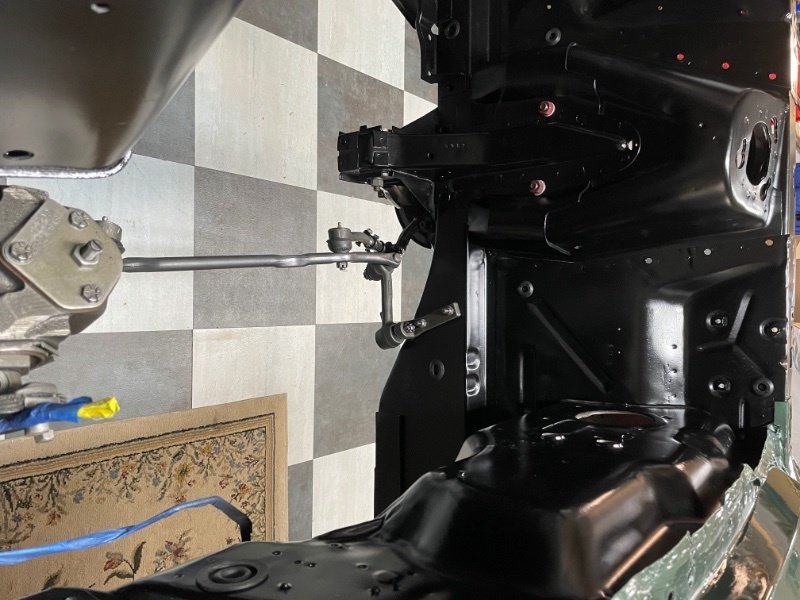
I was under the impression that the pitman arm will only fit into place on the box when properly lined up to the spline. Like a key to a lock.
Scott, I thought the same as well when I removed it. The steering output shaft has four wide splines 90 degrees apart and the pitman arm does as well and the arm will go on at any of the four positions. Based on my luck had I installed the pitman arm prior I would have been guaranteed the position would have been incorrect.
I’m looking for recommendations for an aluminum radiator for the Cougar. There are a lot of options out there and I prefer a factory appearance and factory mounting brackets. Please let me know what you have used and your experience with installation and cooling. Thank you.
Here is one that I booked marked because it was recommended at some point on either this forum or the SAAC forum.
I am no expert but I am sure one will chime in - but if you haven’t already you could poke around the Griffin site for info.
- Phillip
A little bit more expensive than some aluminum but you can’t beat brass copper for cooling function.
https://buyacp.com/parts/maxcore-3-row-copper-brass-radiator-24-302-351-390-428-fm-er007/

1 Like
Agree with Bill! The ACP is very close to original (but lacks the Fomoco name on top tank). Their brass copper 3 row has done great in my car for years.
Harris Mustang sells the ACP for a decent price.
This is all great, can your next project be a 428 CJ convertible? Would really help me on mine to have a guide like this!
I appreciate all of the responses, the reviews on the ACP are solid I believe that will be the direction I go. Thank you. Jason, you know I am right down the road when need a hand. Like they say, it’s about the journey not always the destination.
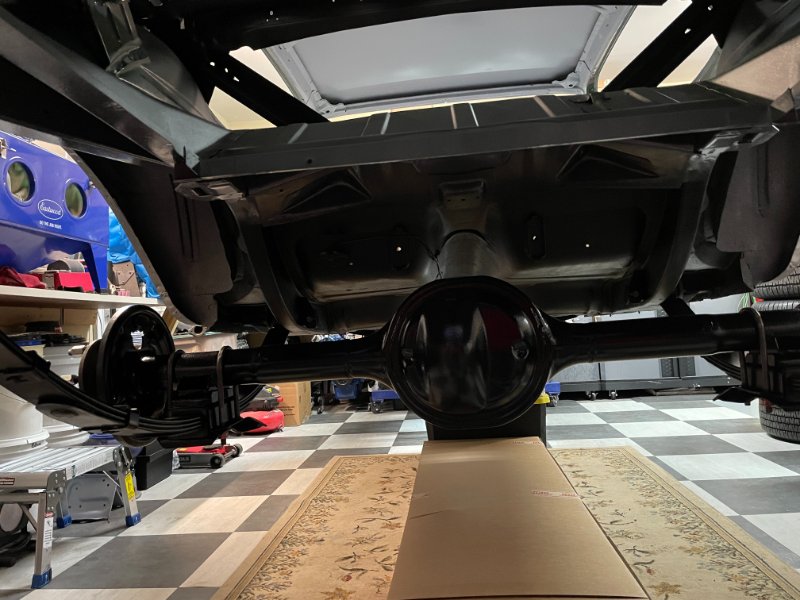
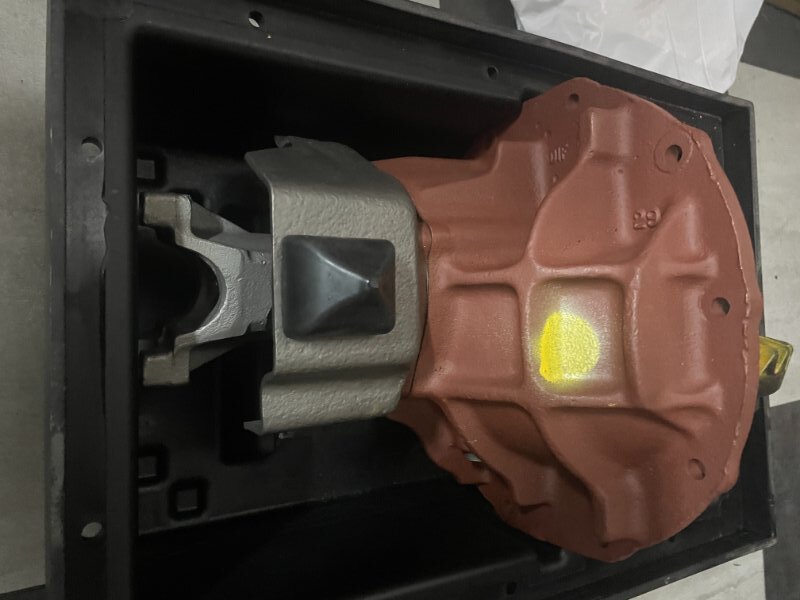
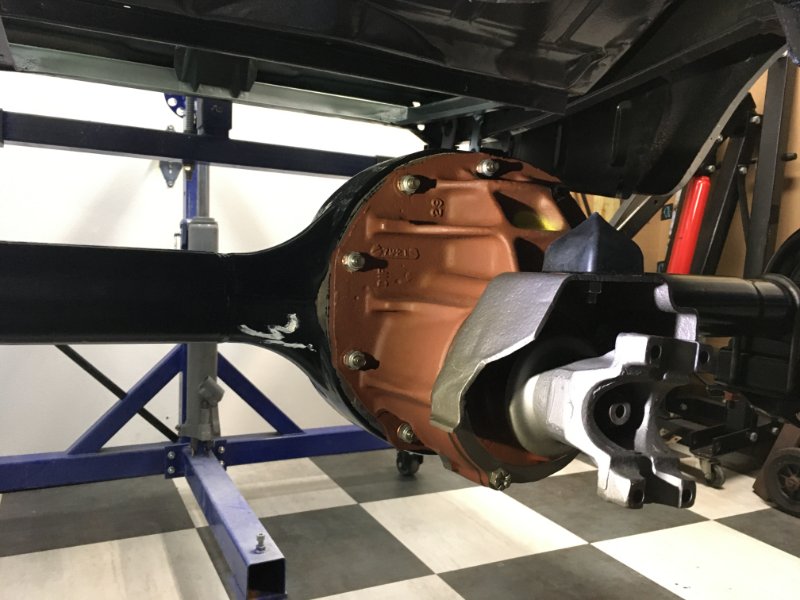
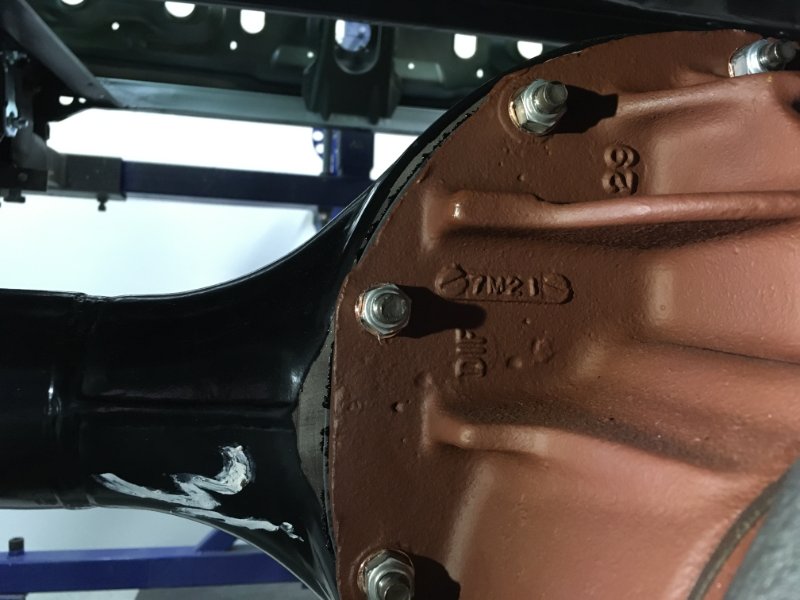
Busy weekend working on the car most of Saturday and a little free time this afternoon. Started out with getting the differential installed in the housing. When I bought the car it had a non-N 3.50 Detroit Locker. When I popped the pumpkin loose from the case no grease came out so I was a little puzzled. After removing it fully I found a mound of solidified grease in the case which had to be dug out. After getting the case cleaned I sent it and the backing plates out to be powdercoated.
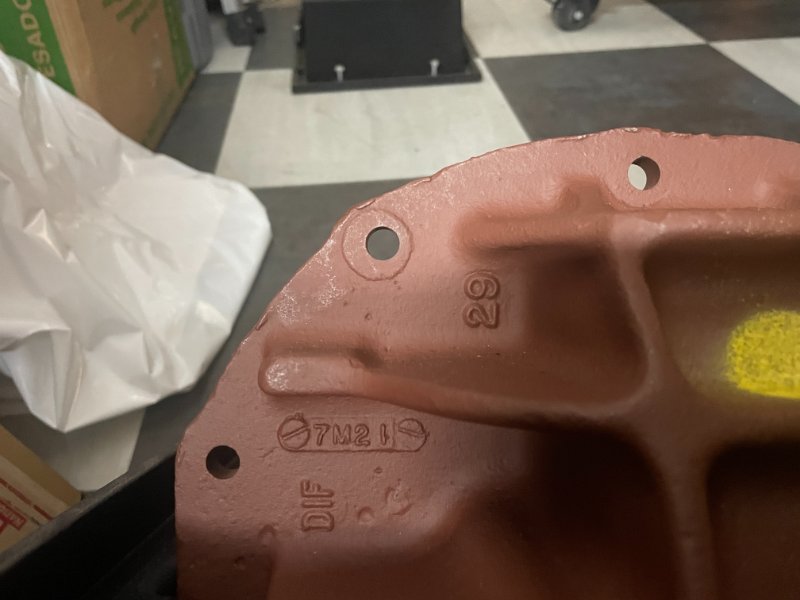
The car was originally ordered with a 3.50 open differential… what were they thinking. I was able to locate a correct 7M21 carrier that was already built with a 3.50 Limited Slip. Once the carrier was in, the refurbished backing plates were installed with new gaskets and hardware.
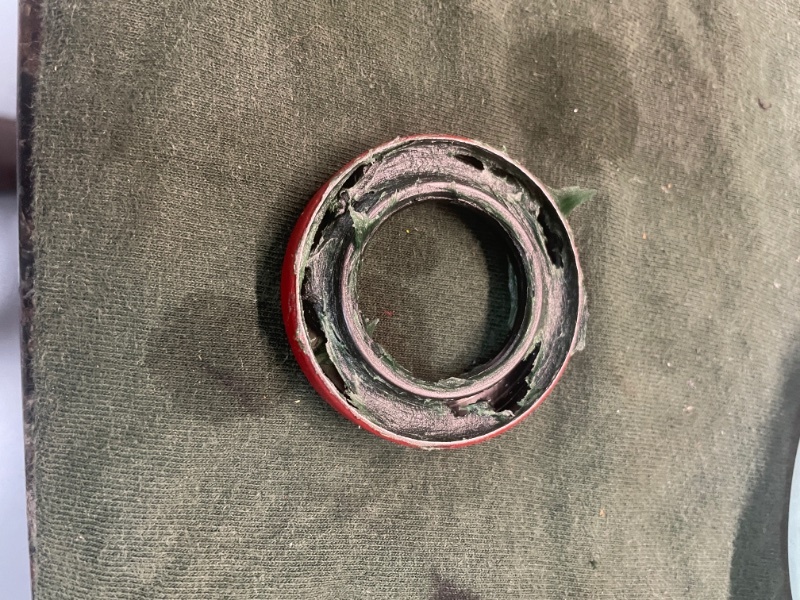
New bearings and seals were installed as well. I usually pack some assembly lube into the back of the seal to avoid the spring popping off while installing the seals. Years ago I was a line tech for Ford specializing in transmission and differential repair and a seasoned guy showed me that little trick.
Next I moved on to the wheel cylinders and rear brake lines. I used the pre-bent Classic Tube standard carbon steel lines. I have used stainless in the past on the last project but had a terrible time getting them to seal as they tend to be less flexible than the carbon steel. The lines fit perfectly.
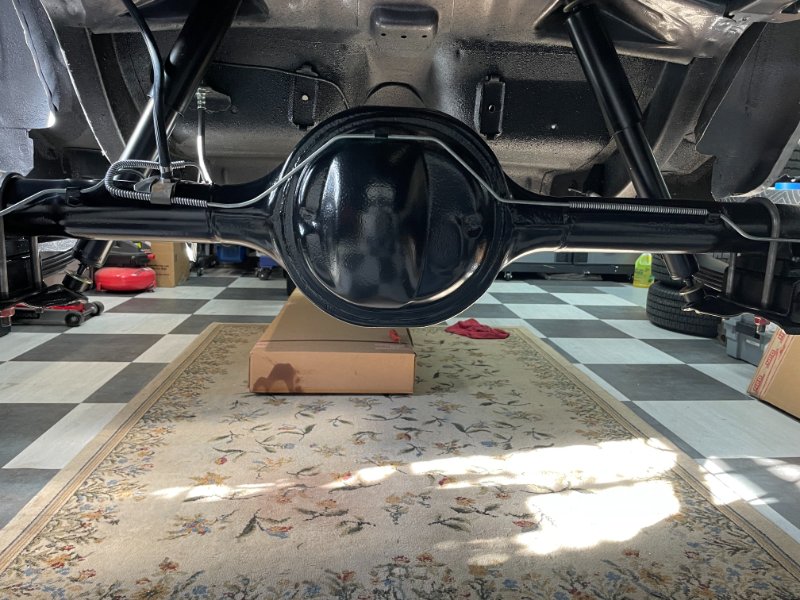
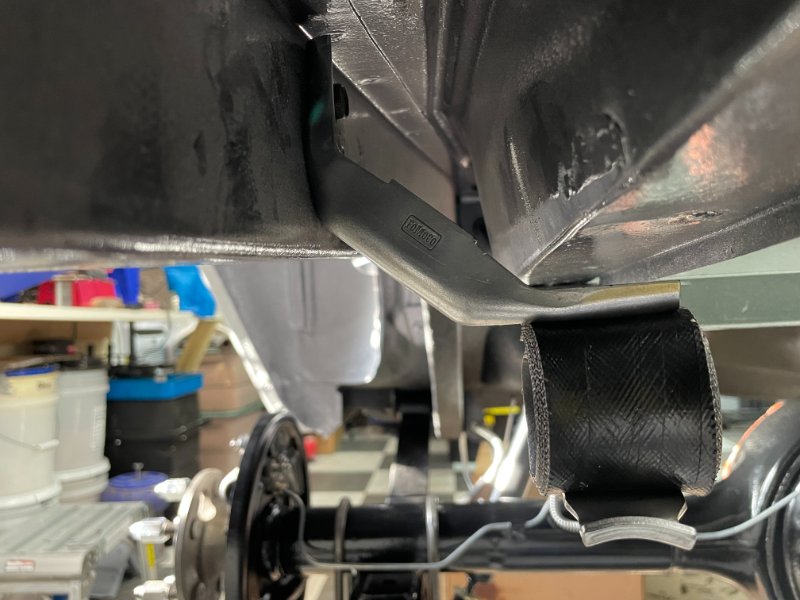
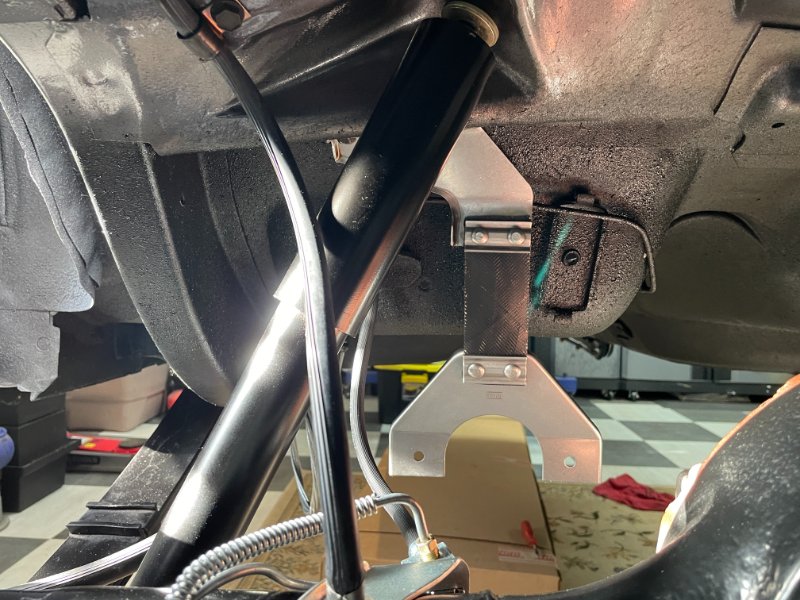
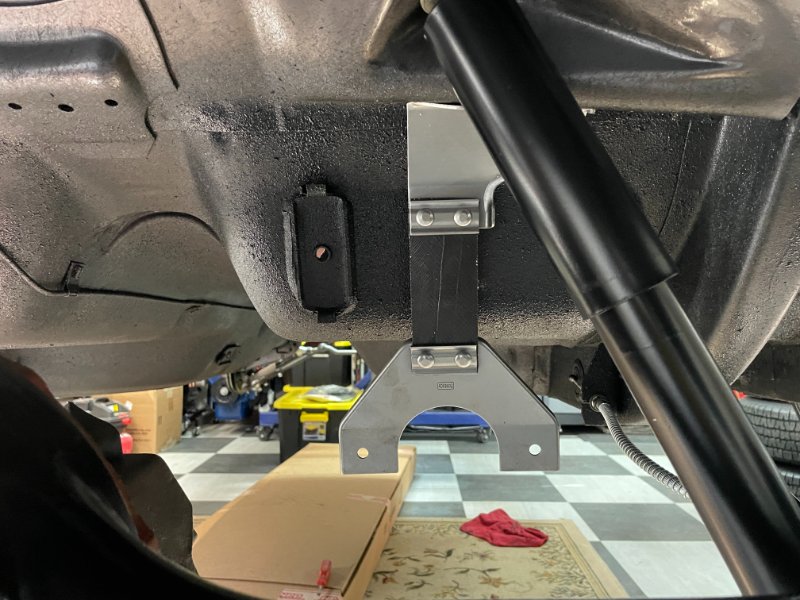
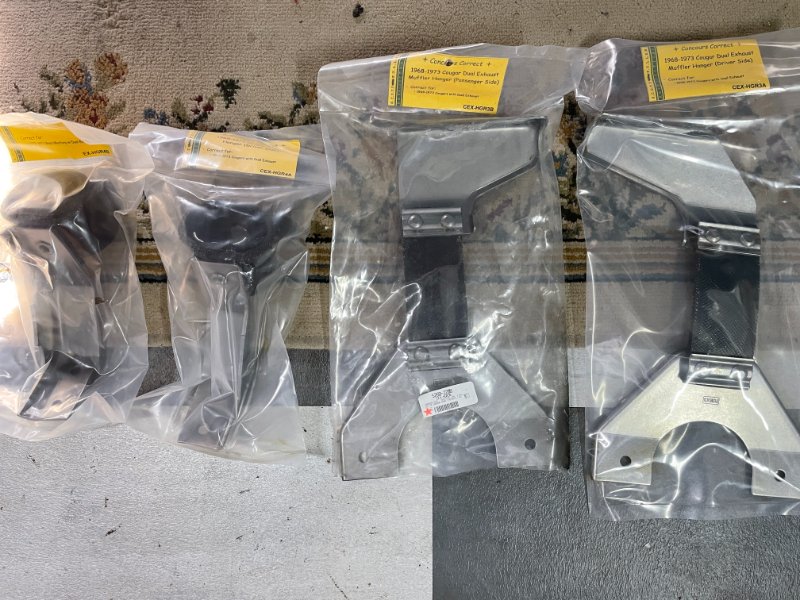
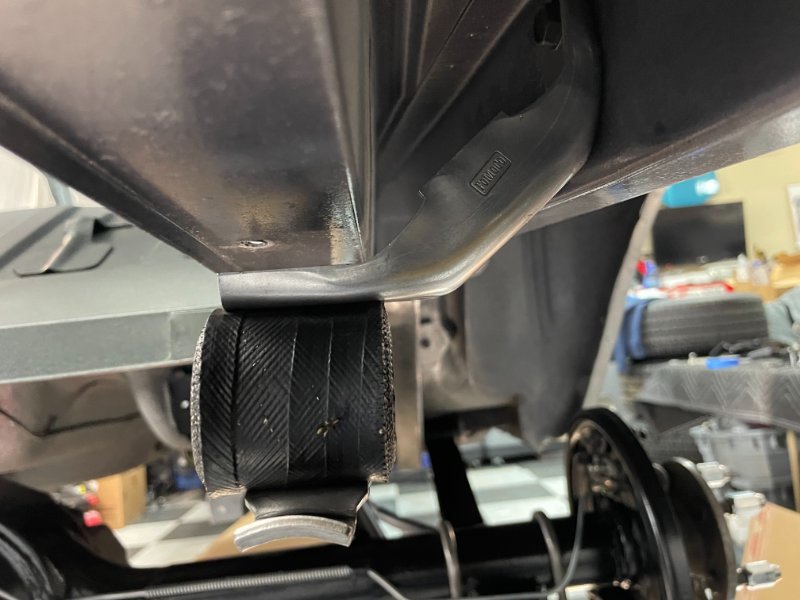
While I was hanging out underneath I installed the shocks and new exhaust hangers. The hangers are Scott Fuller reproductions and are an excellent reproduction of the originals. The shocks are KYB gas-a-just painted black like the originals. On a side note when I got this car it still had the original shocks on it, they were in pretty rough shape though.