That would be great, first hand knowledge. Plus all of the little quirks/process to install, can’t wait to see and hear.
It wasn’t homemade to begin with. It was purchased because it was said to fit a first gen. cat. But the fit was horrible. After many hours of cutting and fitting and molding, it could be considered a one-off.
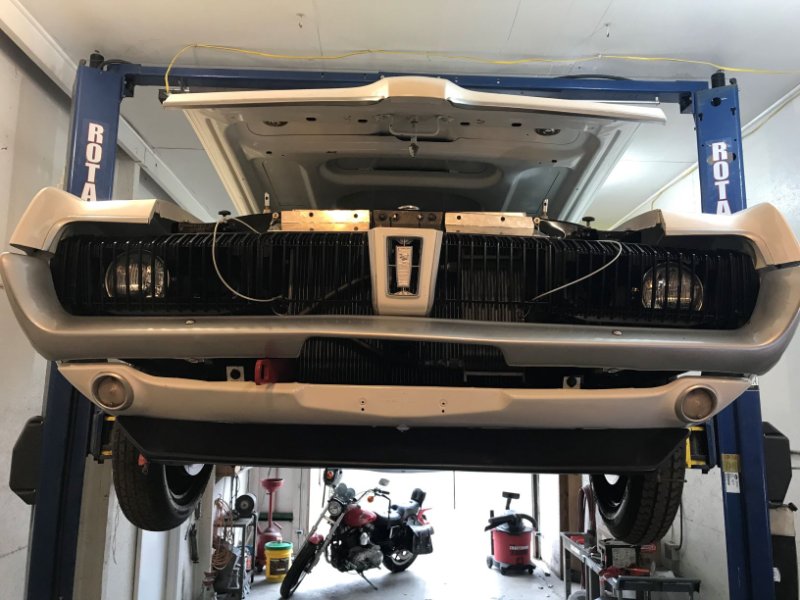
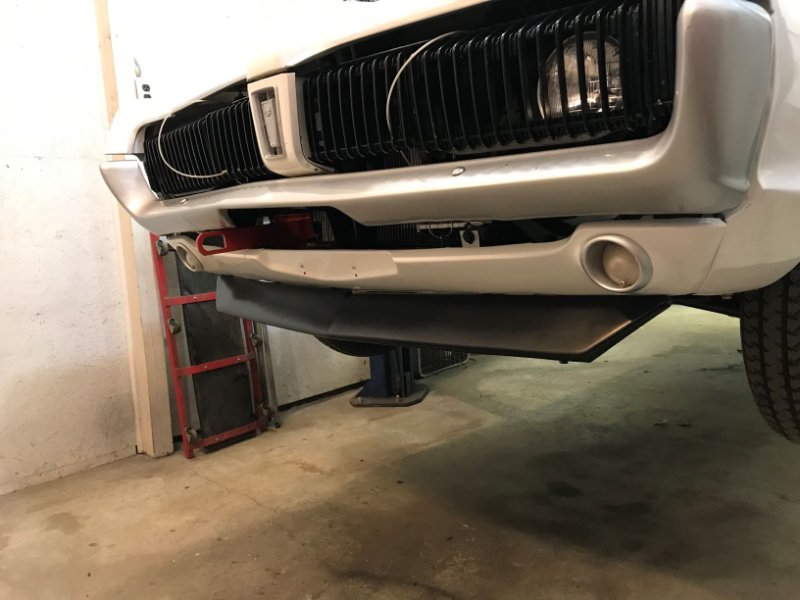
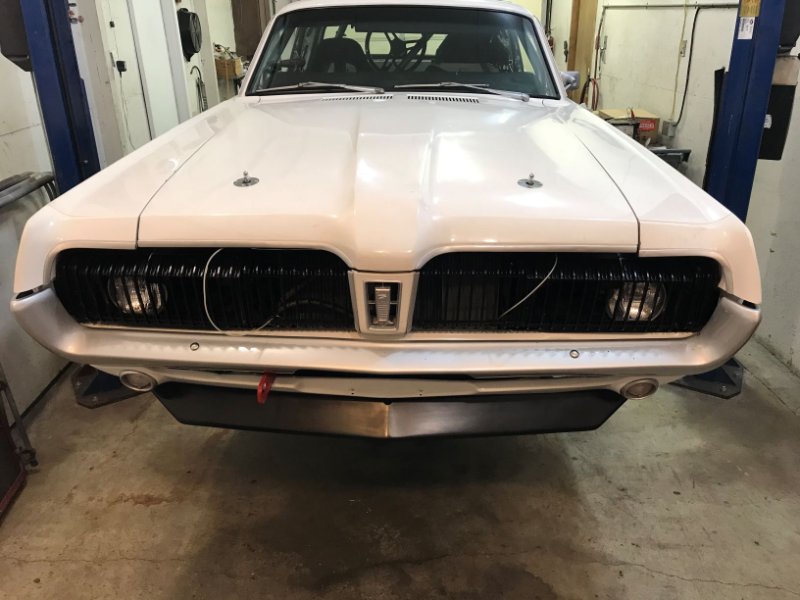
No need for any further supports. The ABS is pretty stout and the entire spoiler has a raised ridge to further support it. So to be clear. MY valance is the factory 67 Cougar unit the car rolled off ther line with. The ONLY mods so far to the valance was the removal of the turn signals and installation of driving lights. The spoiler went on like butter self tappers and done. Will it hold at speeds in excess of 120mph, I have no idea, but it hasnt flown off yet, its a common mod or at least somewhat common so its documented. Also, my new mill puts down 700 at the wheels, I hope to hell it stays put, 'cause 120mph is 3rd gear and I got 5 of them LOL!
I think the full length fiberglass front spoiler looks better than the Camaro one, especially if it is painted body color.
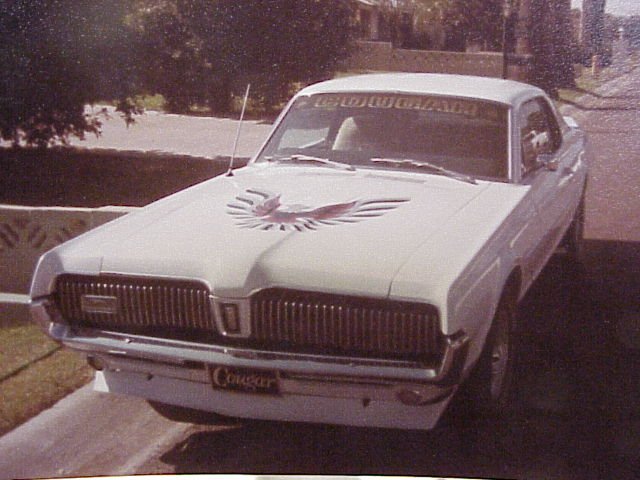
Here is a photo of one from my very first Cougar from way back in 1984! Please disregard the Firebird decal on the hood, not sure what I was thinking back then (note it was removed after less than 1 year). scott
Camaro spoiler install.
I got the Camaro spoiler installed on the race car. I had two main goals for the installation.
- It has to be ridged/strong as I regularly reach speeds on the straight away between 120 - 145 mph.
- I needed it to unbolt and bolt back on continuously in case it doesn’t clear the ramp on the car hauling trailer. My trailer is still in storage and I don’t have the race tires installed to check it right now.
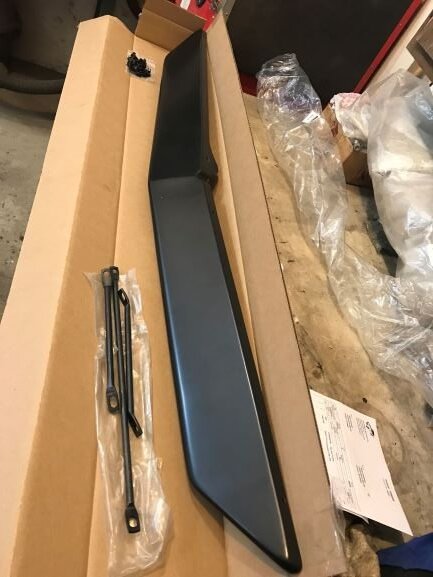
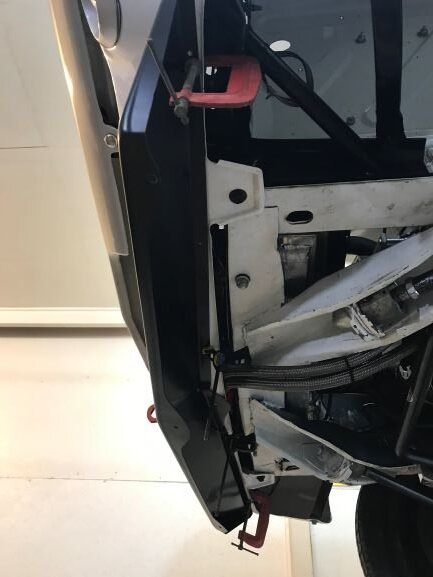
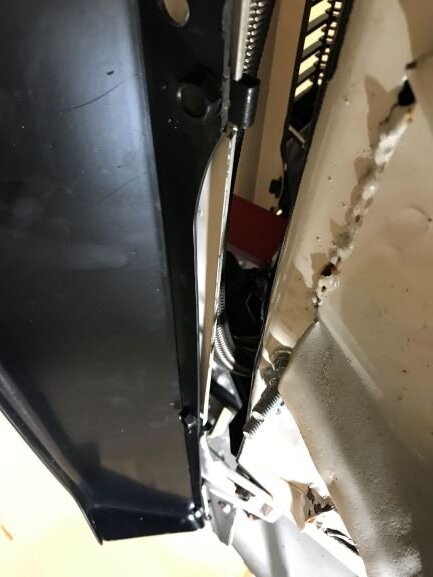
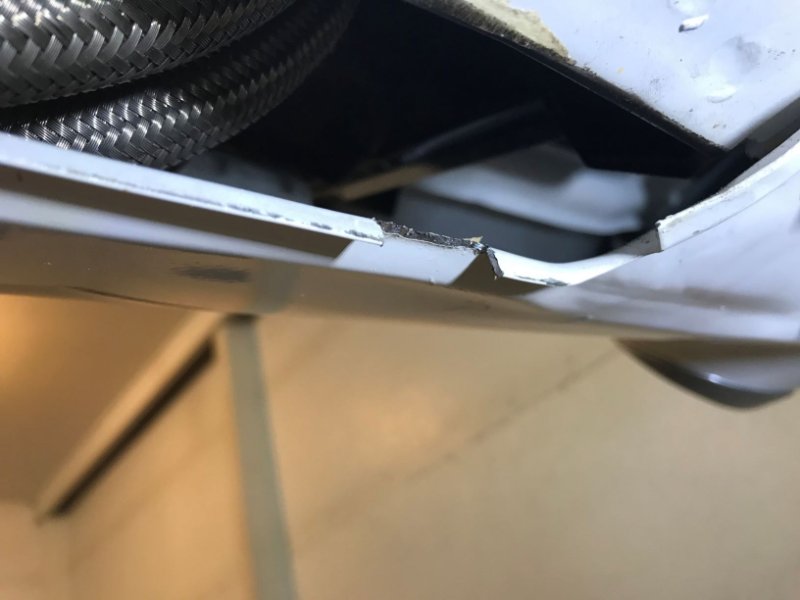
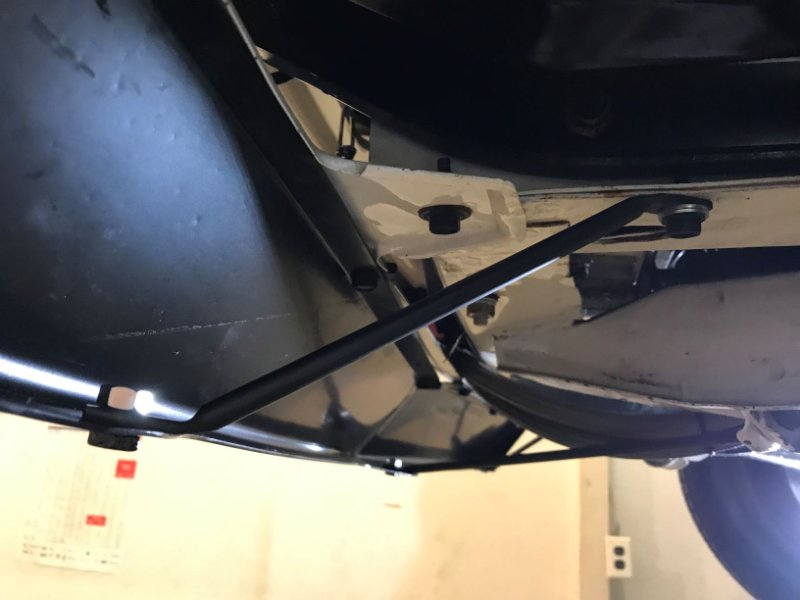
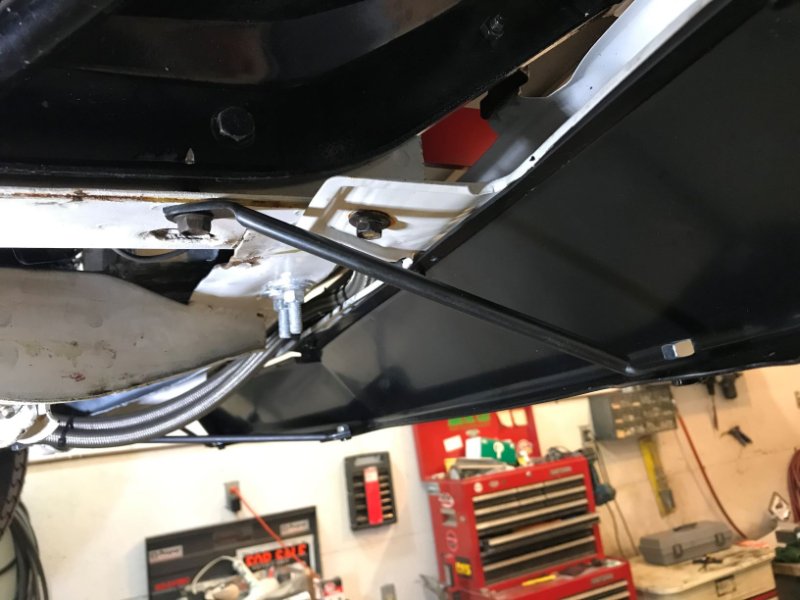
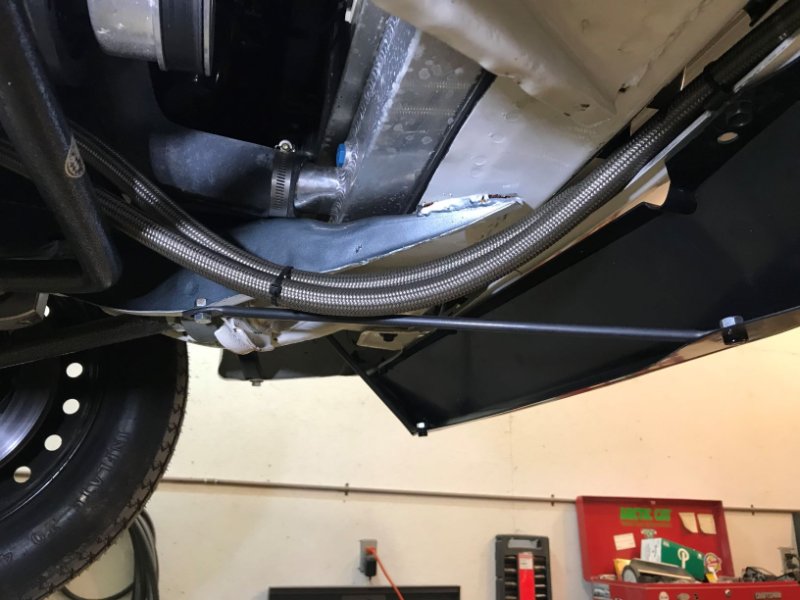
I first recommend you go watch a Utube video on the install on a Camaro. It will give you some insight how it’s suppose to be installed. I bought the 67/68 Camaro spoiler from an Ebay vendor for $47 that included the hardware & bracket kit. It comes with 5, 5/16 bolts & clips for mounting the steel rod brackets and about 6 sheet metal screws for mounting the spoiler to the front valance. With my goal in mind to make it removable & strong I elected to use the 5/16 bolts to mount the spoiler and fastening the bolt clips to the valance. I mounted the spoiler with C clamps and centered it. I put the back of the spoiler tight to the rear valance lip. I does have a slight V and will not be tight in the center. It has a round center mount in the middle of the spoiler that will have to be trimmed off ( originally this went around the licence plate bolt on the Camaro). I then marked the five locations for the bolts to the valance. Two on each side and one in the middle. I then used my dremmel tool and removed the small lip on the back of the valance to install the bolt clips. I mounted the spoiler to the valance with the five bolts. Then I mounted the two outer shorter rod brackets. I elected to use the front frame rails as a mounting point. I investigate going to the fender bracket, but that would have required cutting & lengthening the bracket and it would be more visible and not as stiff. The eyelets of the brackets will have to be bent to get the angles right. I then drilled and taped the frame rail 5/16-18 and mounted the short bracket rod. The long rod goes in the center of the spoiler. A number of different ways you could engineer to mount the center rod. I choose to go to the lip of the strut rod support. Simply drill a hole in the lip and bolt it. Again the rod eyelets needs bent to get the angles right.
Mounting it this way the spoiler is SUPER STOUT! very ridged! and not flexing at all. Using the 5/16 bolts vs sheet metal screws I can remove and reinstall without to much trouble. This ridged mount will also allow me the add brake cooling ducks to the spoiler in the future if needed. I have some rubber gasket material that has tape on one side. I’ll added that between the spoiler and valance to hide a slight gap between the spoiler and valance. I don’t think you would have that slight gap if you used the sheet metal screws vs 5/16 bolts to mount the spoiler.
For a street driver car I would mount it different.
- First method I would use the sheet metal screws to mount it to the valance. Then install the rod brackets. This is how it is installed on the Camaro. I wouldn’t use just the sheet metal screws without the brackets. It would be very flimsily.
- Second method if you don’t want to install the brackets. I would use the 5, 5/16 bolts and clips like I did and mount it to the valance. It makes the mounting strong enough that you don’t have to use the rod brackets.


Thank you, a fantastic result and postings.
Has anybody, installed a Camaro spoiler WITHOUT ruining the front valance with a dozen screw holes???
You know I wouldnt think this would be much of a concern when adding and aftermarket spoiler like this, Its kinda a given your going to have do something to the car to make it fit. After all your installing a camaro part on a cougar so some drilling may be required.
Given that, If you really dont want to drill a hole maybe consider a repro valance to drill into and save your original? Or now that you have seen how these actually mount you can come up with a no drill option?
Have you thought about using velcro? OK…probably not that good of an idea. How about Lord Fusor panel adhesive?
Without buying a repo valance panel, using Velcro or some adhesive, again is damaging the panel. I’m hoping to attach it just as the one from WCCC attaches, have no problem putting holes in the spoiler.
The mentioned 67-68 reproduction front spoiler wraps beyond the valance panel and will likely require mounting points at the lower front area of the fenders: Spoiler - Front Chin / Air Dam - without Bumper Guards - Repro ~ 1967 - 1968 Mercury Cougar ( 1967 Mercury Cougar, 1968 Mercury Cougar ) at West Coast Classic Cougar :: The Definitive 1967 - 1973 Mercury Cougar Parts Source
If the use of sheet metal screws for attaching the spoiler directly to your Cougar’s fenders and valance panel is not a desirable option…
You could consider engineering some brackets that are similar to what Brian Carpenter used for his Cougar. If doing so, and to address the lower front fender mounting points, you might consider making 5 to 7 individual remote brackets that attach to the spoiler; maybe triangle design brackets at the fender wrap mounting points. Each bracket bent as needed and also having an inward, holed flange. Thin wall aluminum or steel tubing could be used to fabricate strut rod mounts that would fasten directly to the front lower frame and between the remote spoiler brackets. After cutting the tubing to length; a vise, hand arbor press, or hydraulic press could be used to coin the ends of the tubing flat. Holes could then be drilled (or slots milled if access to a vertical mill) through the coined ends for the attaching hardware. Each strut tube could then be bent (to suit) between its coined flats to properly bridge the mounting points. A little work… but aesthetic and rigid when complete.
I think if you used the three rod supports like I did on the bottom of the spoiler which adds lots of rigidity. You could try several large binder clips on the top of the spoiler to the valance instead of the sheet metal screws. I think that combination would work on a street driven car. It would be worth a try.
https://www.amazon.com/ACCO-Binder-Clips-Large-72100/dp/B002VD6BLG
In your post #47, photos 1 and 2, it shows the brackets attaching to the frame, were there holes already there??
The flange of the valance panel bolts to the frame, this is where the WCCC cougar spoiler attached, not the one in the previous post that had a link, it’s another one they use to sell.
Anyhow, if I could figure out a way to shorten that bracket, all would be solved, I could use that attachment point What type of shop would be able to do that, any ideas, I’ve had too much chemo, and my brain just doesn’t want to work.
Both replies were very good.
Yes, I drilled and taped the frame rail. You have options of different mounting points without doing that. But, I think you already know it would require you cutting and shortening or lengthening the rods, or making brackets to attach the rods too. Another suggestion is you can buy really small C clamps like 1” or 2” that would work also and provide better clamping force them binder clips. Or maybe a combination of both.
Holes already there??? Or you drilled and tapped them??
Re read your post, you drilled and tapped them, trying not to do that, I can’t get down to look , just had major surgery done the other day.
So the question remains, what type of business would I need to take the support rods to, so they could be made shorter and welded back together??
A general machine shop or fabrication shop. Either will be able to cut and weld aluminum or steel. Another thought would be to look for a local machinist and/or welder that has his own mini shop to work from at home.