Did not notice before. Flow-thru ventilation system was only a 1969 option. Not sure why Kevin included it as a NC (no charge) option on this 1970 XR7.
You’re thinking of the Comfort-Stream Ventilation option from '69.
All the '70’s had the Flow-Thru Ventilation System as a NC option ~ it’s on all the factory invoices.
My understanding is that the '70 Flow-Thru Ventilation has something to do with them adding the vents in the door jambs for '70. There may be more to it than that, but I’m not sure what else goes with it.
Here is the original Monroney label for Waco Cat, as Michael noted it is on every 1970 invoice that I have seen (and I have seen quite a few).
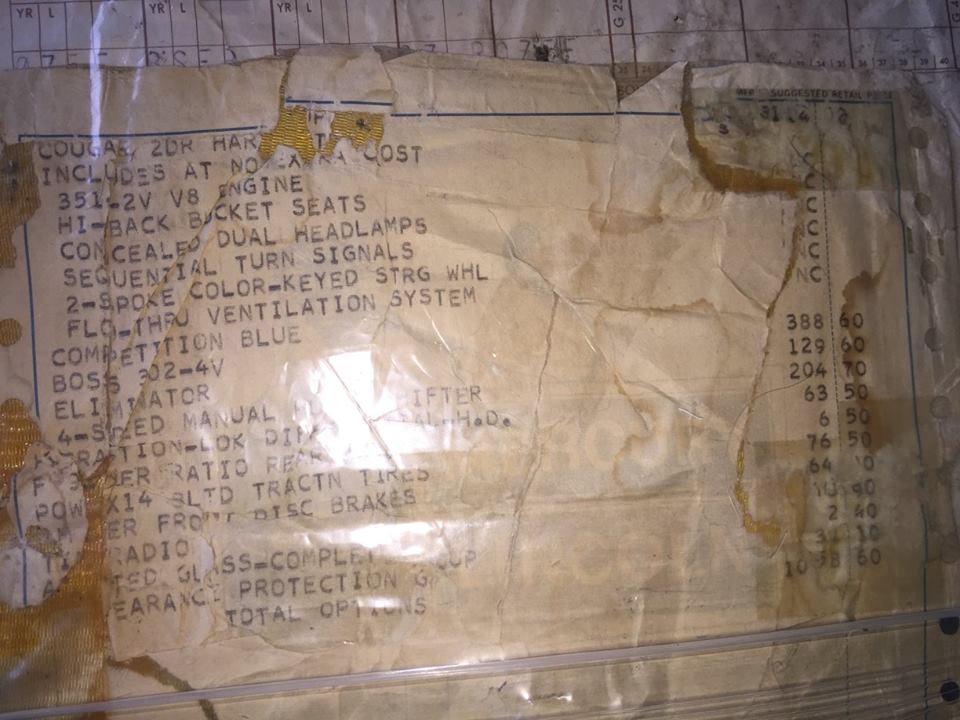
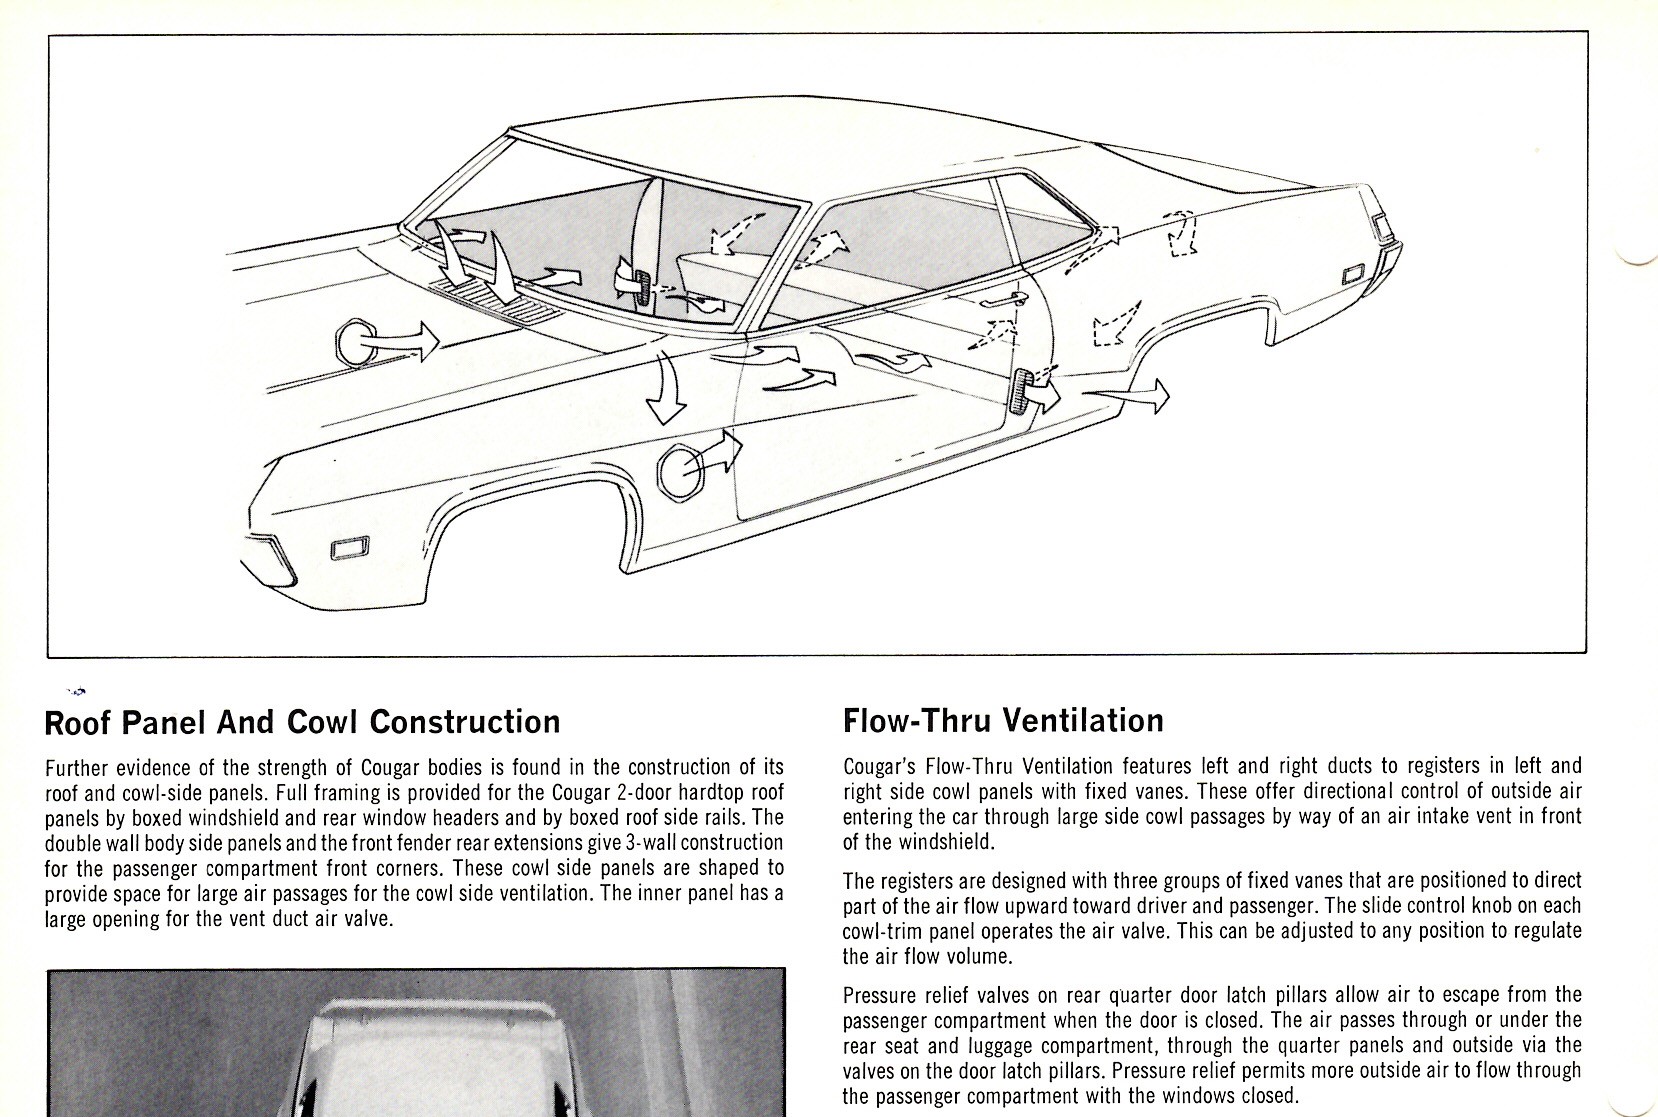
Here is the specifics of the “Flow-Thru Ventilation” system,
1 Like
I still have that shirt, can’t say the same for the hair!
Everything is work and time… haha I’m sure it will take the same level of commitment ![]()
Well, my ole man came out for a visit last week and of course we went over the progress on the cougar. She, ( the cougar) will now be referred to as Phoenix because she is rising from the ashes of being on the brink of extinction due to the fire back in 99. Dad is over 80 and I promised him he would drive Phoenix ( or at least ride in it again). So I better buckle and nut up! The pace needs to pick up!!

4 Likes
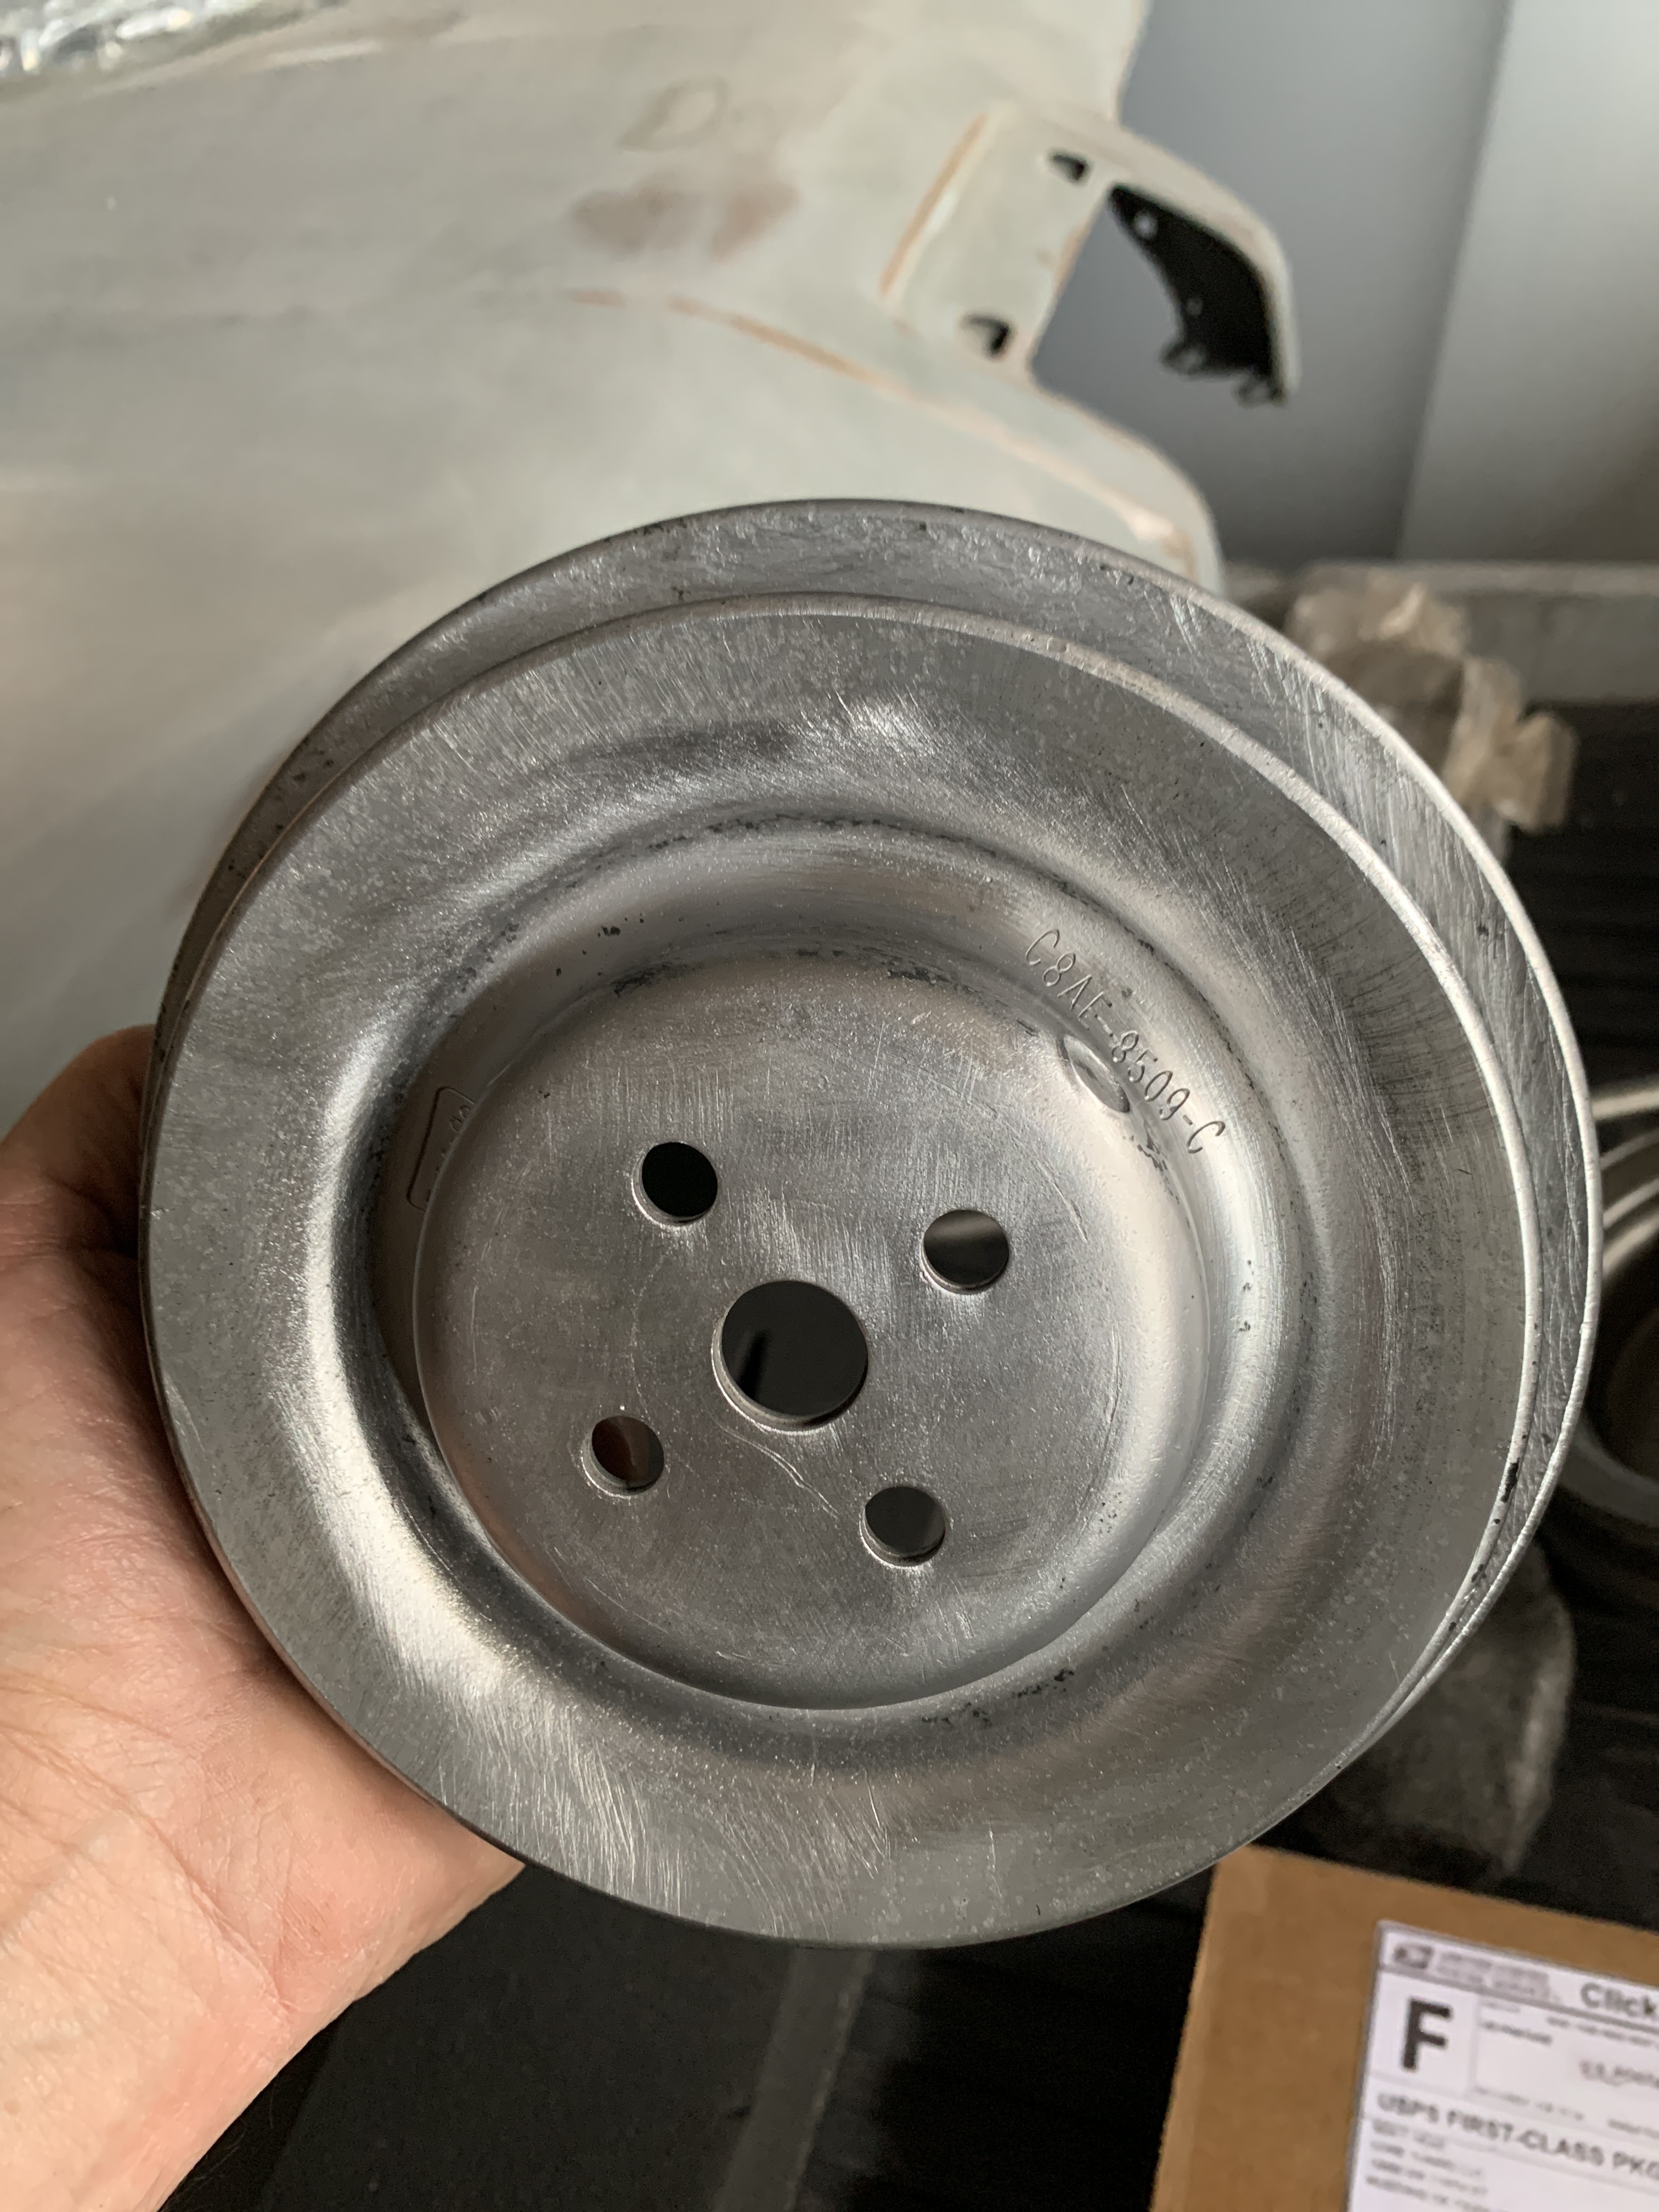
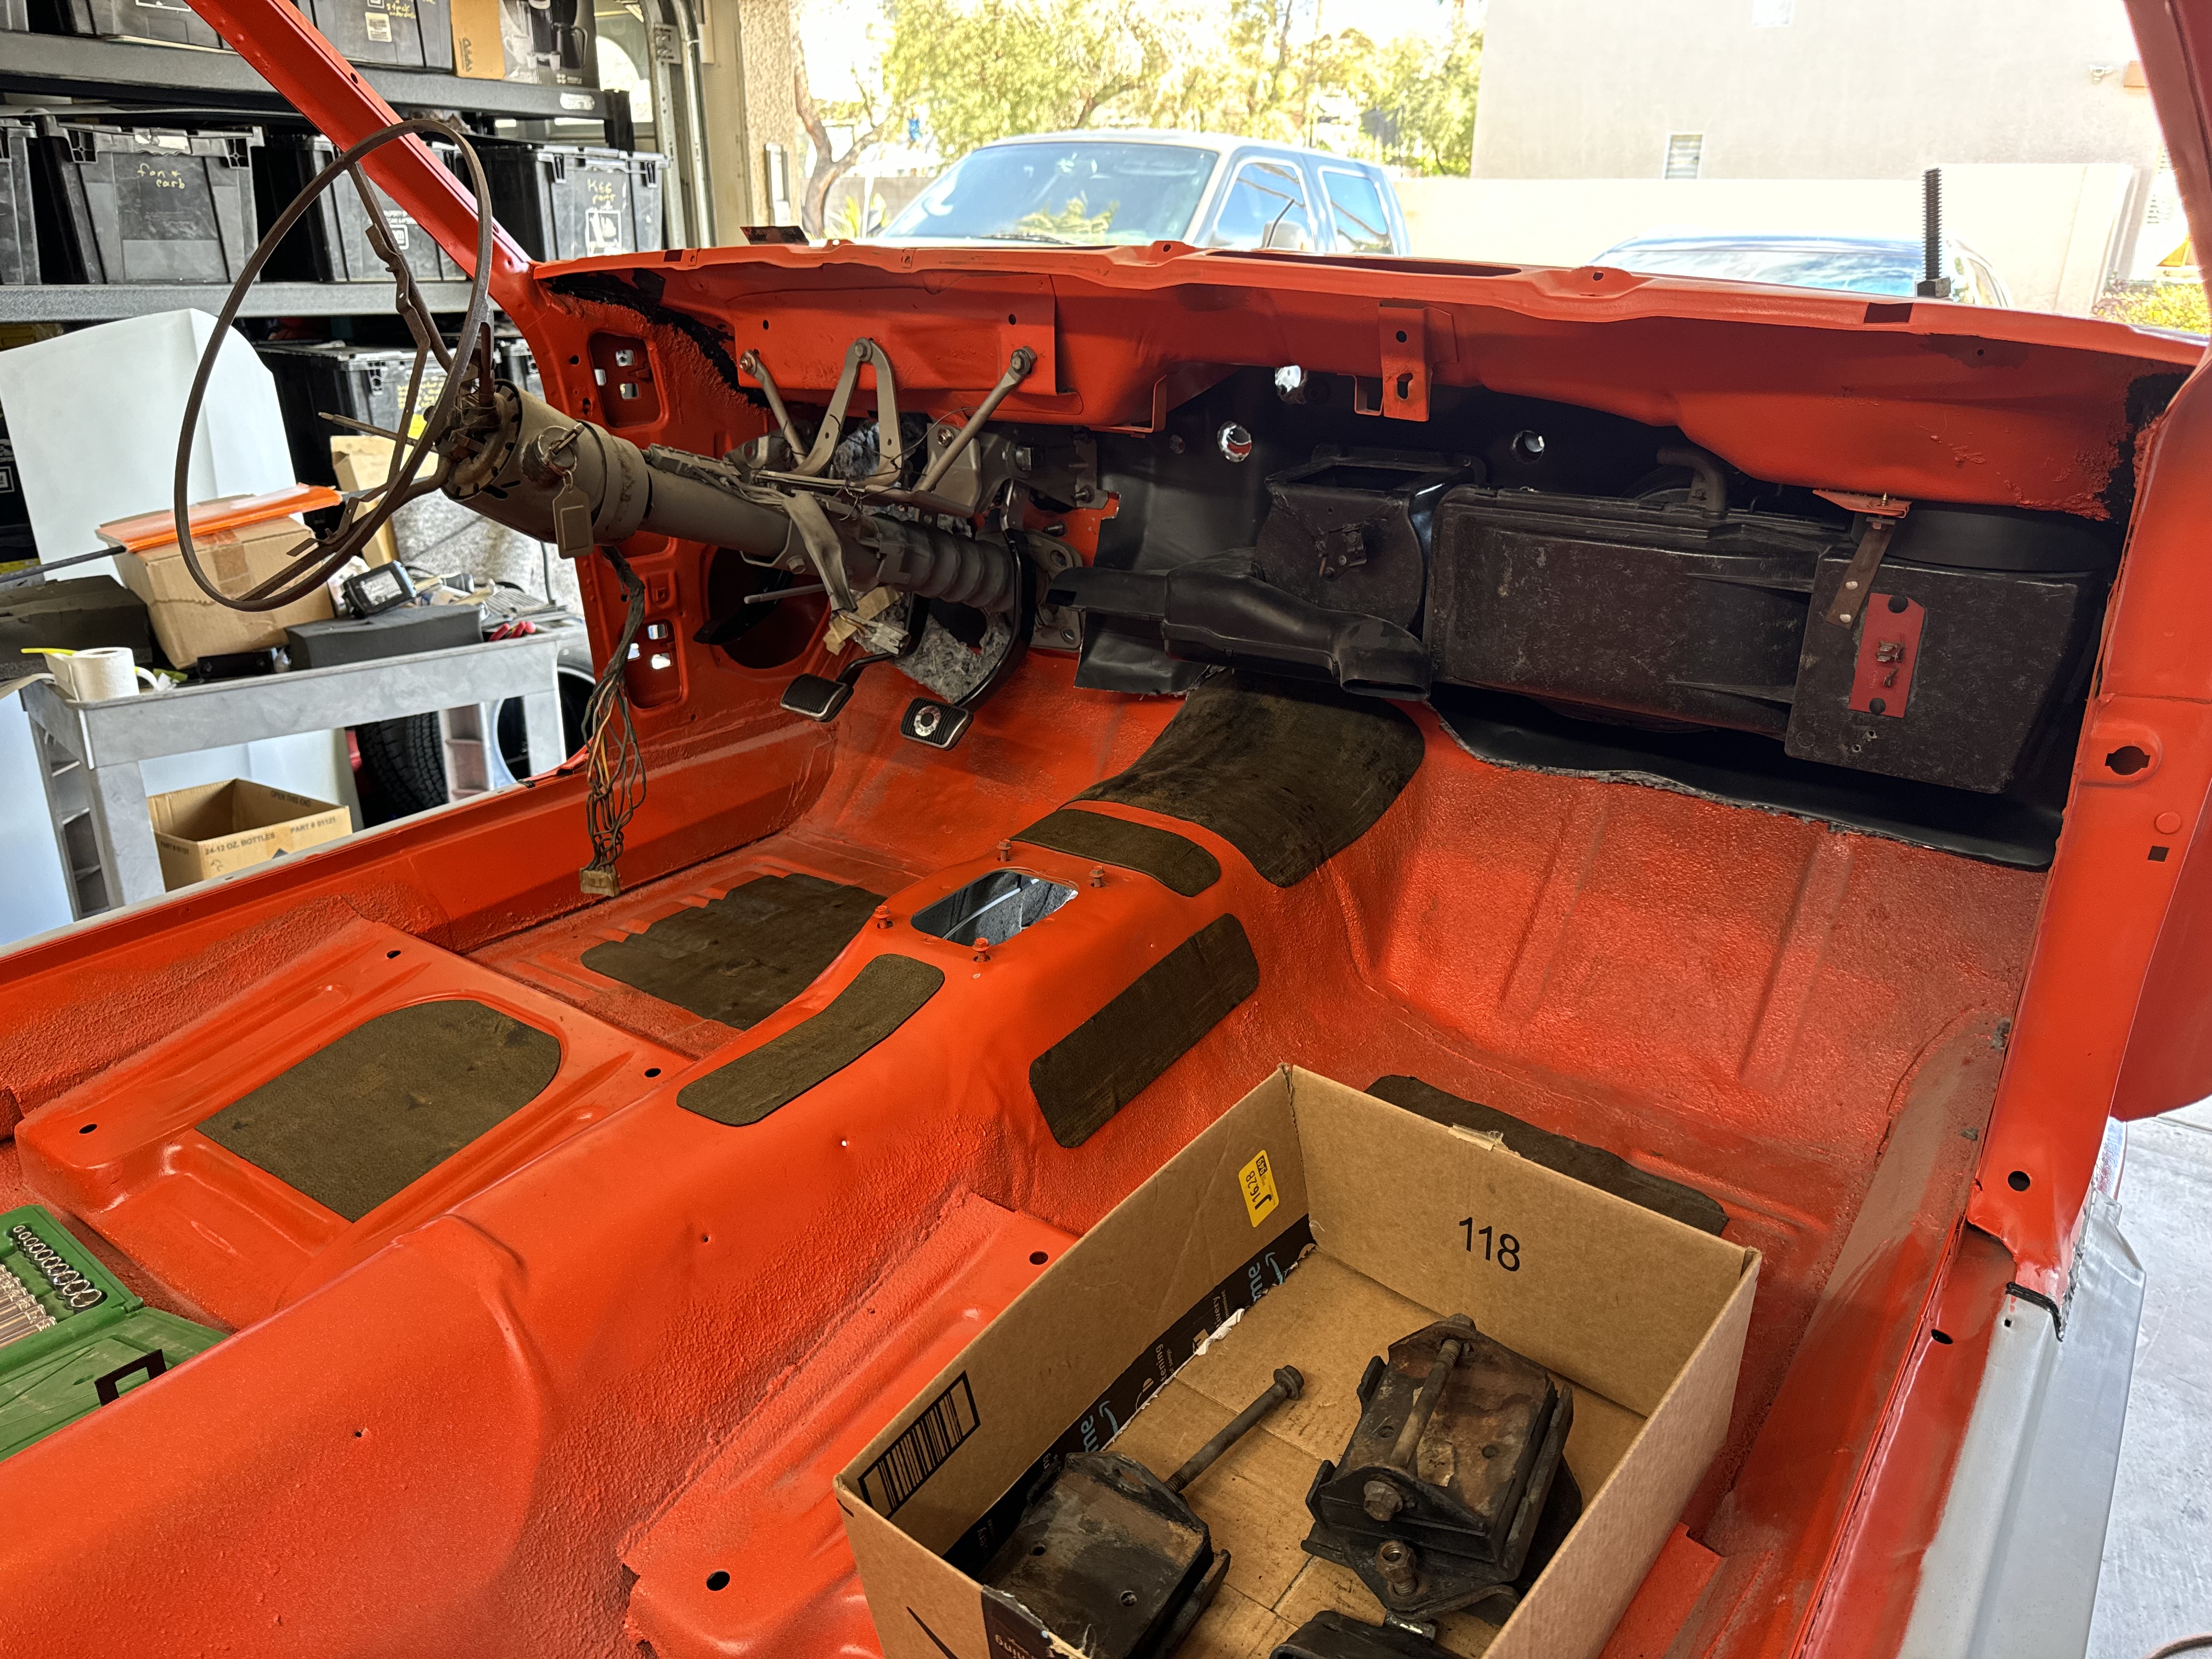
Well, I was messing with Phoenix and digging out tubs full of parts. Got
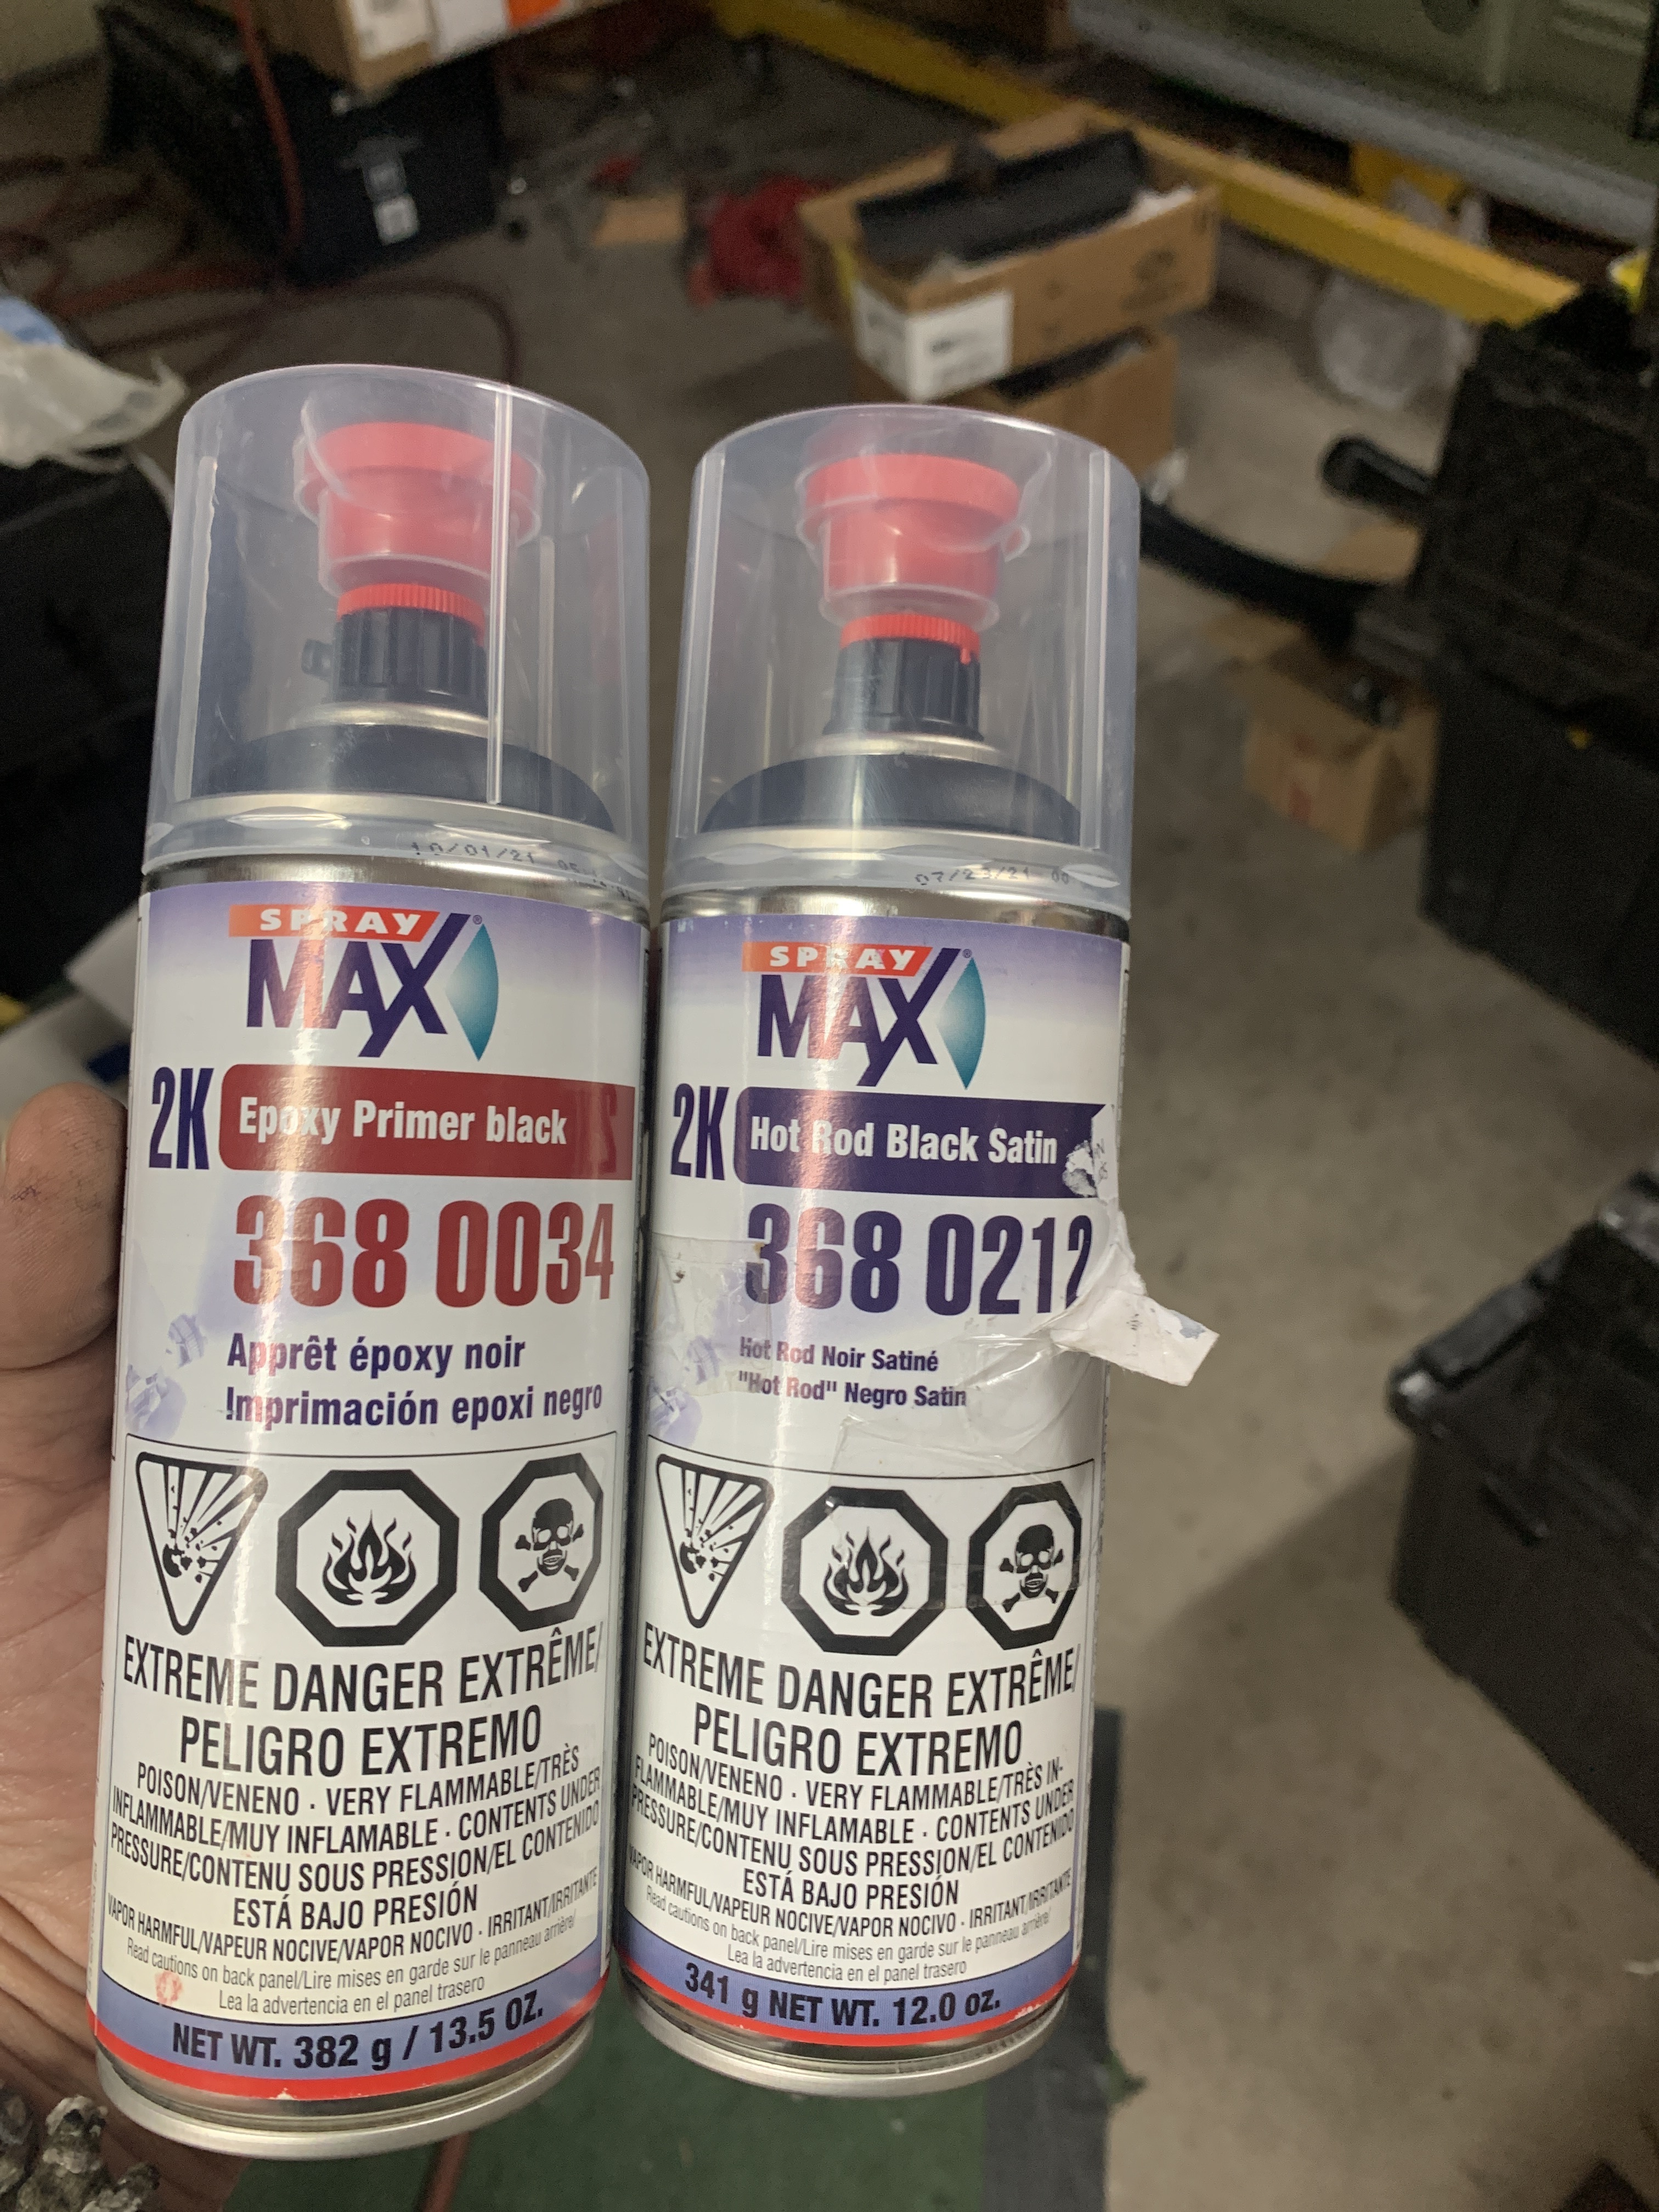
the crank pulley and water pump pulley cleaned up and ready for paint also found the oil cooler brackets and discovered the nutserts had broken off the bottom bracket. No big deal as they are easy to replace. Then I held it up to its eventual home and realized there’s no way to access the back side to install the bolts in the yet to be installed nutserts. Maybe one bolt I can sneak in but the other?? Wtf? Not sure what that’s all about, why didn’t they just punch a hole to access. Maybe I’m overthinking this, working on Cadillacs everyday will do that to anyone! Oh well, back to cleaning and prepping the rear sway bar to paint that at the same time. I started using Spraymax epoxy primer and hot rod satin rattle cans. This stuff works great but when you pop the seal, you only have a day to use it. I tested it out on a couple other pieces and after it cured for several days it seemed rock solid. I then tested it with carb spray and lacquer thinner and it held! Great! It’s probably similar to what Eastwood has available. I guess I’ll dig out more so I don’t waste paint…
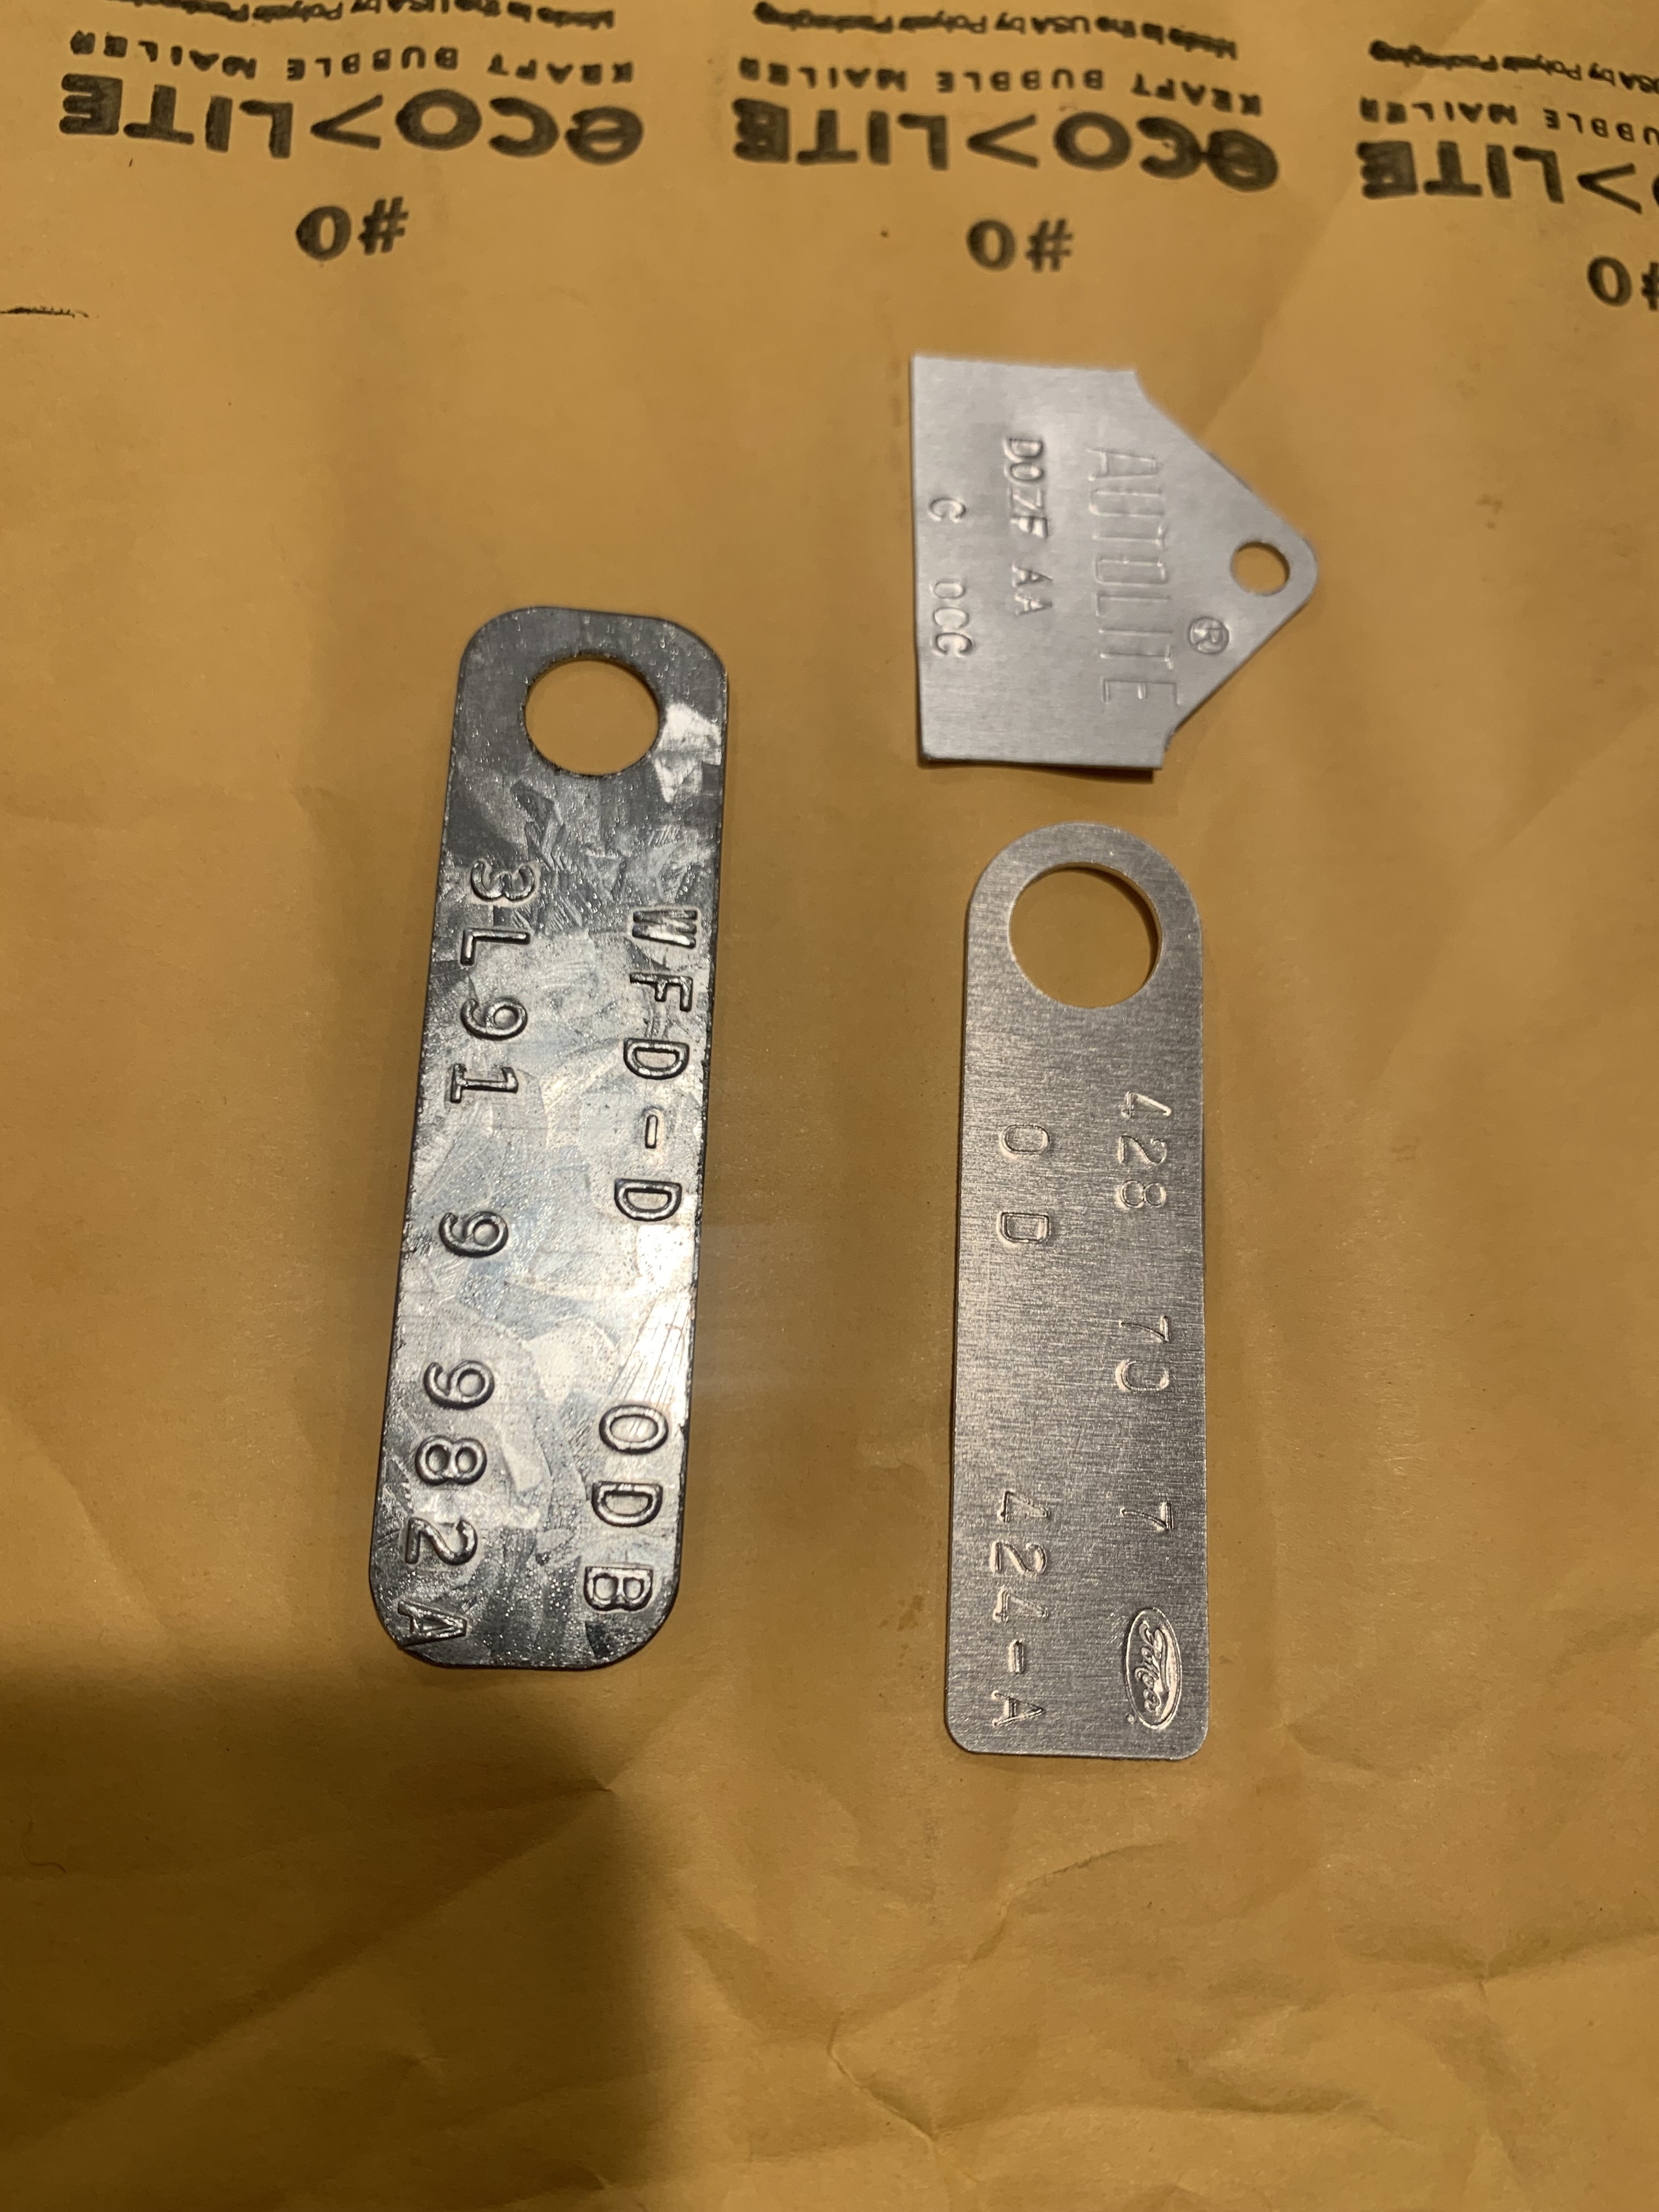
Well, I recently got the replacement tags that were apparently discarded/lost back in the 70’s. They look great! Another baby step done. Next up is to get Phoenix off the spit and make her a roller.
Awesome - great to have the originals of those to put back on!
Well, I’m getting ready to reassemble the front suspension (for the third time) and get Phoenix off the spit and stuff the rear end back underneath. Then I realized, I need wheels- duh! So I retrieved the styled rust wheels my dad took off back in the 80s. I think maybe they came from the ocean due to all the rust! So I poured a couple gallons of evaporust in a container and decided I had nothing to lose, wait 24 hours and wow! I admit, I’m a cheerleader for this stuff! I was almost ready to throw these wheels back in the sea, but now they’re salvageable! Now I gotta go buy more evaporust and a bigger tub! Is there a downside to the riveted wheels? Also, does anyone know what the k19 and other markings by the valve stem signify? They are 14x6


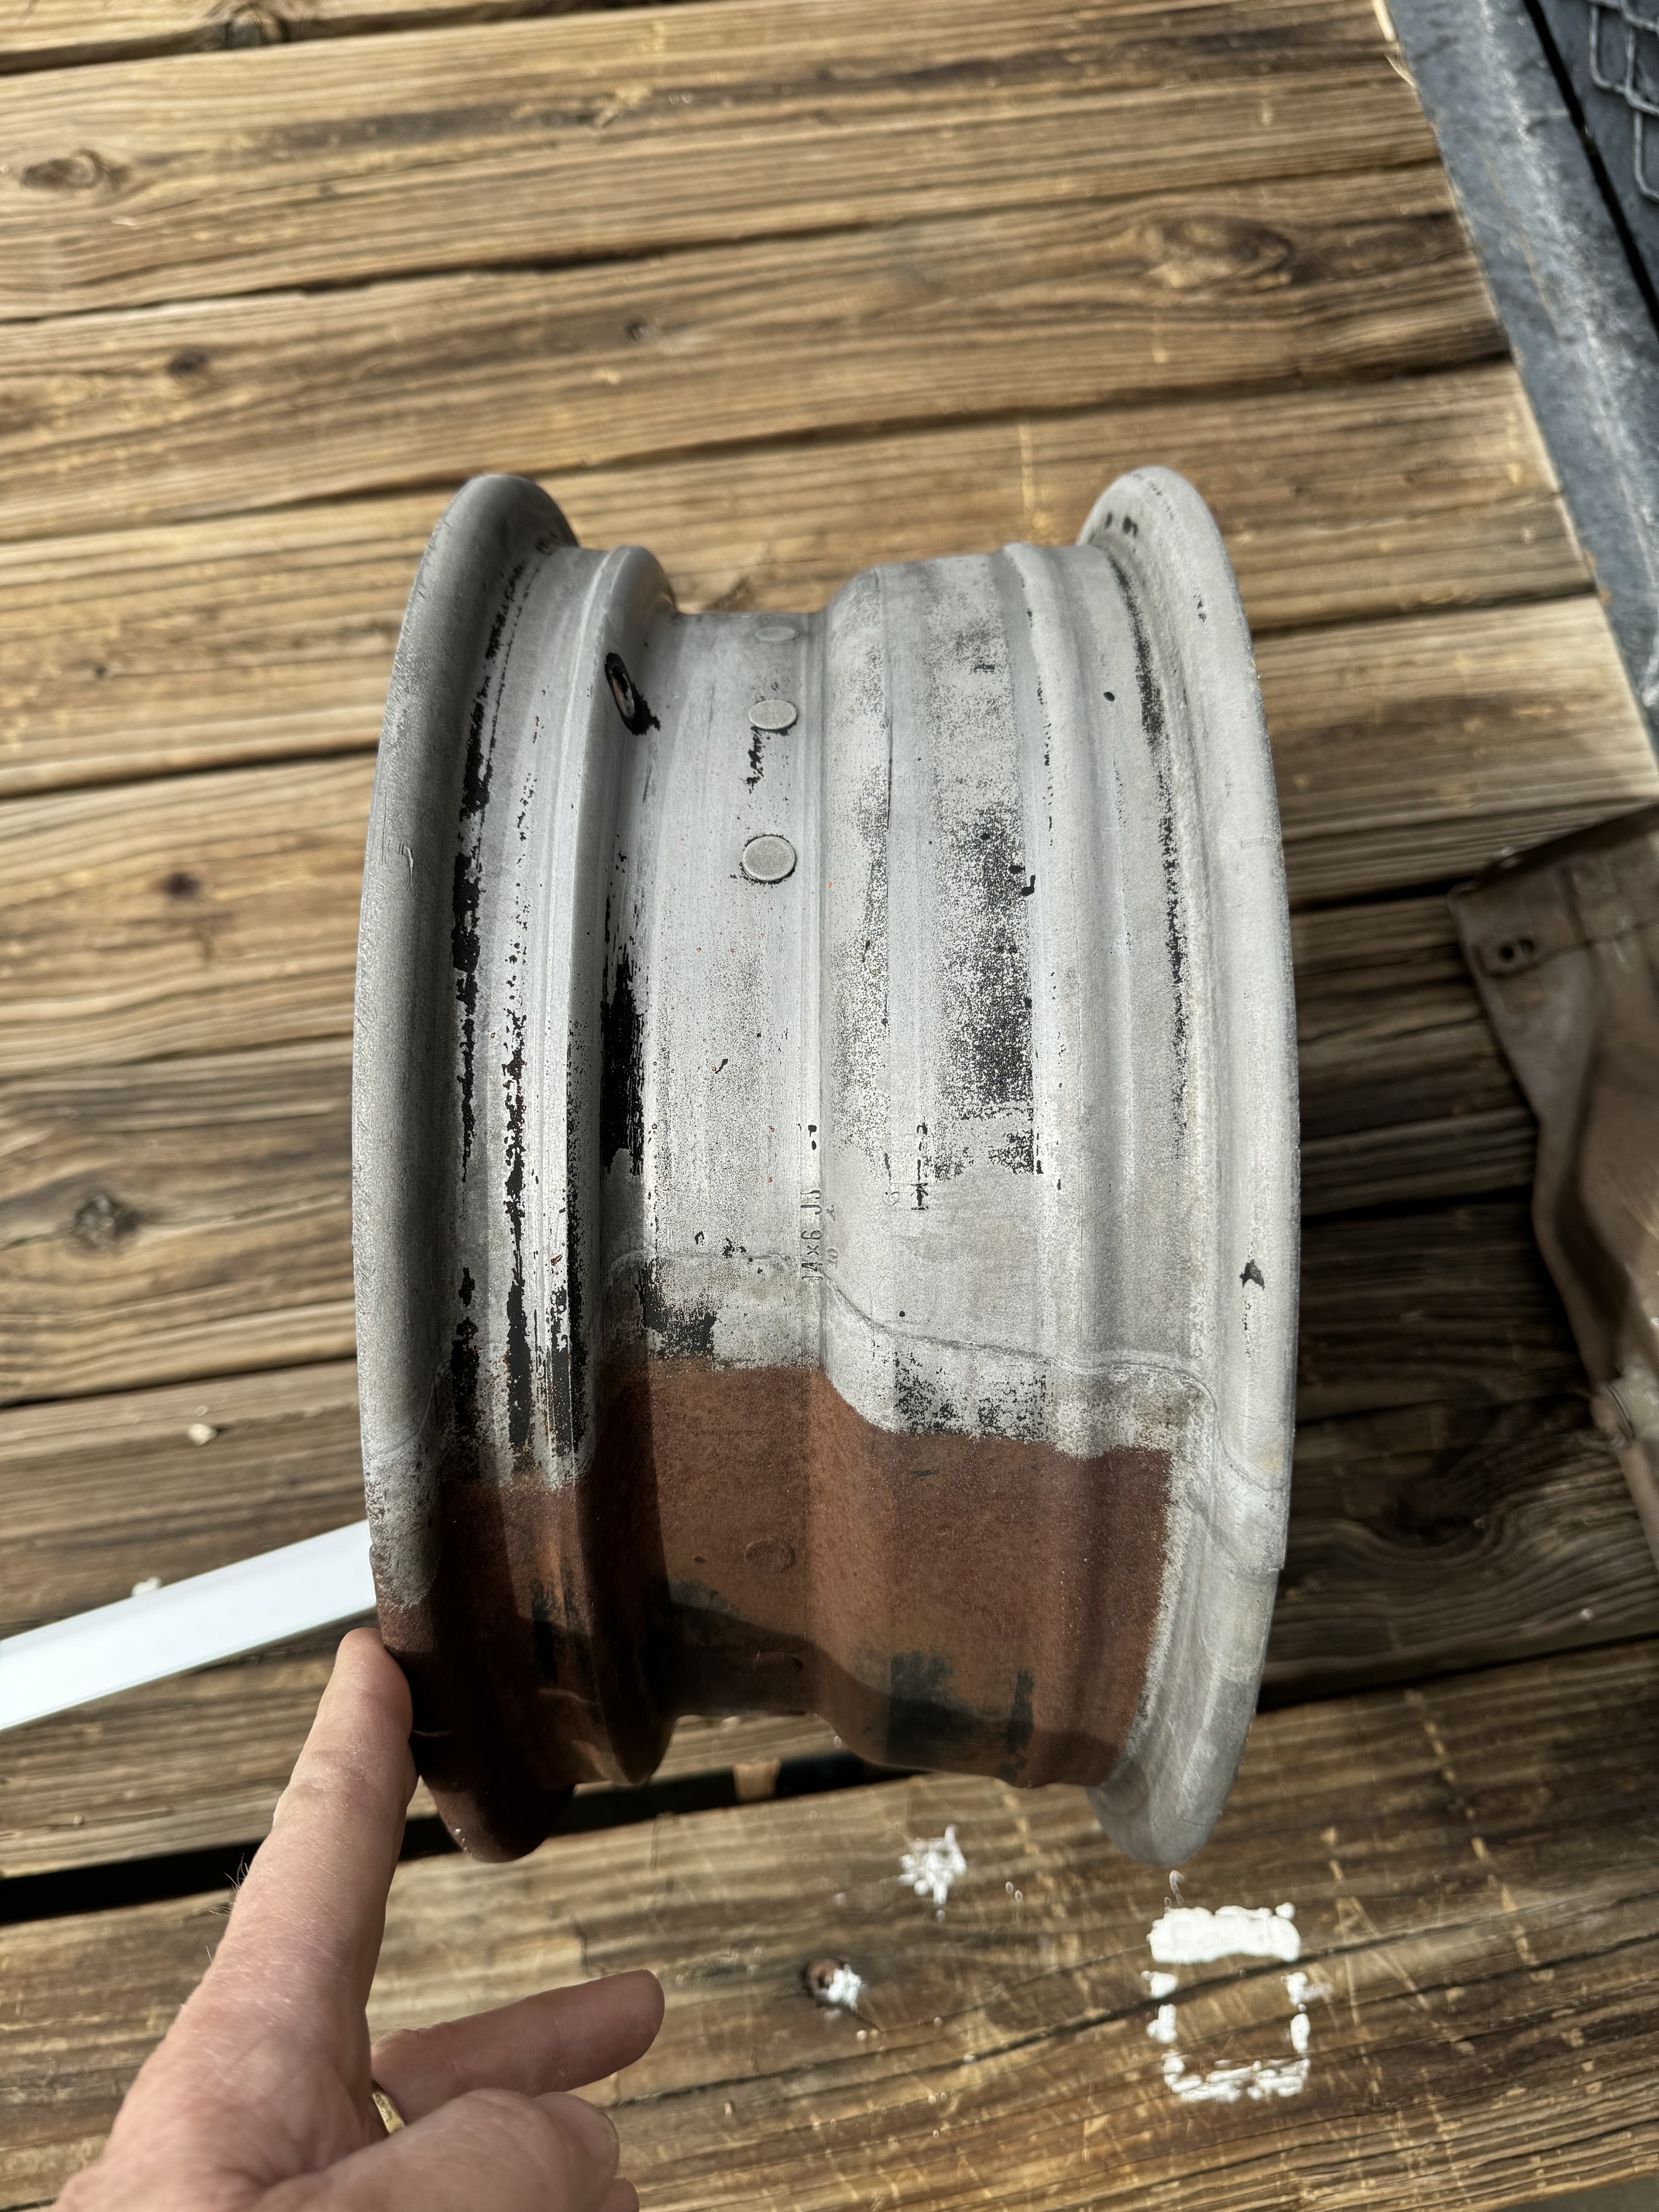
Yeah, the downside is that the rivets can work loose and the wheel comes apart. Also, the wheel truing guys won’t touch them for fear of loosening the rivets - at least that’s what I found here in KC. So you might mount it on a rear hub and spin it to make sure it is still round before you invest too much in it. I am still using my originals, but several people have warned me they had failures of these wheels.
I’m also impressed with the evaporust - looks great!
On the wheel stamping by the valvestem:
K = Kelsey Hayes manufacturer
1 = Romulus, Michigan plant
9 = 1969
10 7 = Oct 7
1 Like
Evaporust is great stuff, but as you use it, it becomes less effective. Doing four wheels at $30 per gallon will be a small fortune….i usually use it on small parts, especially hardware
You can buy it in 5 gallon kits. I dip my “dirty” parts in Oil Eater in a parts washer to make sure they’re clean. Any oil / trans fluid etc and the evaporust is essentially neutralized.
2 Likes
70scj4spvert, in the picture, it looks like the rivet is brass colored. Are these style of steel wheels riveted with brass? Good to see you’re getting Phoenix off the rotisserie.
That color is probably just rust starting over again after the evaporust. Sadly the rims have cracks and are un useable. Now, I have to consider other wheel options and sizes.
Sounds like welding them at the cracks isn’t recommended due to wheel warping? Assuming the tires need updated too. I see you are trying to stay as close to factory original as you can. So, will going up to a 15" diameter rim deviation trigger any show judging points?
Wow. Great car, great story, and great picture of you and your dad! I see you guys taking on these massive, massive projects, and it truly helps keep me from just throwing my projects out in the trash.
2 Likes
Massive is an understatement! It definitely tests your resolve!!
2 Likes
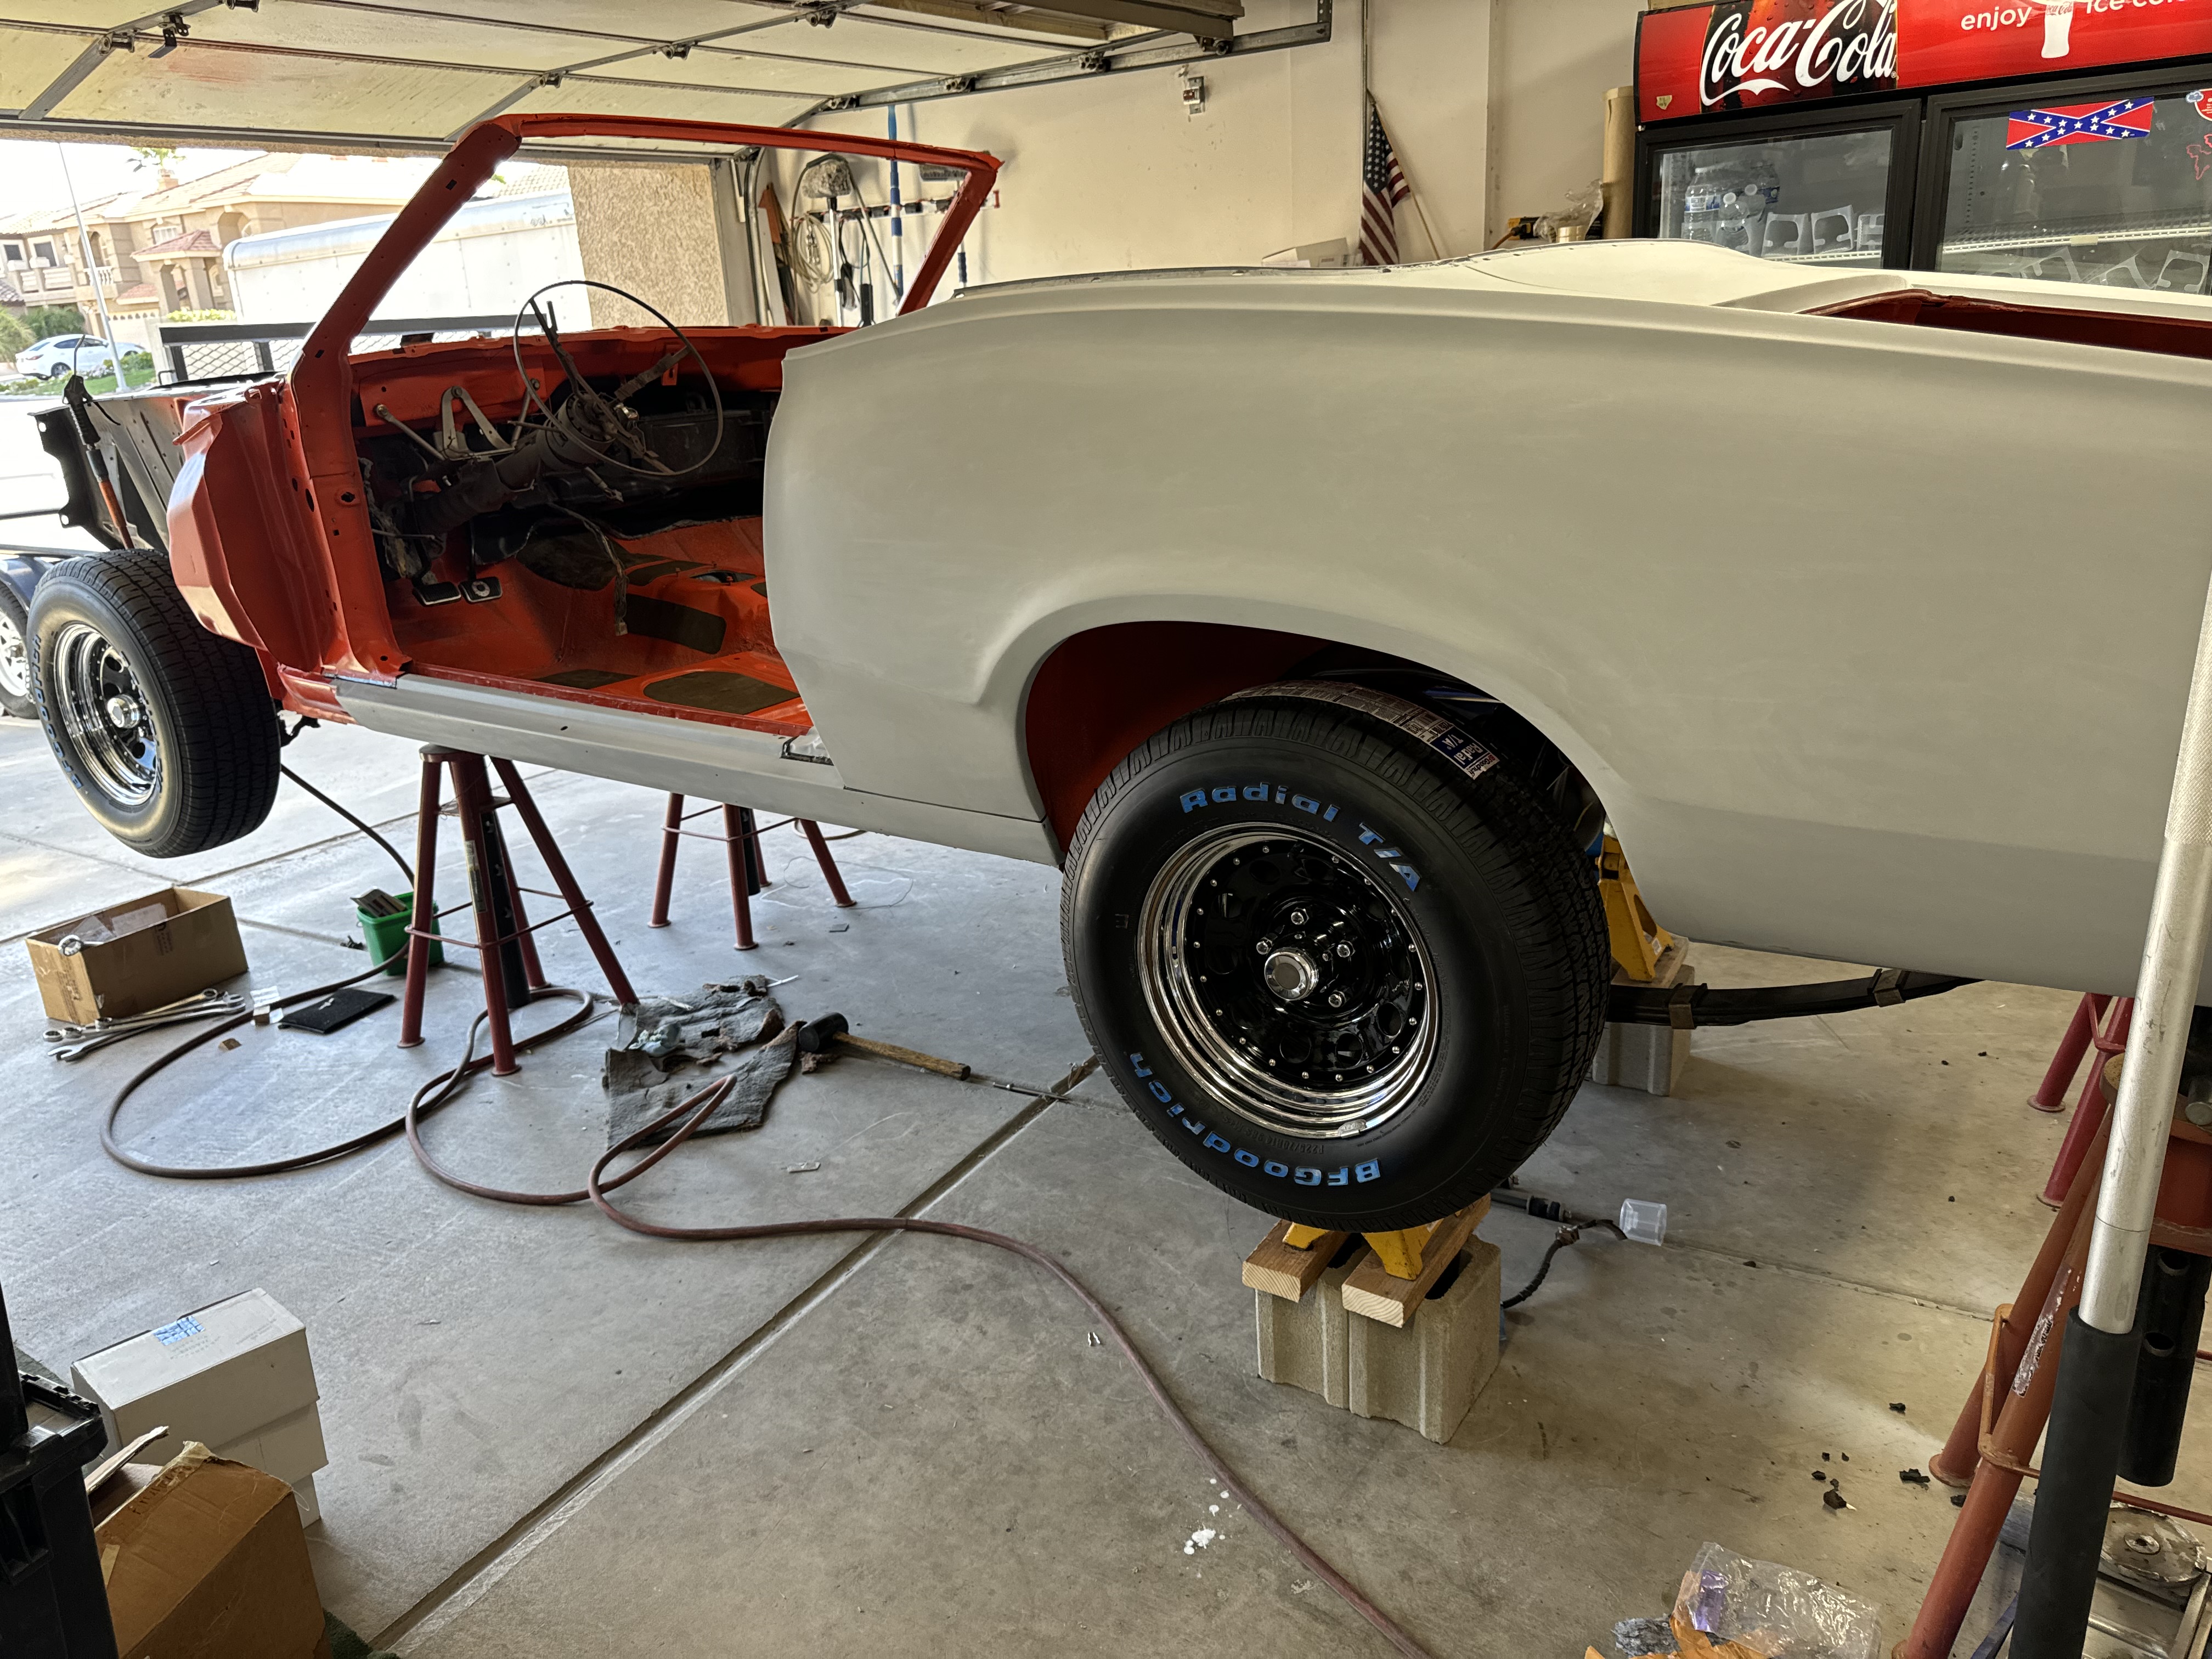
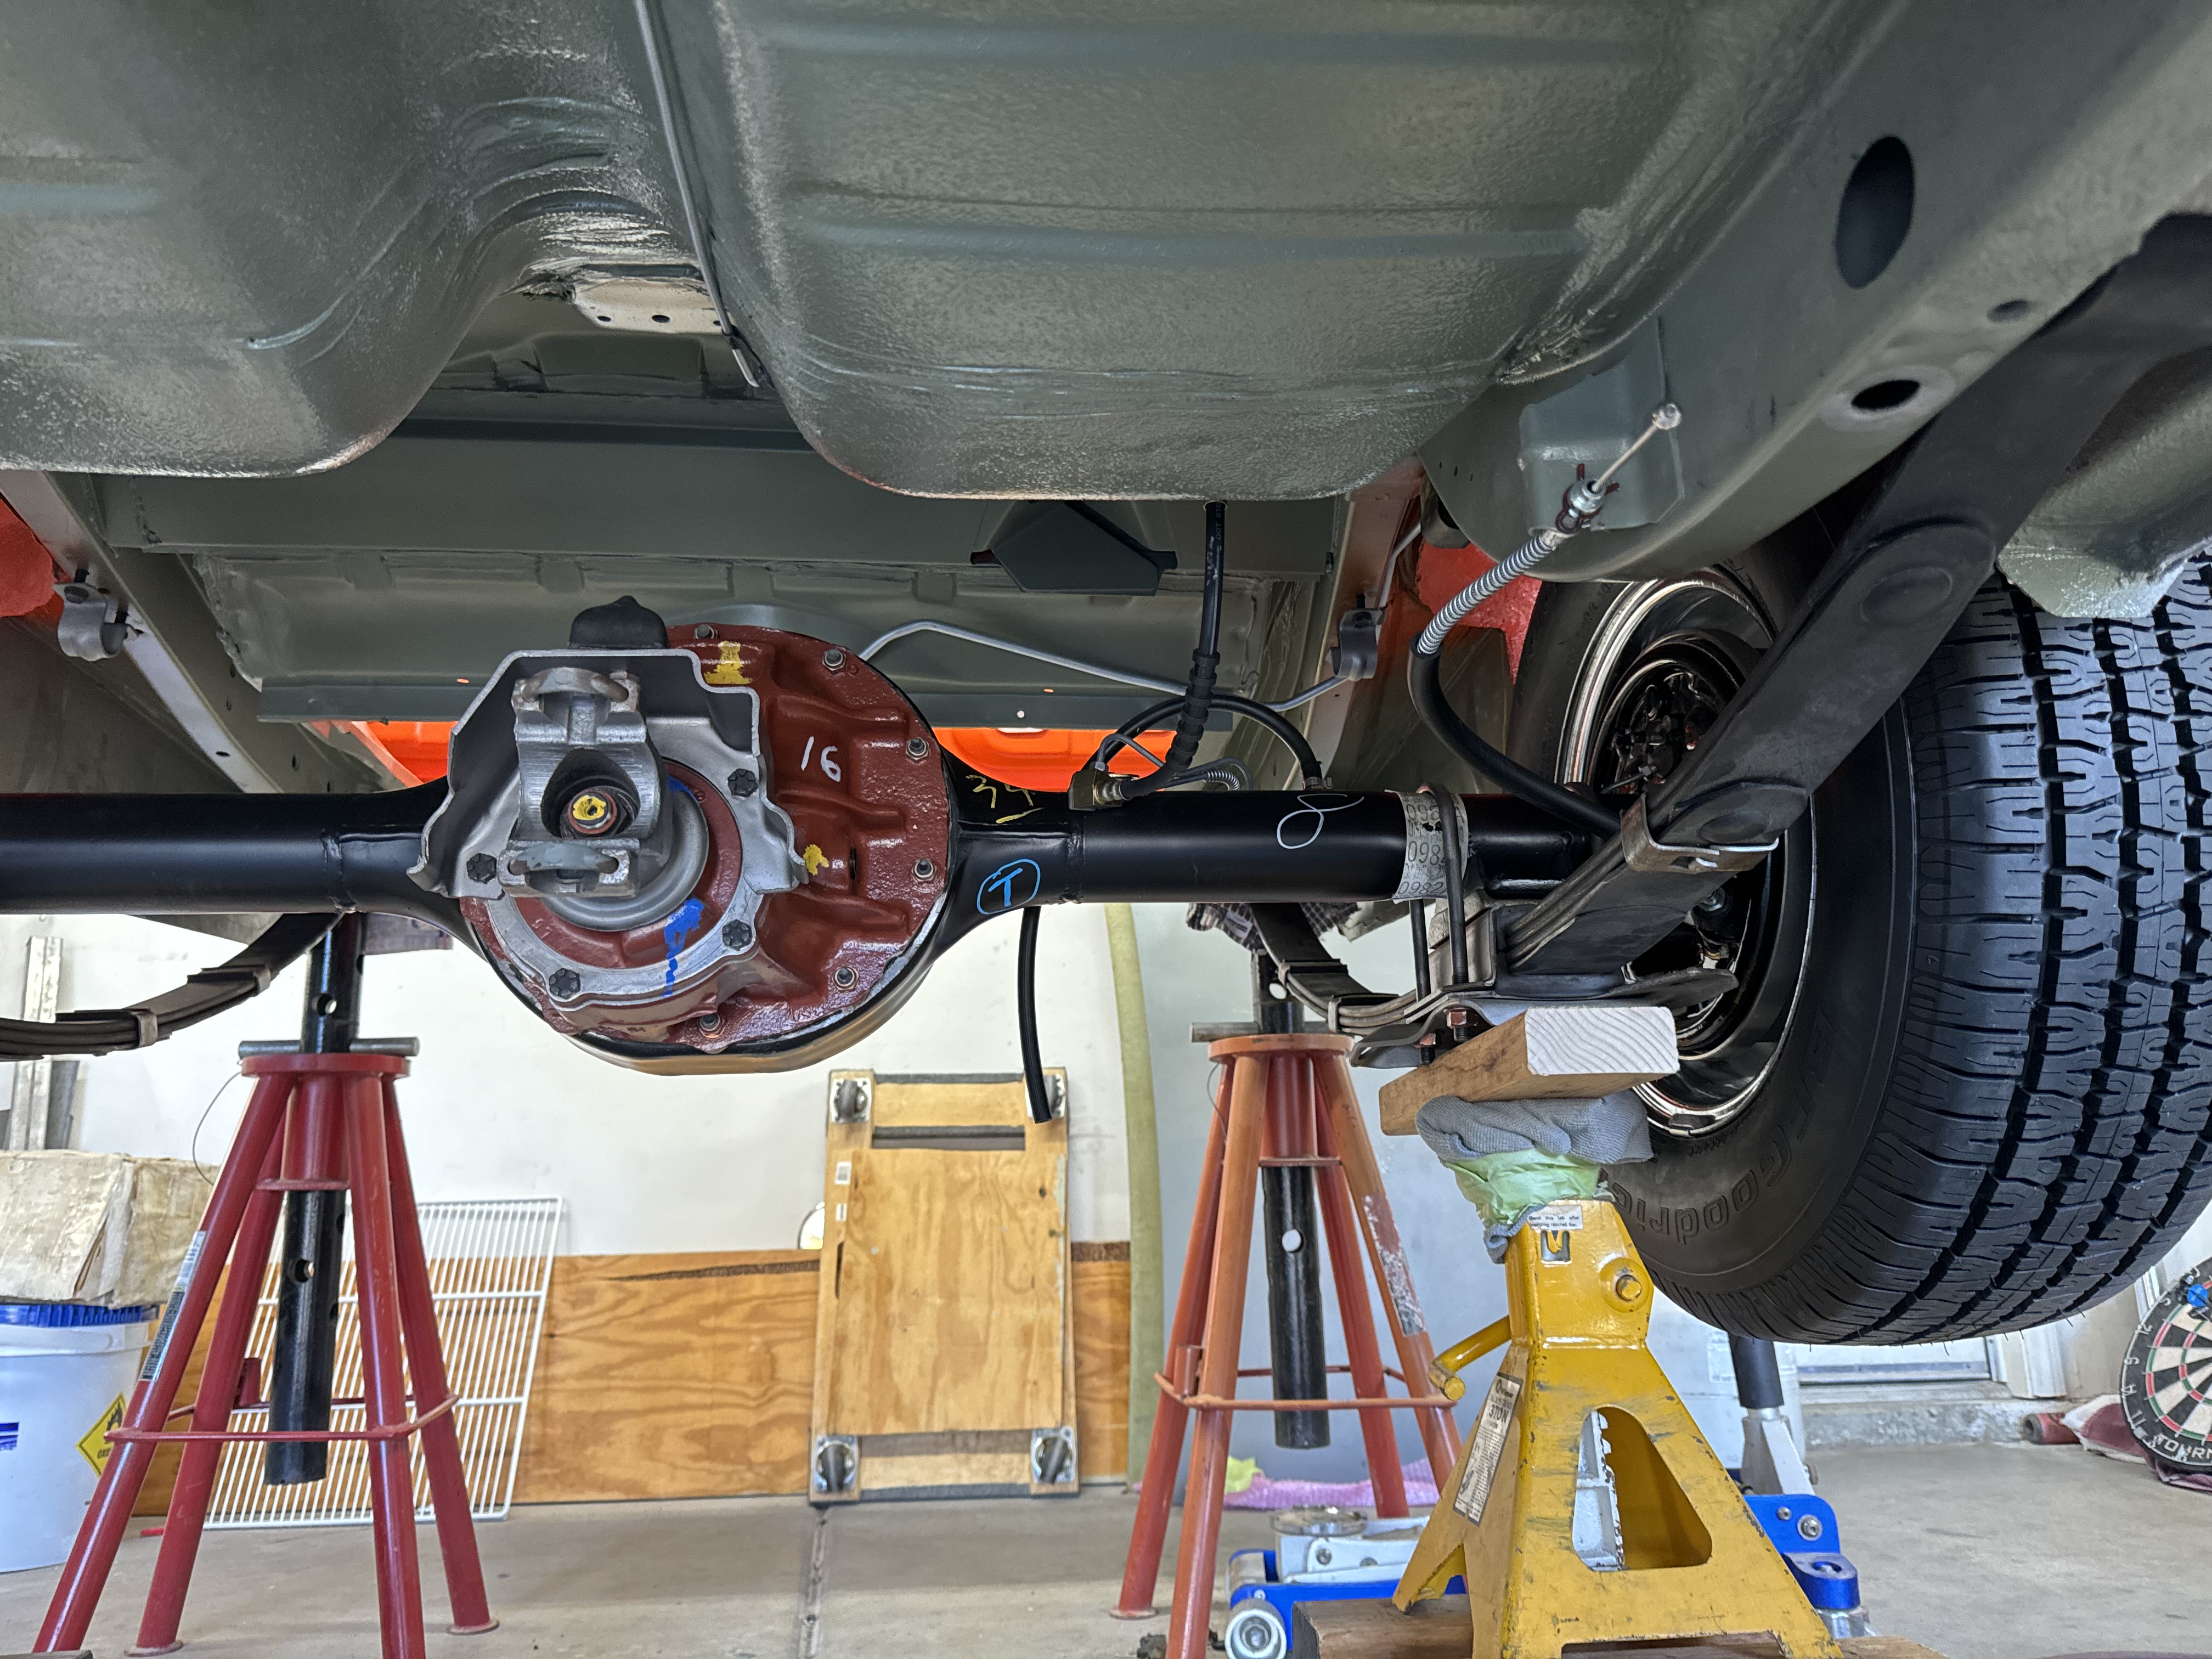
Well, progress is slow but still moving. Finally took Phoenix off the rotisserie and put the rear end underneath it. I was going to clean up the styled steel wheels but found a couple cracks. I ended up cleaning up a set of 14’s I had sitting around to use as rollers. Trying to find decent rubber to hold air is harder than I thought so I just bought some BFG Radial T/A’s. 225/70/14’s . It’s starting to look like a car again! Next up is to get the brakes working so I can move it around and stop it… Getting it painted is coming soon (thanks Scott).
I now have a nice rotisserie for sale, PM me if interested.
2 Likes
Going to be amazing!
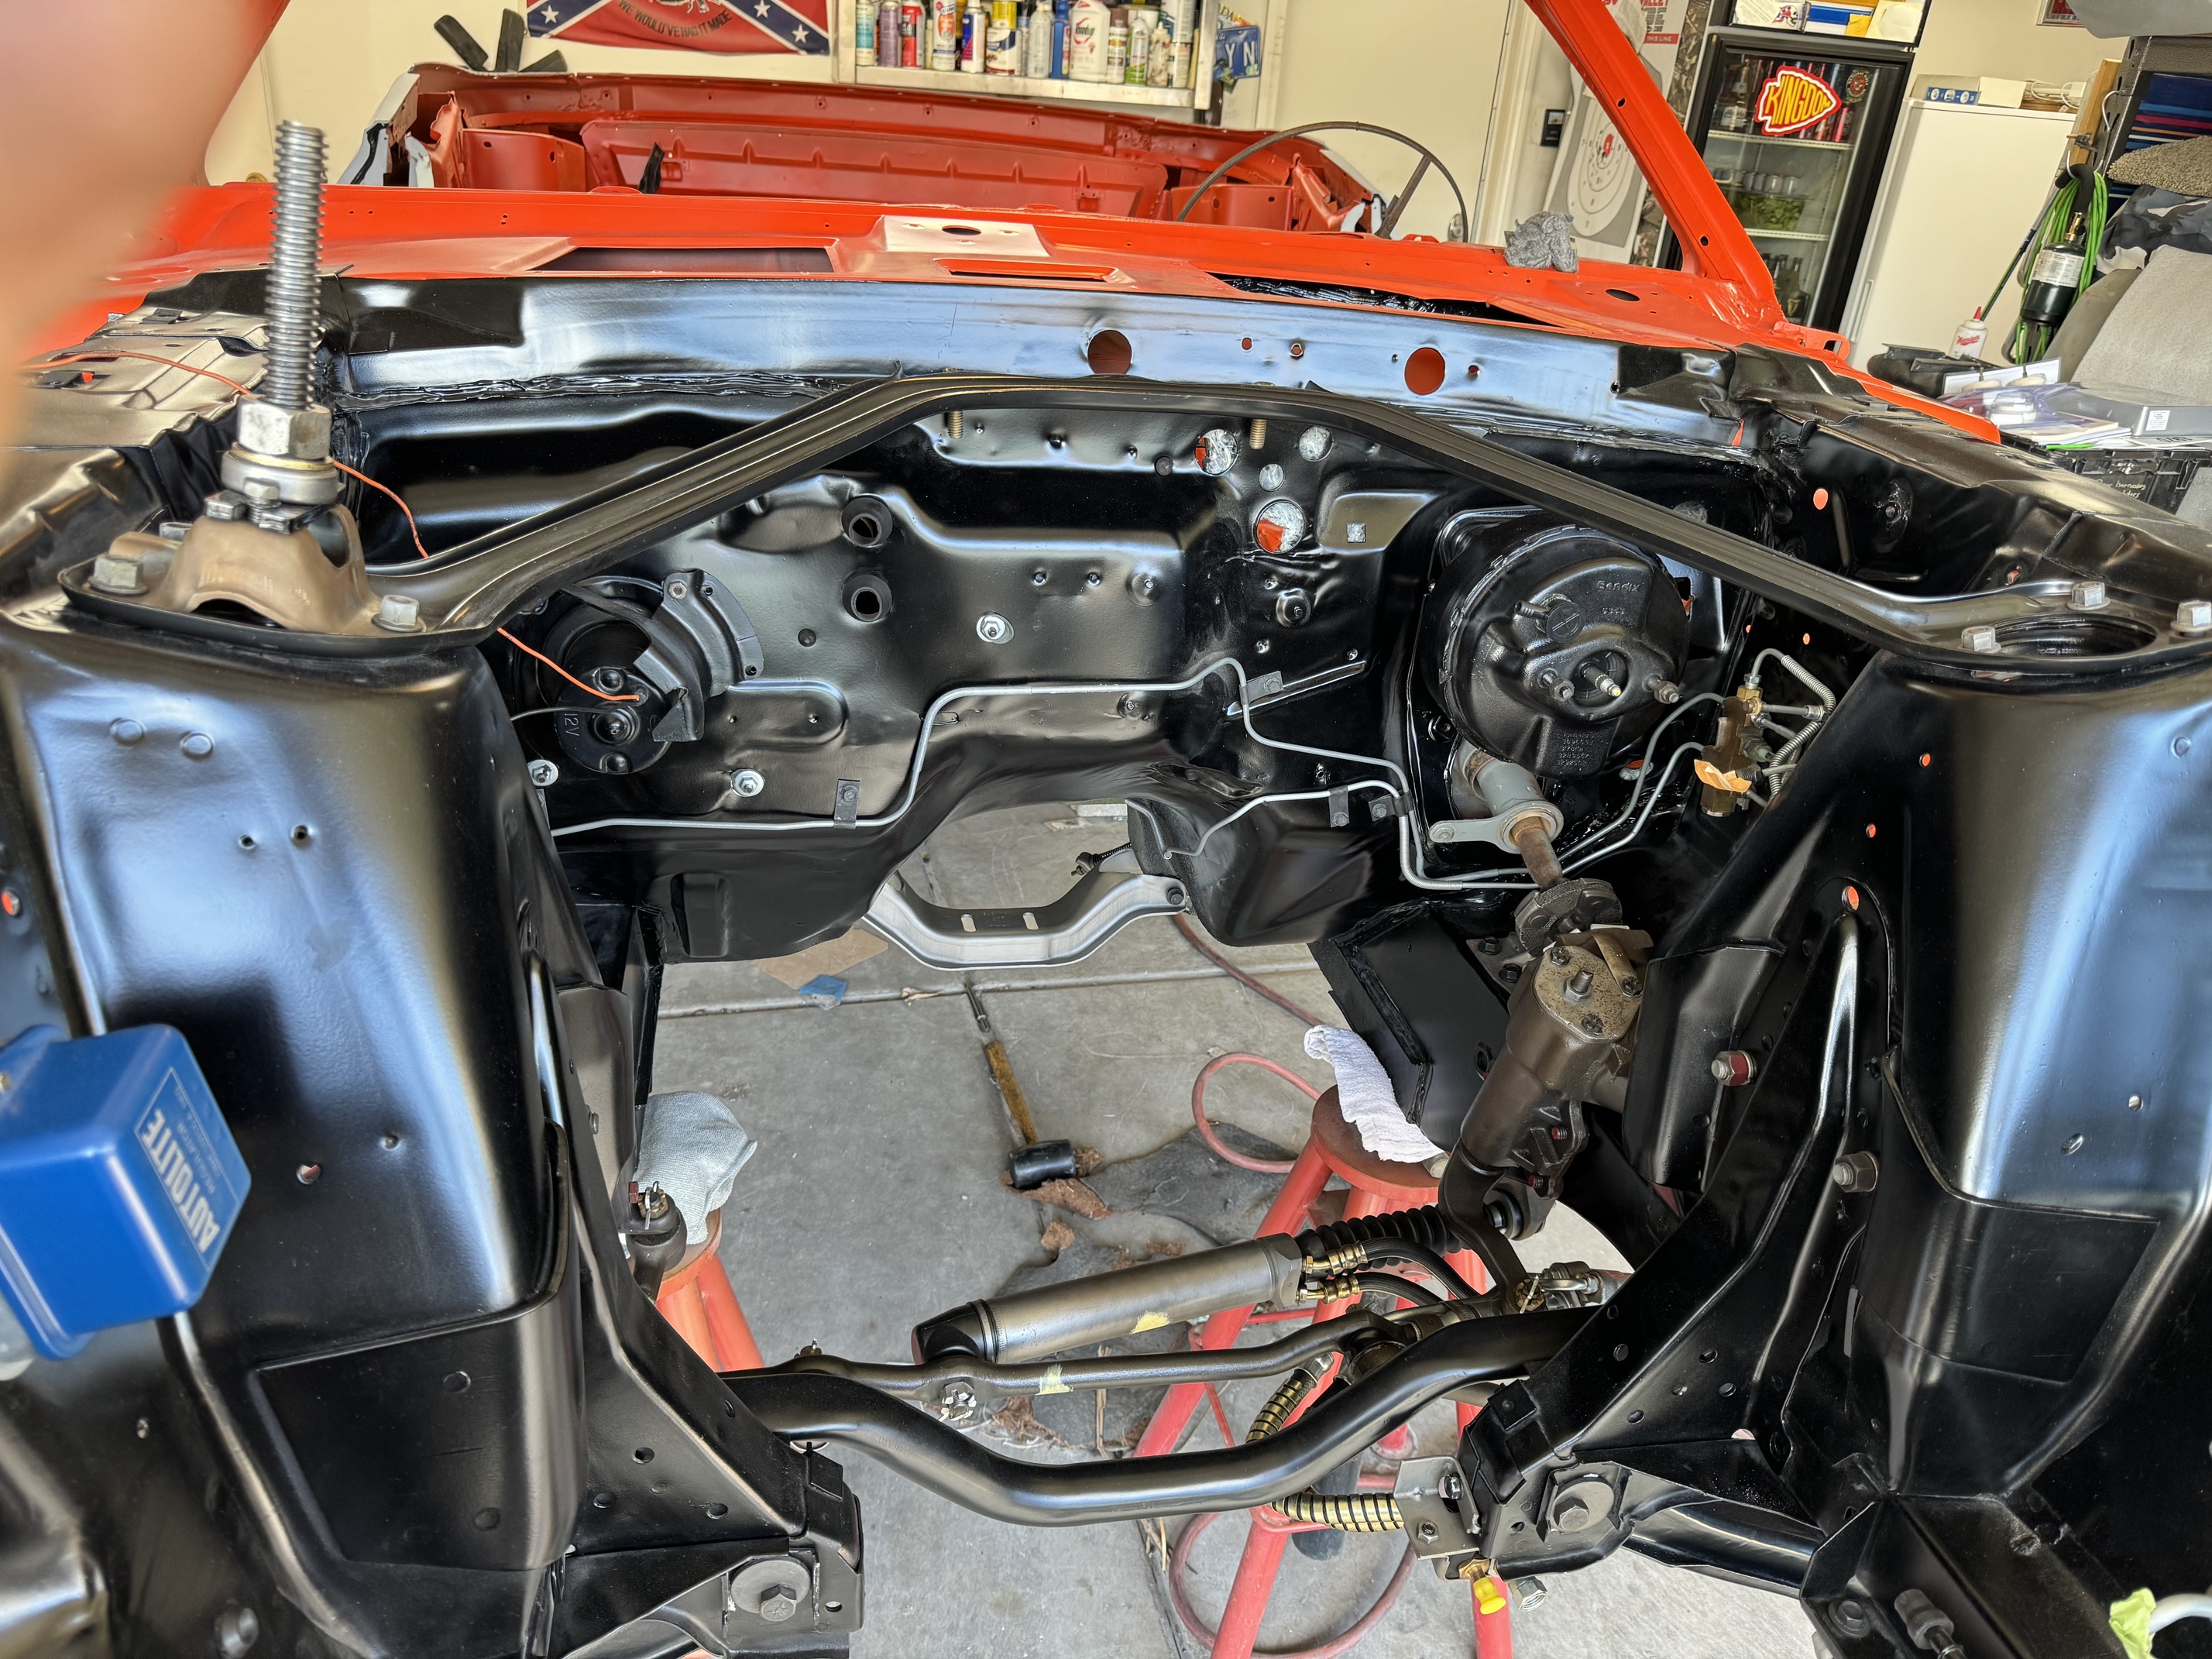
Would you do me a favor if convenient? Could you take a close up, down low, of the opening in the firewall where the clutch rod passes through? Both sides?
1 Like