I think it looks better with those rims ![]()
Jody I really like the look of the steel wheels. Heck I like the look of you entire car. ![]() When winter is over are you going to put back on your other wheels?
When winter is over are you going to put back on your other wheels?
Steven
I’m actually starting to think so, myself. The snow tires are exceedingly ugly, but they do grip something wicked.
Steven: I dunno. If I could find a good set of 14 inch widetracks I might. I like the look of the crown vic wheels, but they’re getting kinda crusty. I wish those styled steel wheels would have fit.
I like both sets, the Crown Vic wheels kind of have the Rader G look to them. In my case I’m glad I have your old rims for my 67 the other steel styled wheels I had went on the XR7G. I still need to get tires for the 67 wheels so they are just sitting safe in the garage for the time being.
Steven
Six and a half hours in the garage today battling leaf springs. Both front eye bolts were frozen beyond the powers of my handy dandy homemade bolt and coupling nut press. Things degenerated quickly from there. After much violence and swearing (and about a half dozen sawzall blades) I am happy to report I prevailed. By that time, however, I was in no mood to try and remove the shackles from the frame bushings, so I simply ground the head off the spring eye stud and twisted the spring until it pulled through the shackle. I’ll simply replace it with a new bolt.
Been there… I have a 6" dia cut off wheel that’s large enough to get in there and cut the bolt next to the spring. A lot easier then burning up sawzall blades. Make sure you use a lot of anti seize on the new bolt and bushing sleeve when you re assemble.
Nothing beats the “fire wrench”.
Yep, been through it myself (and burned up a bunch of said sawzall blades). These bolts must be grade 8 or better, i.e. damned hard. Oddly enough, on Isabel neither of them were seized in the bushing sleeves and came right out. Strange when you consider that this and many areas much higher were under salt water!
Not to be confused with “a metric ass-load”.
Well, you learn something every day (even if it is stuff that your Mom would slap you if you said)!:
Success. New springs are in and man, what a difference in ride quality. The old ones must have been shot. I slathered everything I took apart with axle grease as I put it together so that should keep the rust away for a few years. Considering that the old springs lasted 45 years, ill be 90 before they have to be changed again.
I like to use anti-seize for this sort of thing but axle grease is way better than nothing!
BTW, what brand springs did you get Jody? Mine are JRS (John R. Spring). Not concours correct but they work well and were cheap (bought through JC Whitney!).
I’m not sure what brand they are. I got them from a guy on ebay who decided to go with a 5 leaf set. $200 including front and rear bushings, shipped to my door.
Now it’s time to start thinking about the front. I think my springs are fine but I’m sure the bushings and ball joints are pretty much junk.
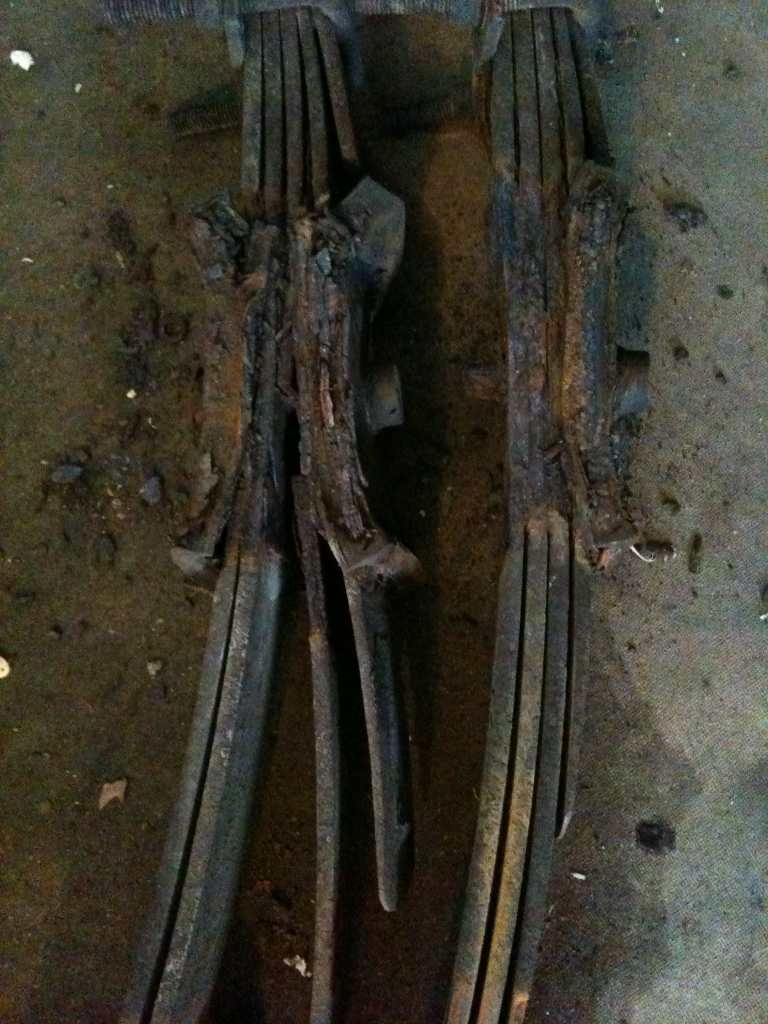
Ya think? The old springs look like they were broken in half. Not much spring left when the metal starts to separate from itself!
2 of the 4 leaves on the drivers side were broke and the rubber bushings were pretty much just a crumbly mess. I’m surprised I’ve been driving all this time with these that bad. Yikes.
With the prospect of spring on the way, I figured I’d better get to work on some of the more cosmetic details of this project that I’ve been putting off in favor of more practical concerns, like leaf springs. This past week I set to work polishing my custom aluminum trim around the back of the top. The trim pieces are cut from 1/4 aluminum stock and although I had installed them on the car last year, I had not taken the time to finish shaping them and polishing them up. So, starting with a big ol’ file and some 80 grit on the belt sander, I went to work carefully rounding off the all the edges to create something of a teardrop profile to each piece. I then used a power sander and some 120 grit dry paper to smooth out the marks from the belt sander. After that, I spent the better part of a week of evenings stooped over the utility sink in our basement wet sanding each piece (man, that’s hard on a guy’s back!), going progressively from 220 grit all the way up to 1500. At that point, things were looking pretty darn good and I was ready to leave it at that but I figured I’d try a little bit of Mother’s aluminum polish on them just for good measure. WOW! that stuff is amazing. In just minutes, the shine on the aluminum trim was indistinguishable from chrome. Though my crappy iphone 3GS camera doesn’t do it justice, these pics at least give an idea of where things are at.


In case you’re wondering, the reason the trim is wider at the corners is because of the opening for the convertible top at the corners is about 2 inches forward of where the vinyl top trim originally was and I didn’t want to have to fill in the mounting holes. Instead, I shaped the new trim to simply cover them up. Also, by doing it this way, the back edge of the new trim follows the same contour as the original vinyl top trim.
Wow, that’s a good shine!
That is beautiful!
Very nice Jody, great job. ![]()