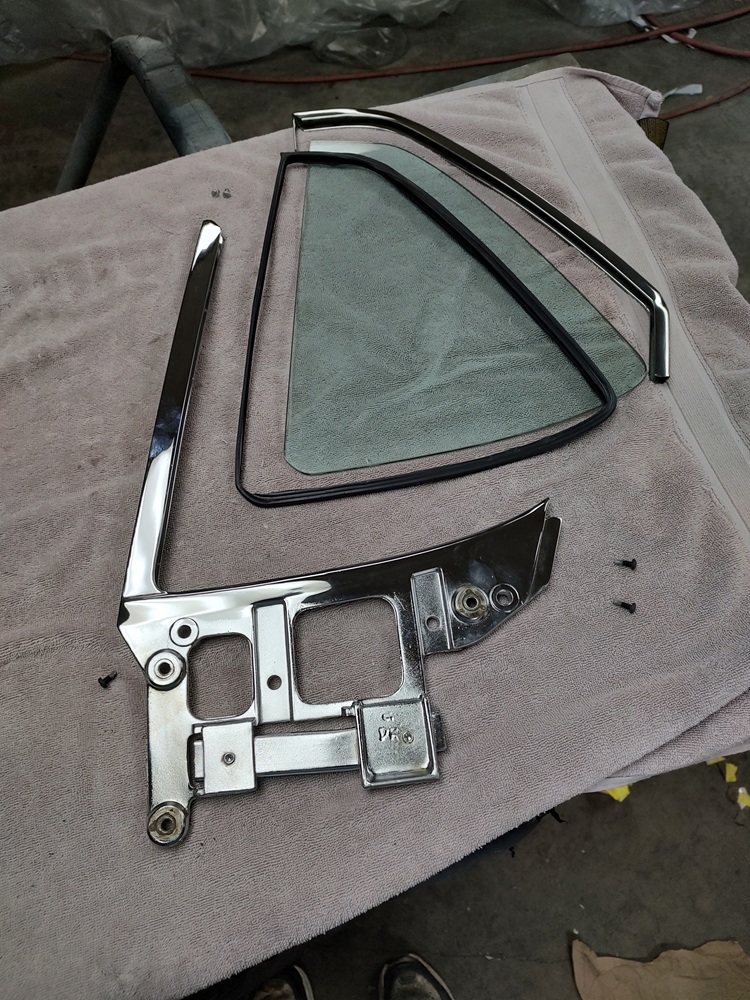
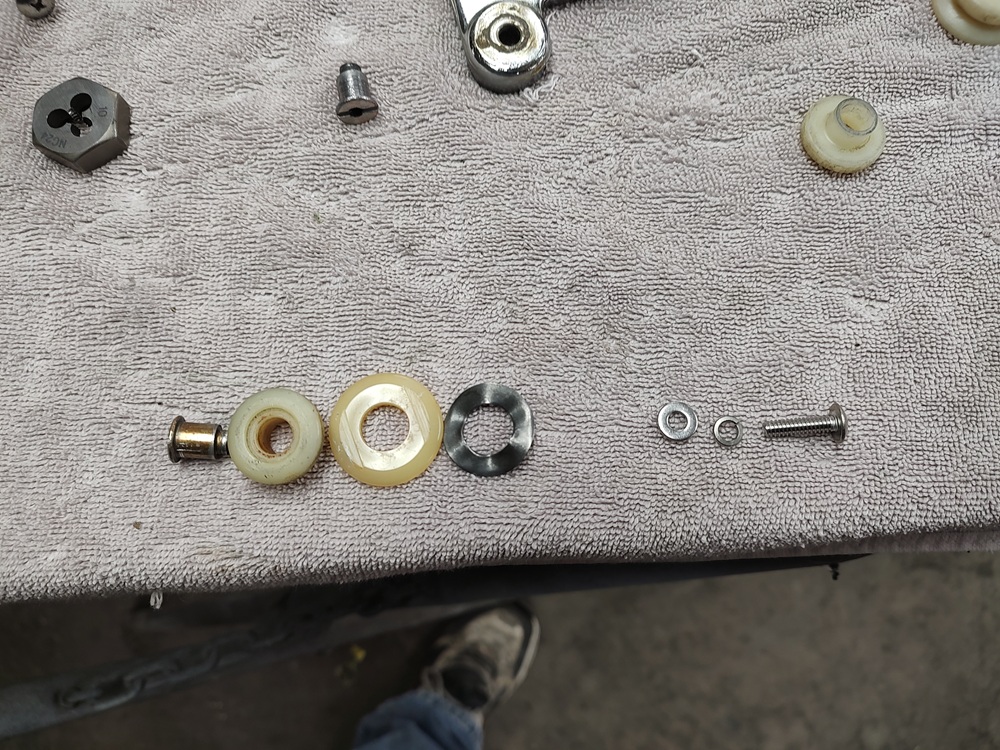
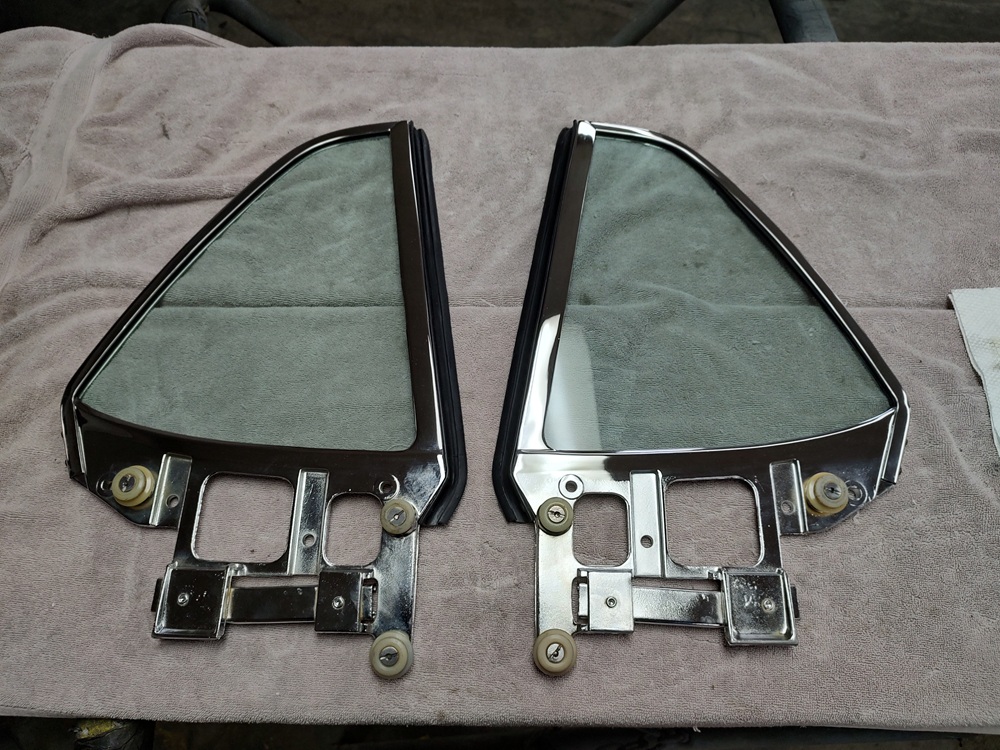
The rollers that come with them are pretty destroyed so I followed Don’s video and modified the rivets from some used rollers by tapping out the centers and screwing them in. I did vary the design a little bit by using lockwashers with button head screws to ensure the hardware doesn’t come apart. The flat washer is there to keep the lockwasher from going into the hole in the window frame.
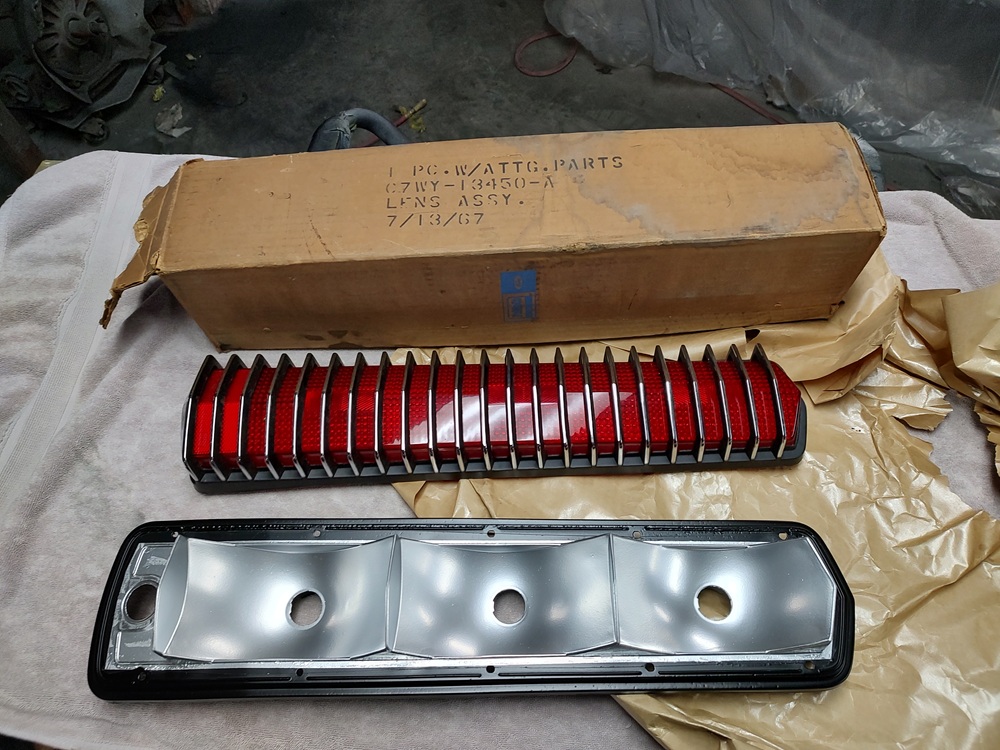
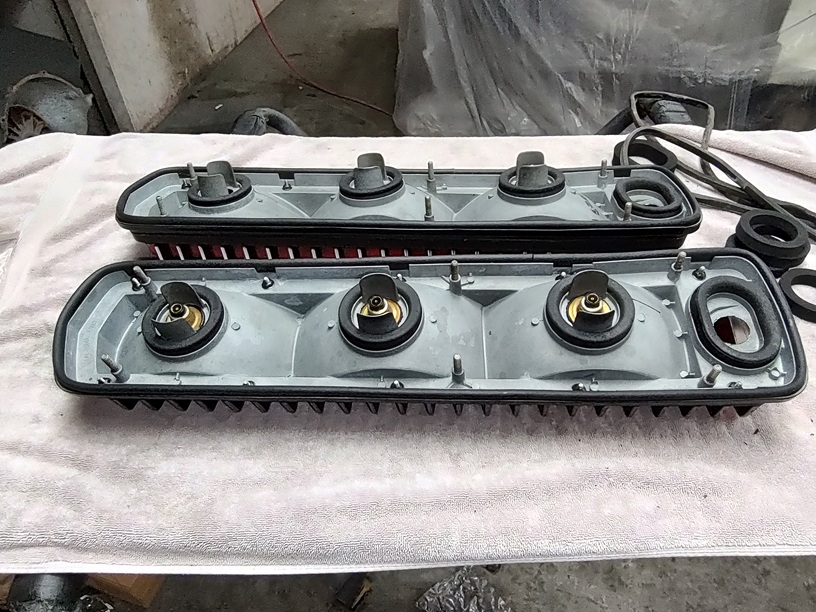
The tail lights were simple to restore. I got a great deal on a pair of tail light lenses and bezels, so all I had to do was cleanup and paint the housings.
I didn’t like the gaskets for the light socket openings that come with the repo kits. Luckily my originals were in great shape.
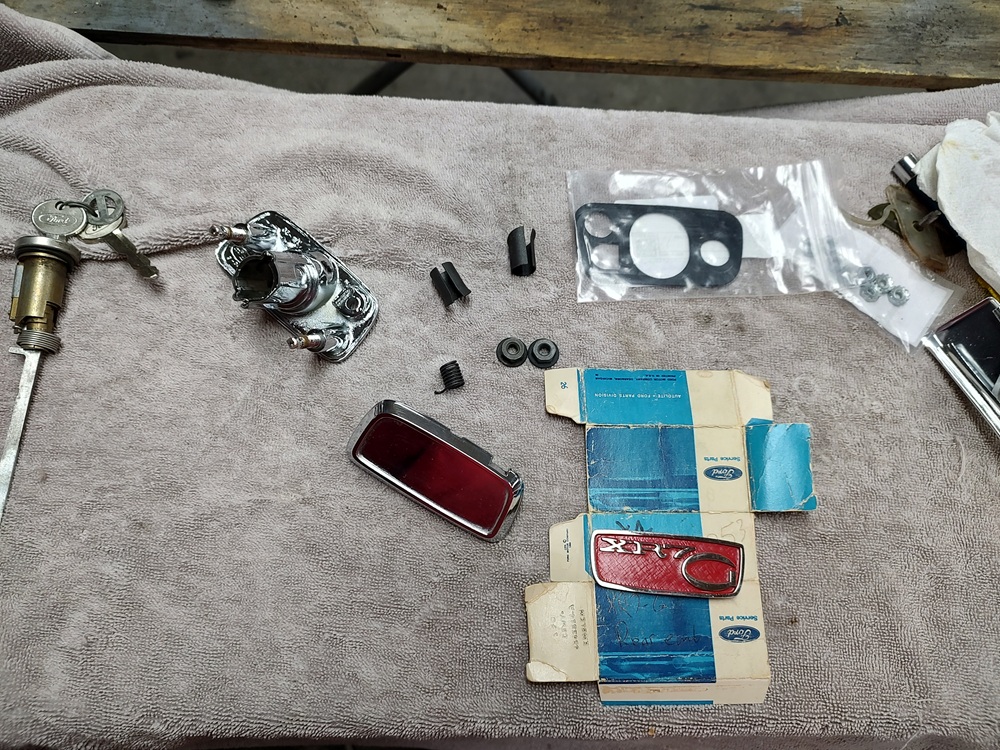
I replaced the trunk lock housing with a rechromed on from WCCC.
The G emblem is an NOS part that I purchased back in 2008 when I first bought the car to restore. You can tell an original part by the crosshatch pattern under the red paint. Repos don’t have the pattern.
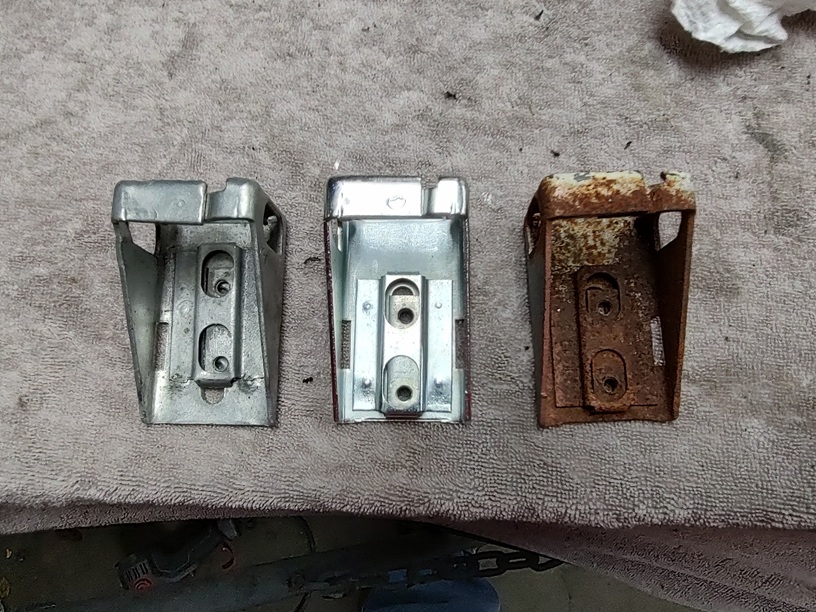
Here are 3 different trunk latch catches. the original is on the right. The one in the middle is a replated original. The one on the left is an NOS one that I paid too much money for. Check out the nut retainer on the NOS part. It was factory welded in the wrong location. Wish I noticed this before I bought it,
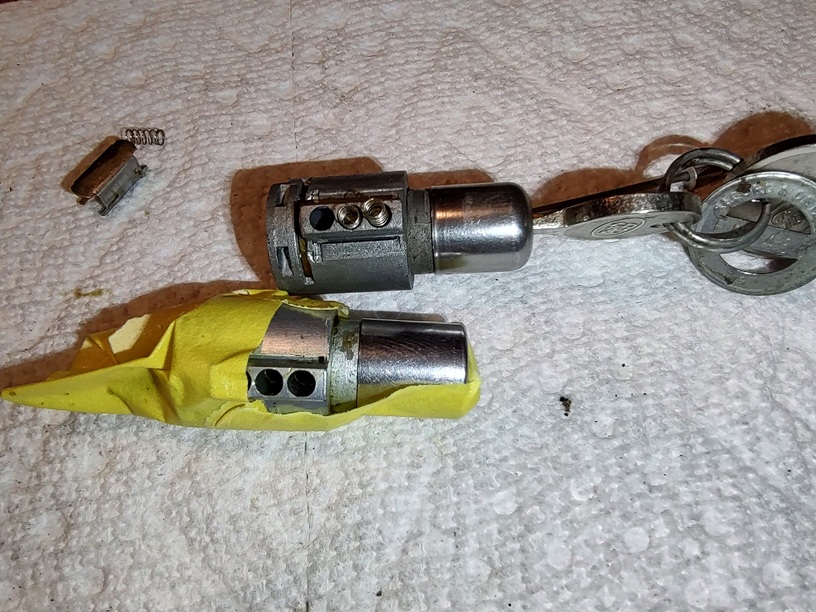
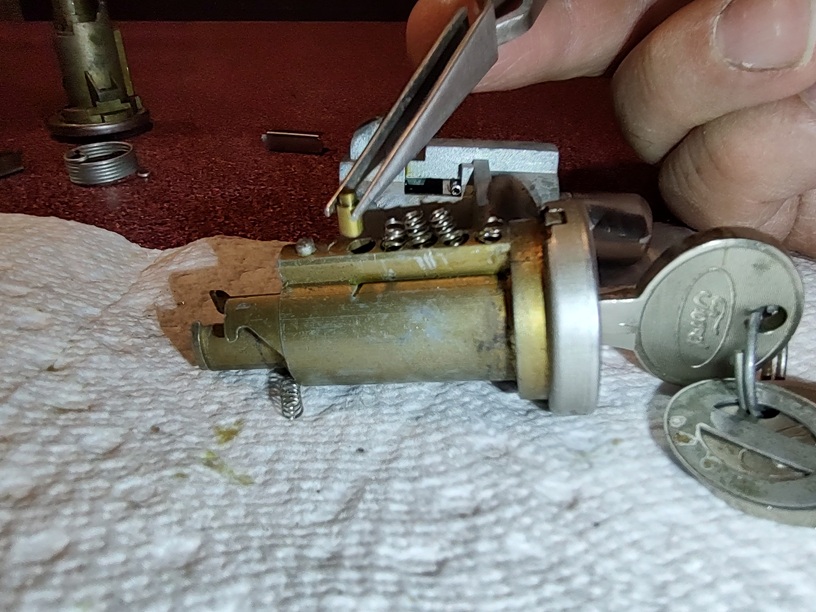
The original trunk lid, XR7G emblem, lock & housing were missing when I got the car. The lock housing I bought off ebay, but without a lock. The trunk and glove box are supposed to use the same key. My original glove box lock housing was loaded with corrosion and would not look very good with the restored dash. So I bought an NOS 67 trunk/glove box lock set. But fo course 1967 has a flat front to button while 68 is rounded. You can’t really find an NOS 68 style these days. So I pulled the locks apart and replaced all of the tumblers so that they could use the same key.
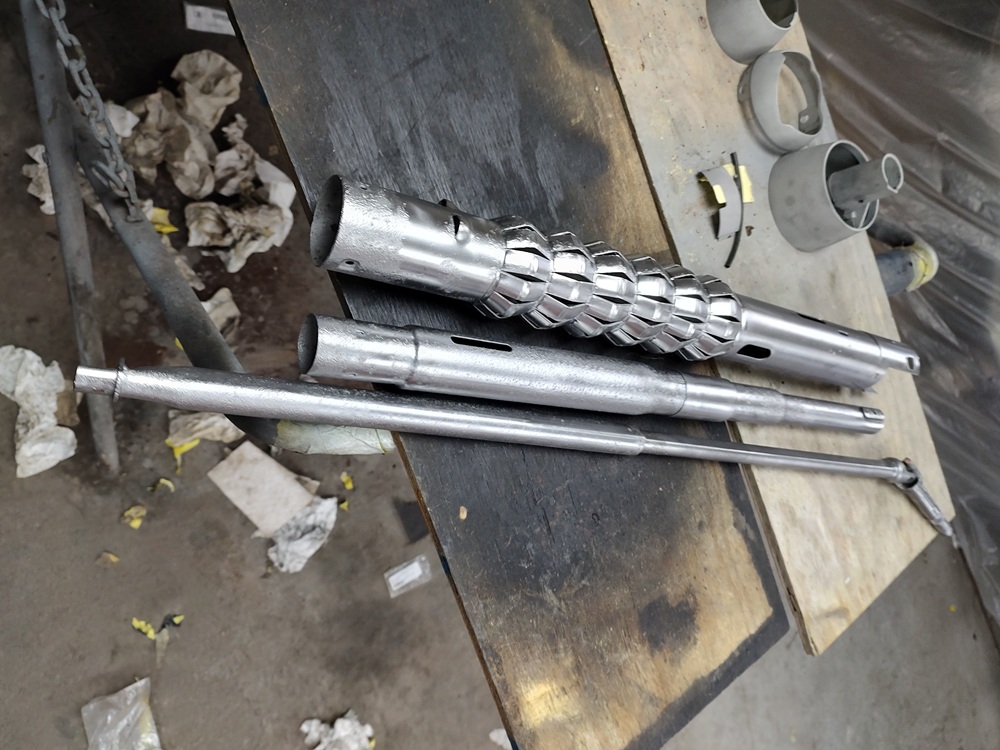
The tilt-away steering column was quite the tricky beast to take a part and restore. The pivot pins are quite the bear to pull out. I used a rivenut tool like Don shows on his video to pull the upper pivots. the lower ones do not need to come out. I did have to soak the knuckle in penetrating going for a week to get the knuckle to pivot freely as it was seized when I got the car.
The replacement shrink tubing is a little too gray for my liking, but it is the only thing I could find. The usual repo places were sold out, so I was able to buy some from digikey.
Me too. The only one I could find in a dark blue moon crater design was made by Scott Drake, but it is not made correctly. At least for the cars without the removable front access panel. I am having an upholsterer modify it for me. Fingers crossed.
UPDATE 5/15/2026: Taking too long for the weather to stay warm up here in Vermont, so I decided to get the nose back together before gluing in the headliner.
First Up: Front Suspension
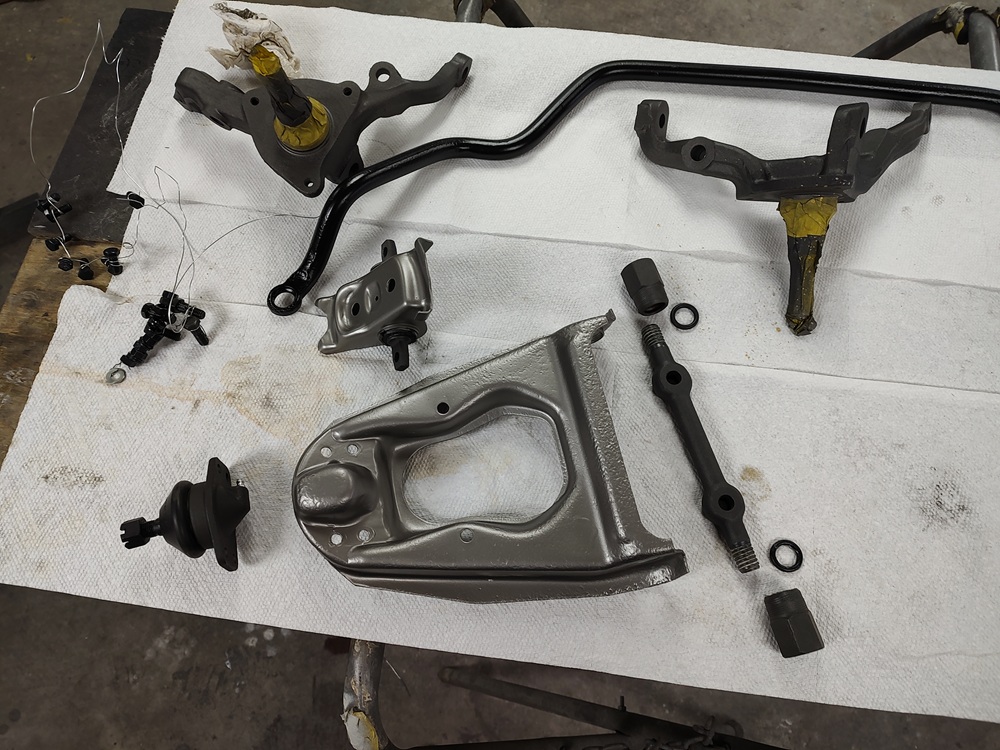
I rebuilt the upper control arms using NOS D2Z spring perches. Just pulled the anti-squeak rubbers off them and they are the same as earlier years.
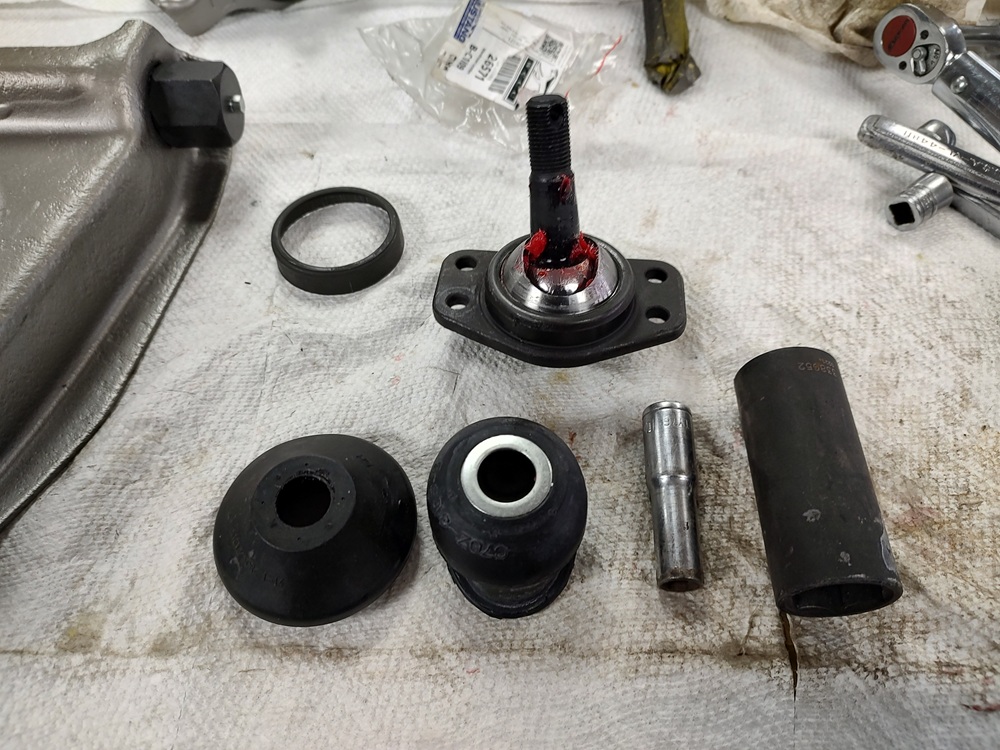
For the upper balljoint I replaced the repo boot (left) with the more correct concours version (center). The ring on the inside is a little too small on them and will tare after install. I used a stepped socket and a hammer to open them up. I then used a much larger socket to install them with the original repo retainer ring (upper, to the left of the balljoint).
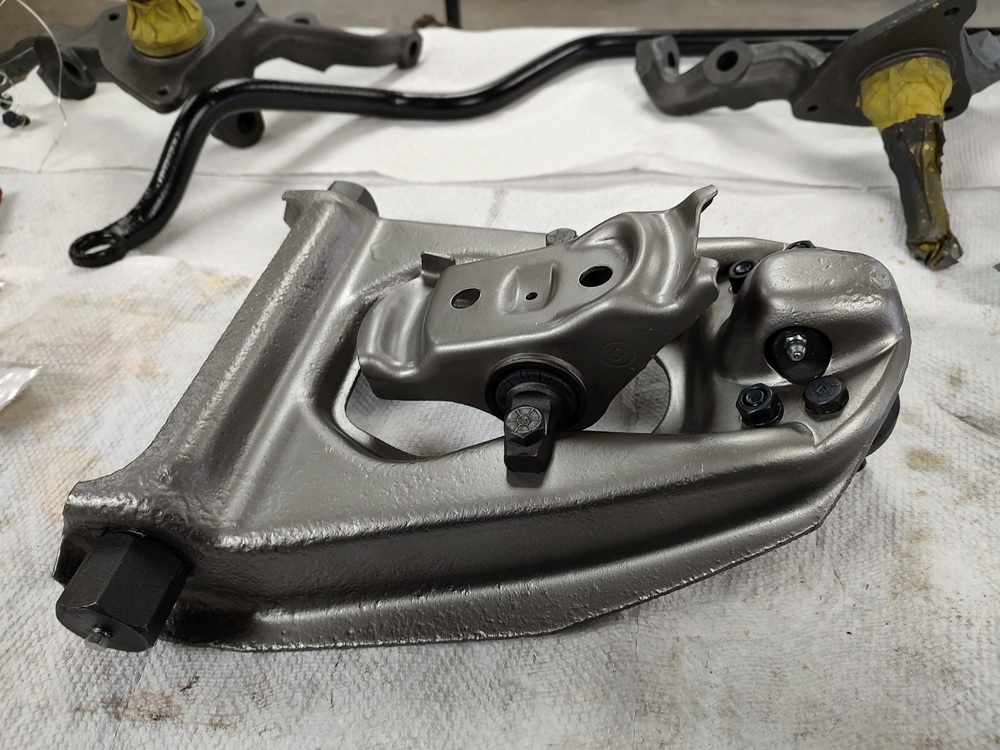
The lower control arm is the Scot Drake version, which I had to repaint to cover their logo and get the black paint dip line in the correct location. The strut rod was soaked in evaporust, touched up with gun bluing, clear coated and then dowsed with Boshield. The bushing are the correct ones from Dead Nuts On.
Yes, I bolted the upper balljoint in place. I made several attempts at riveting them, but was unhappy with the results and opted for safety over concours correctness. That and I did not want to dump several hundred dollars into paying someone to rivet them to make them concours like.
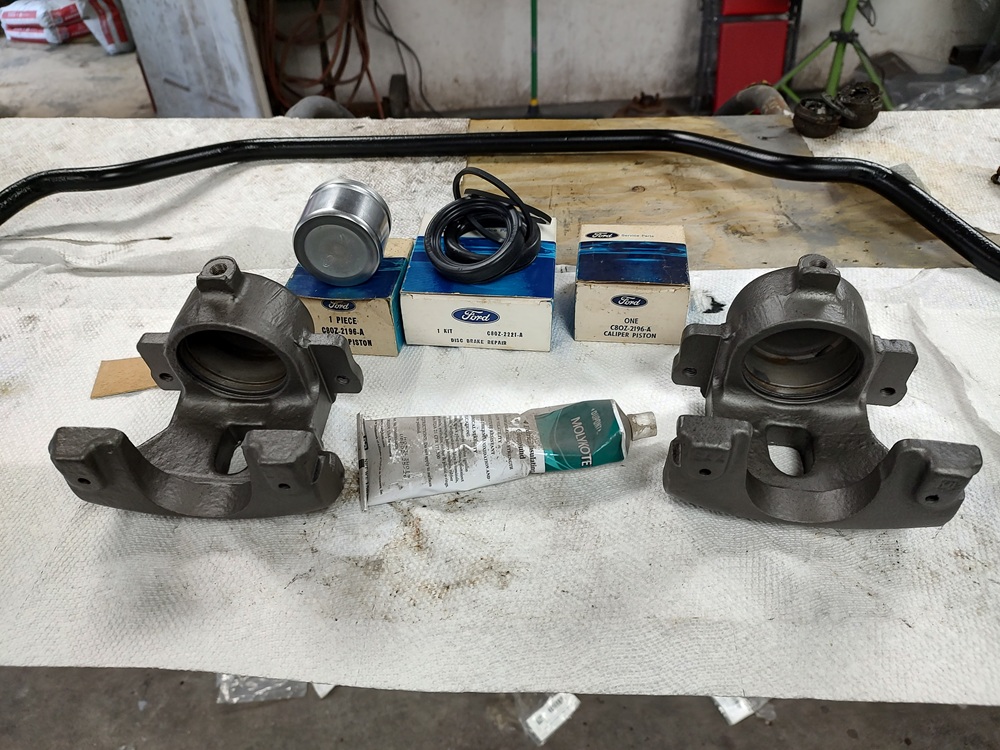
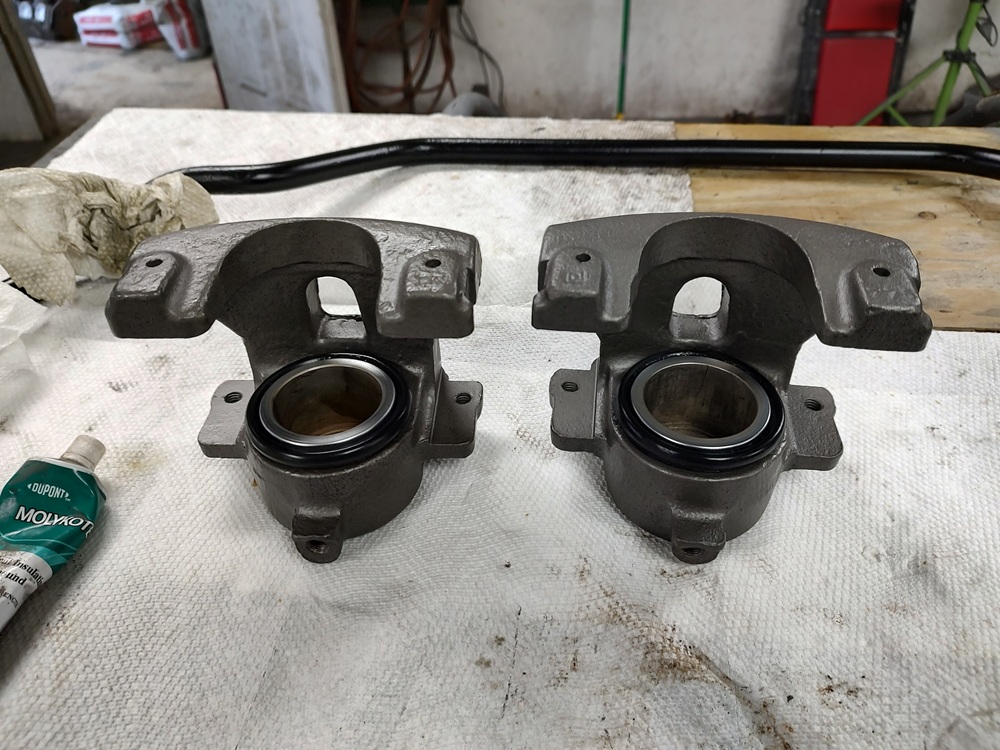
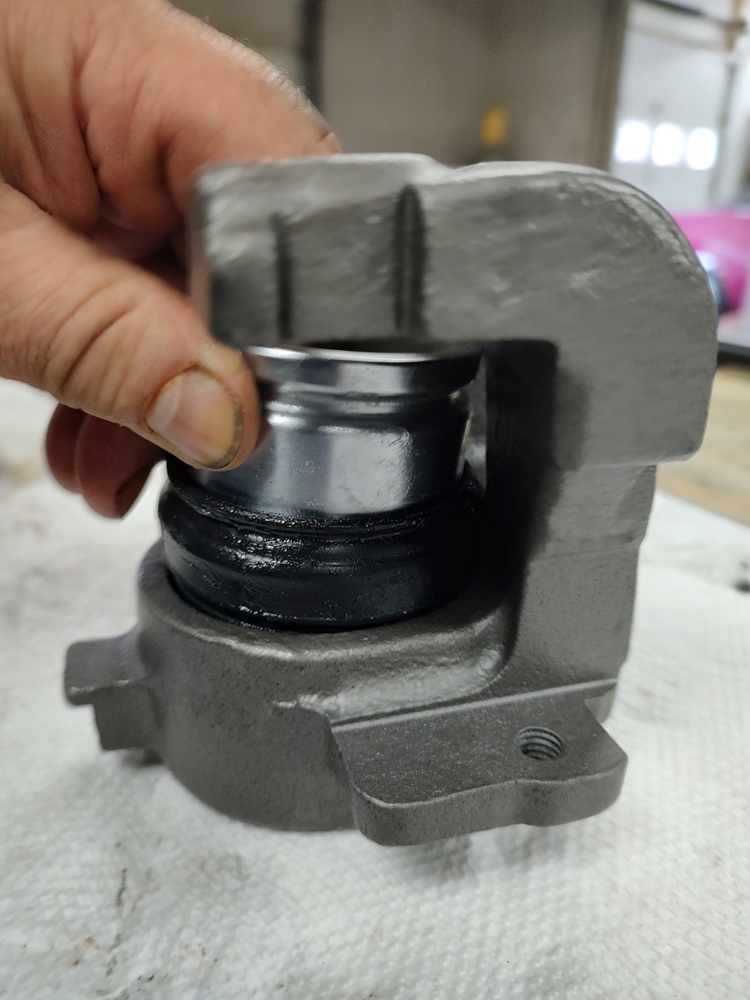
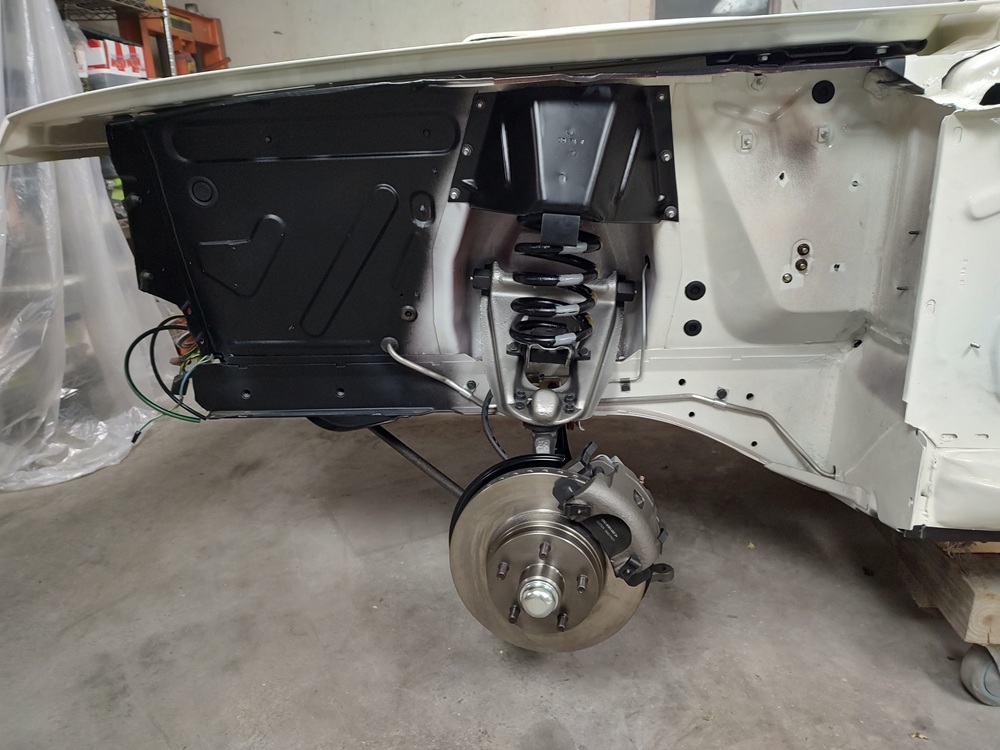
The trick to install the seals and pistons, is to slide the seal way down below the piston, hook them into the lip of the casting and then press the piston to the bottom of the bore.
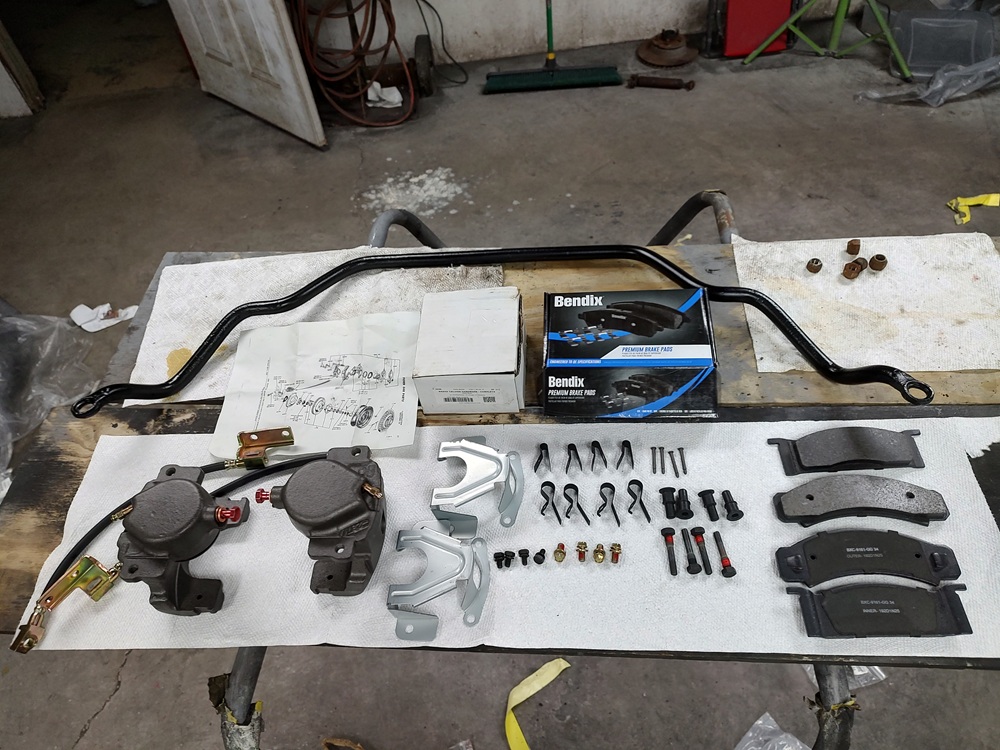
Here is a shot after the rotors and caliper was installed. Eventually I am going to touch up everything with some Boeshield to make it more factory looking.
On the topic of rotors, the originals (right) are of a 2-piece design. There was a point in time when you could get similar looking ones cast by Century sold as a Wagner part (middle), but now all you can get is a 1-piece design. I was lucky enough get a 2-piece Wagner.
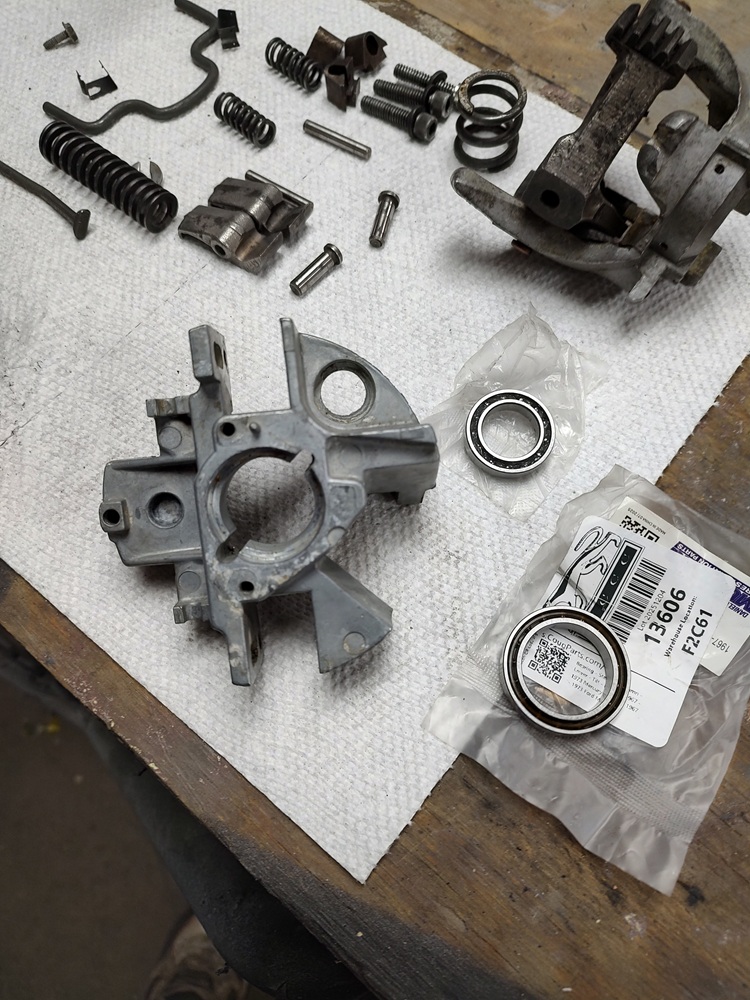
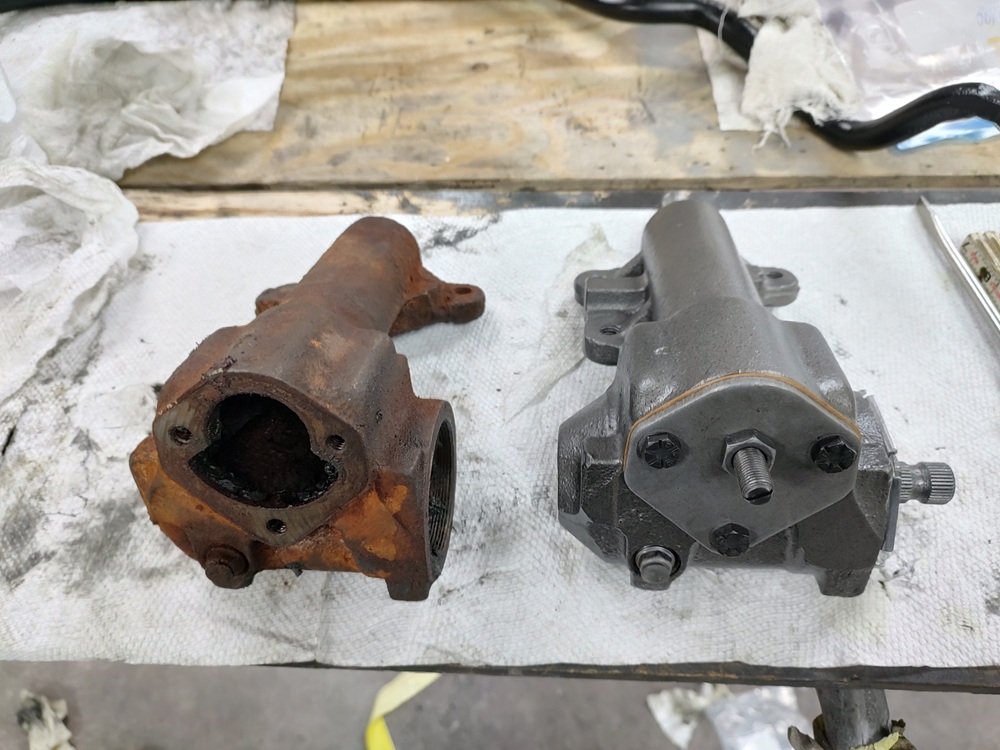
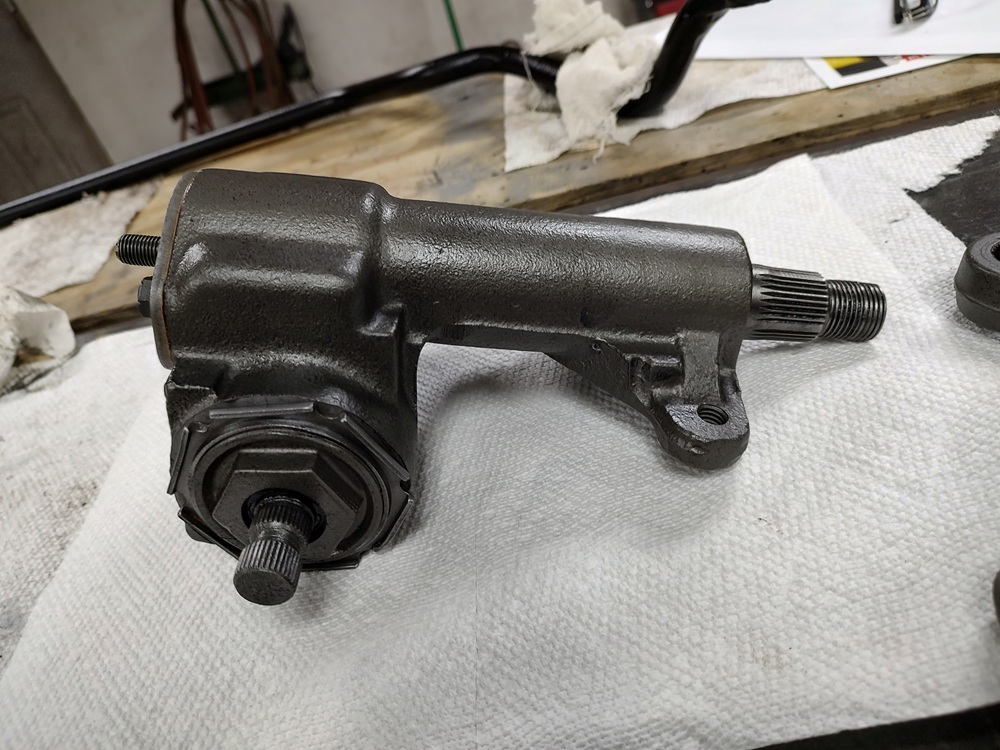
The power steering gearbox was pretty crusty on my car to the point where I wouldn’t trust it to not rust out again in a few years after restoring. I was fortunate enough to get a properly date-coded housing and rebuilt the gearbox using the replacement housing and new bearings & seals. Note: The tag was installed before I mounted the gearbox.
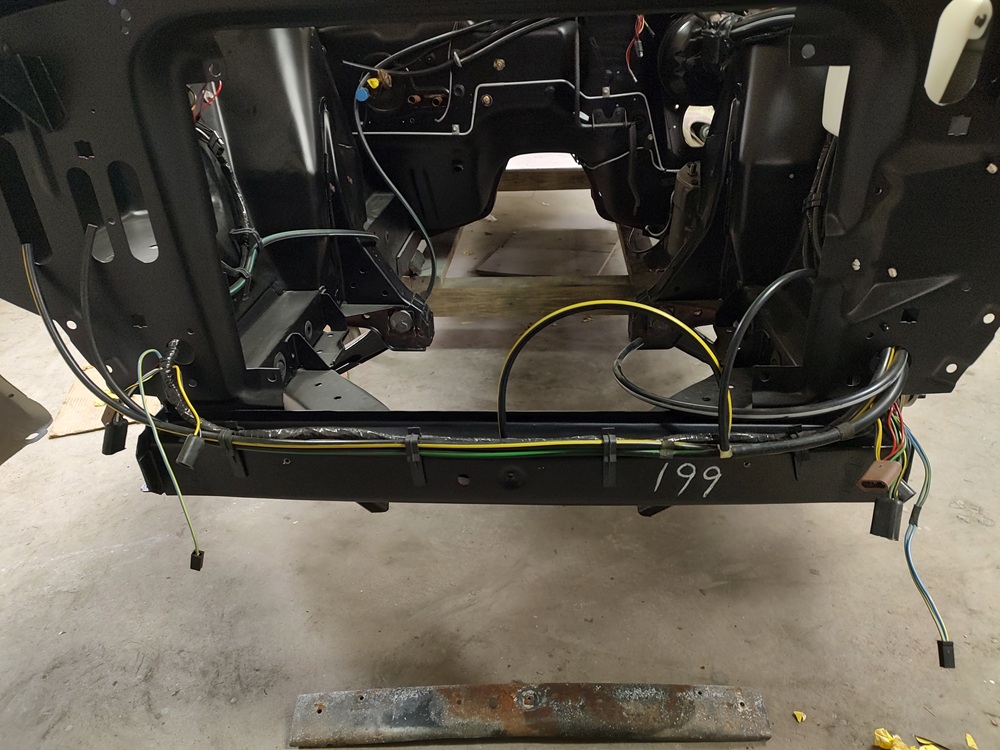
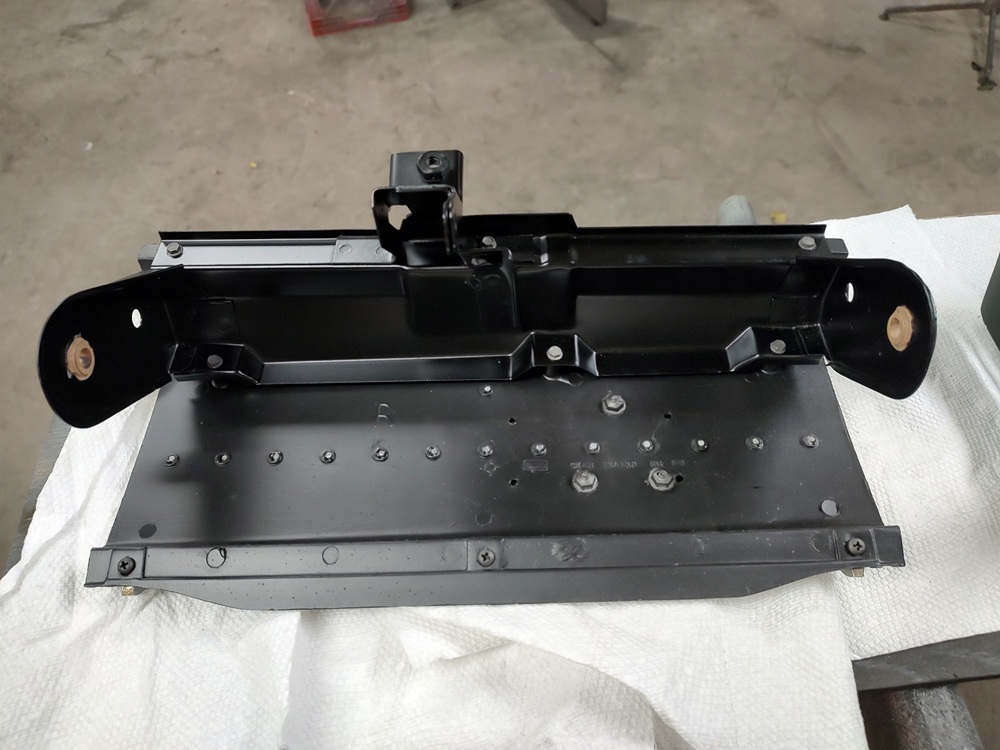
I’ve been waiting since August of last year to install the front fenders, but just before that happened I put the rotation number back on the lower radiator support.
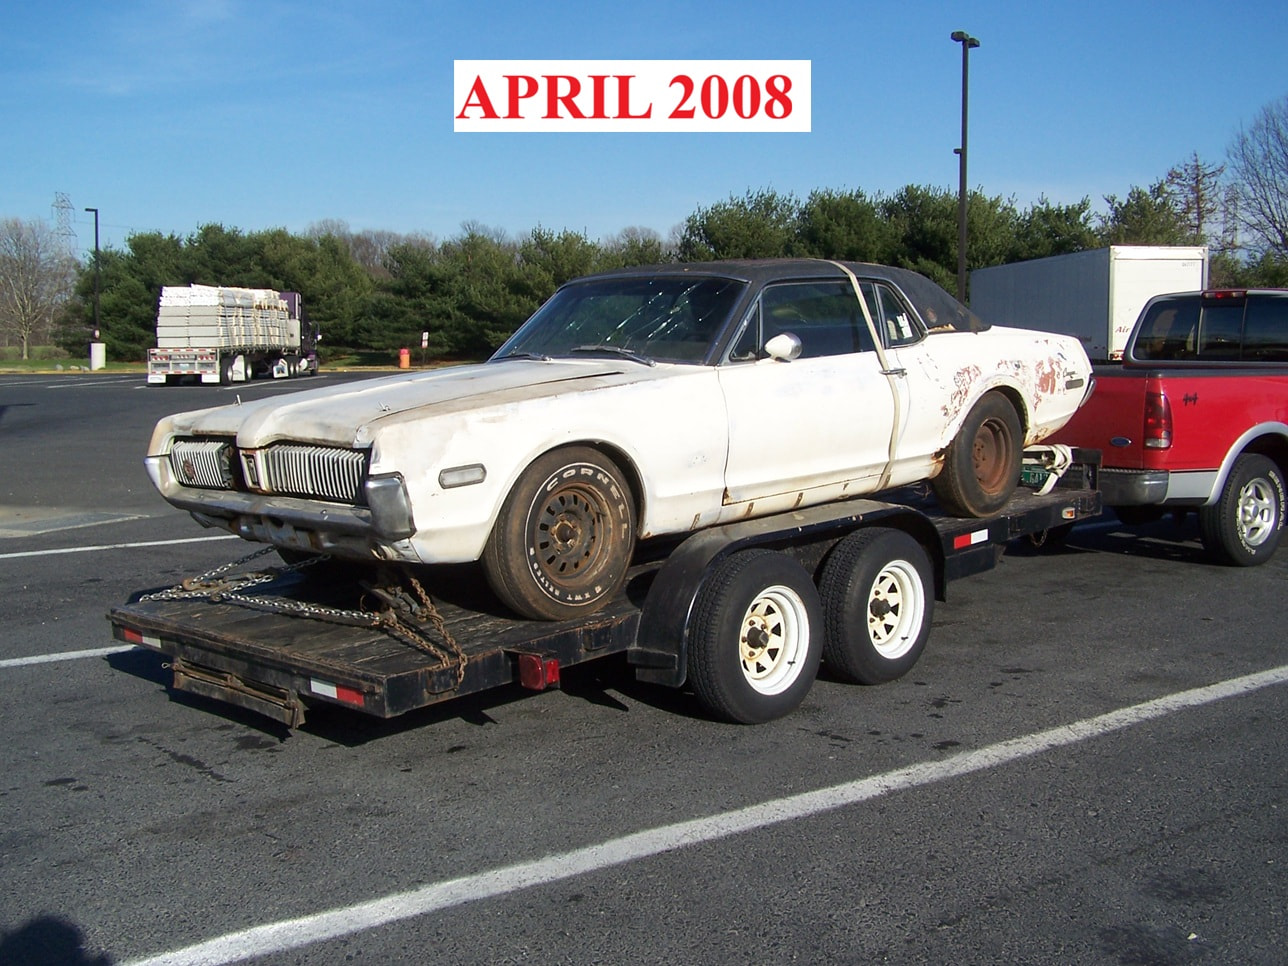
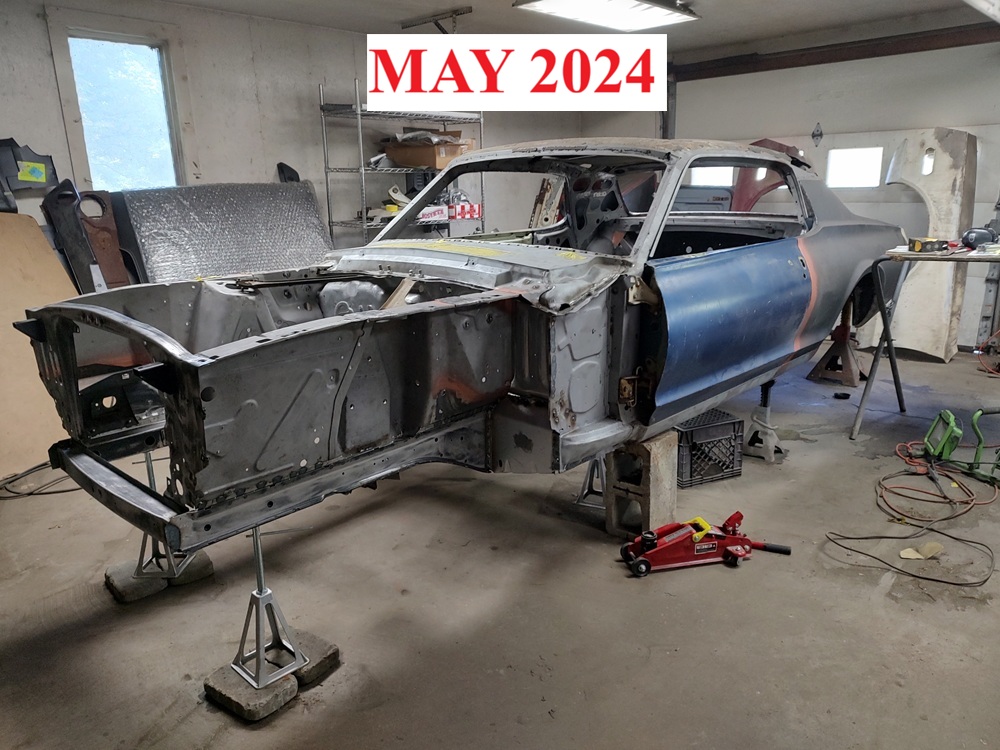
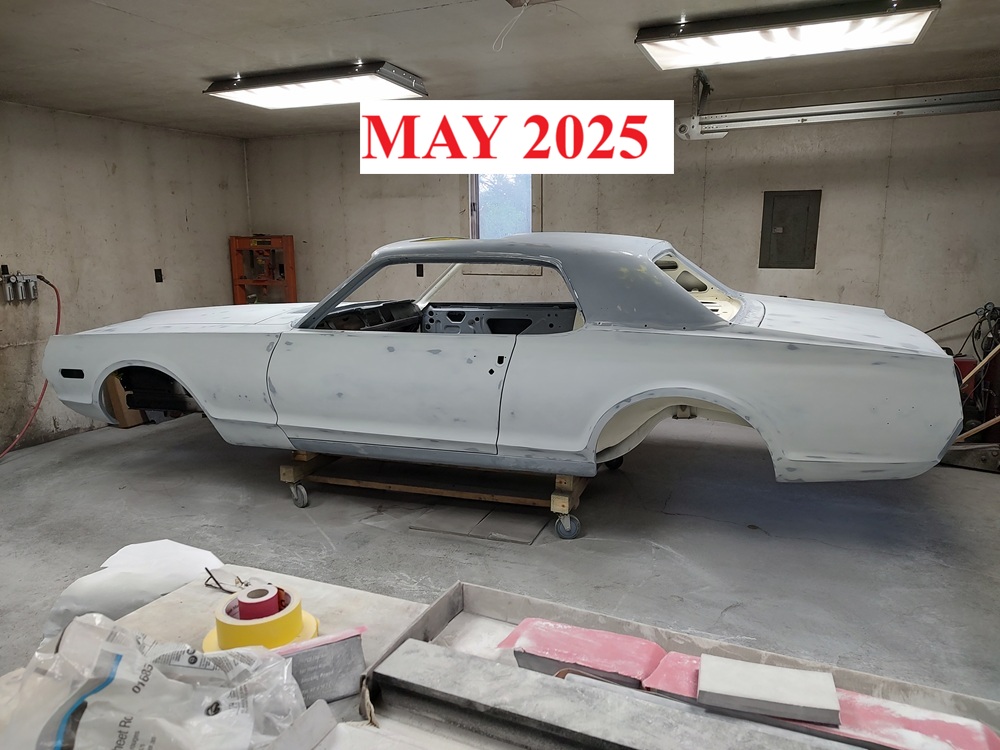
Since today is the 3-year anniversary of me starting the project, I thought I would offer some yearly pictures of the car since I bought in back in 2008:
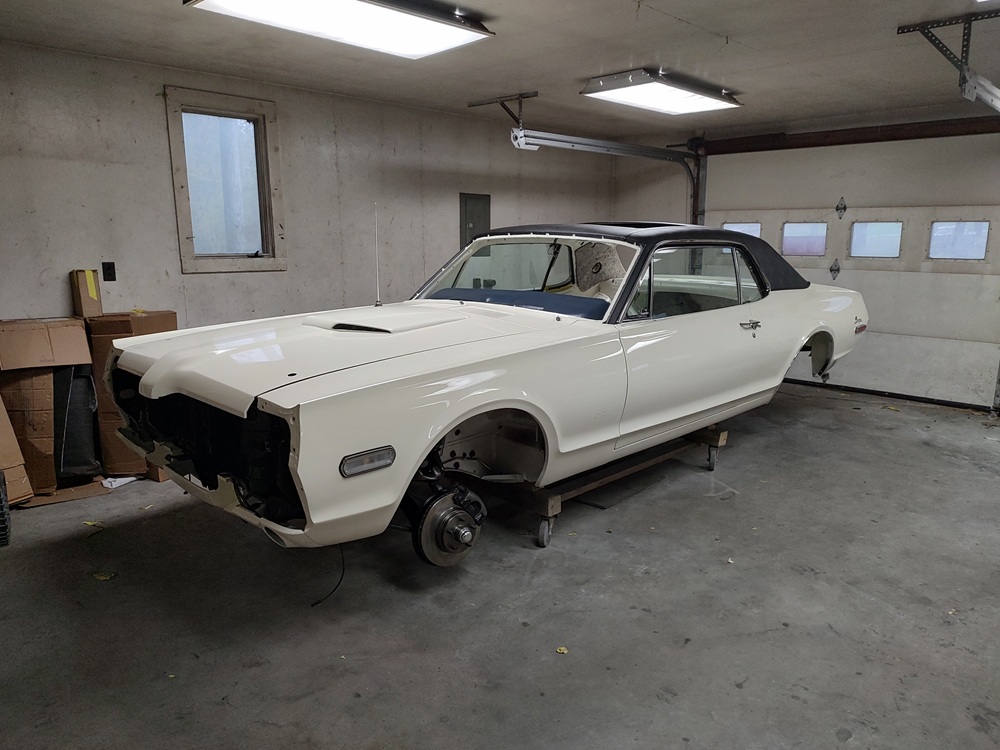
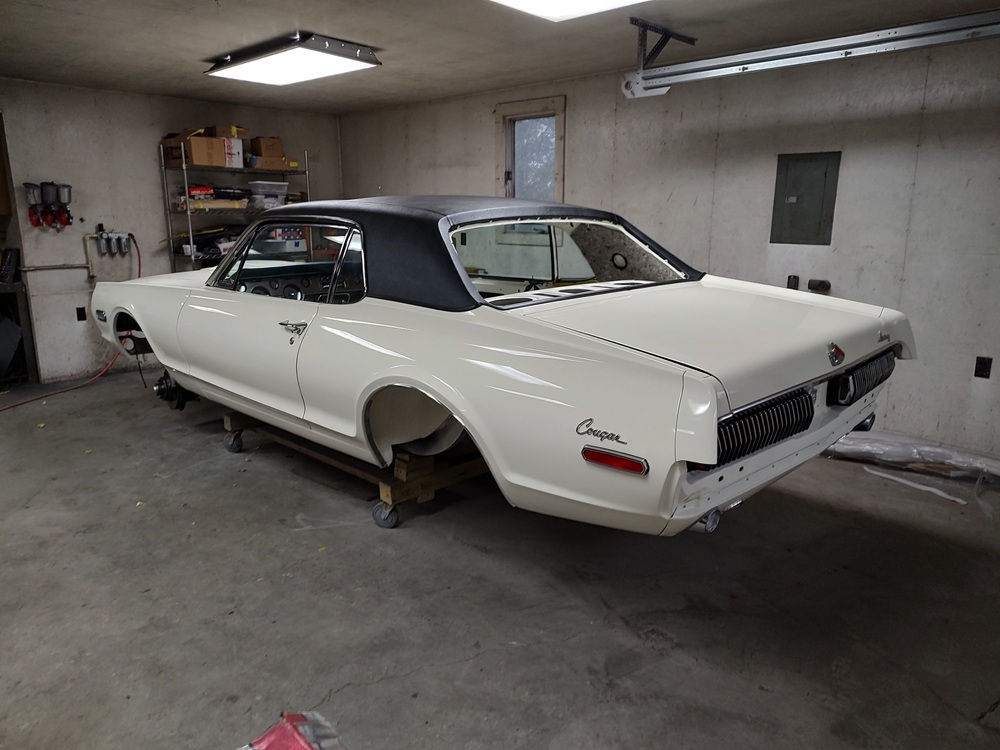
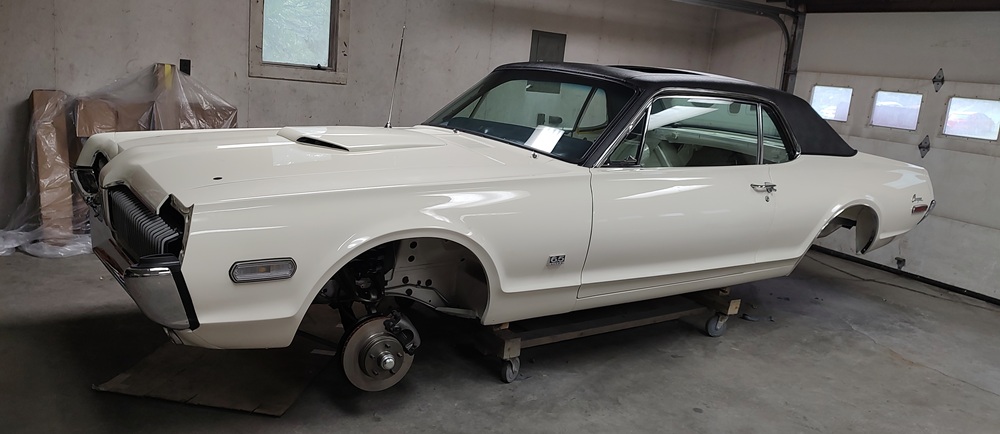
UPDATE 6/26/2026: The car is coming along nicely. The nose is just about done, the headliner is in and the glass is all in. I need to do the sunroof panel next so that I can seal up the interior. I also need to restore/rebuild the transmission so that I can drop the engine in.
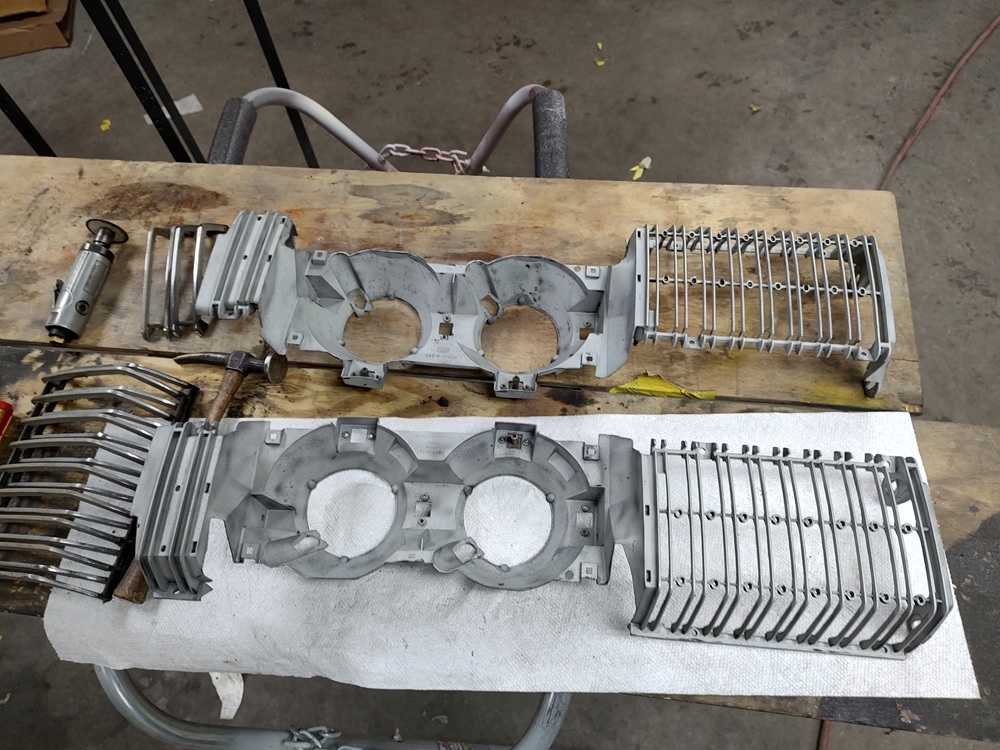
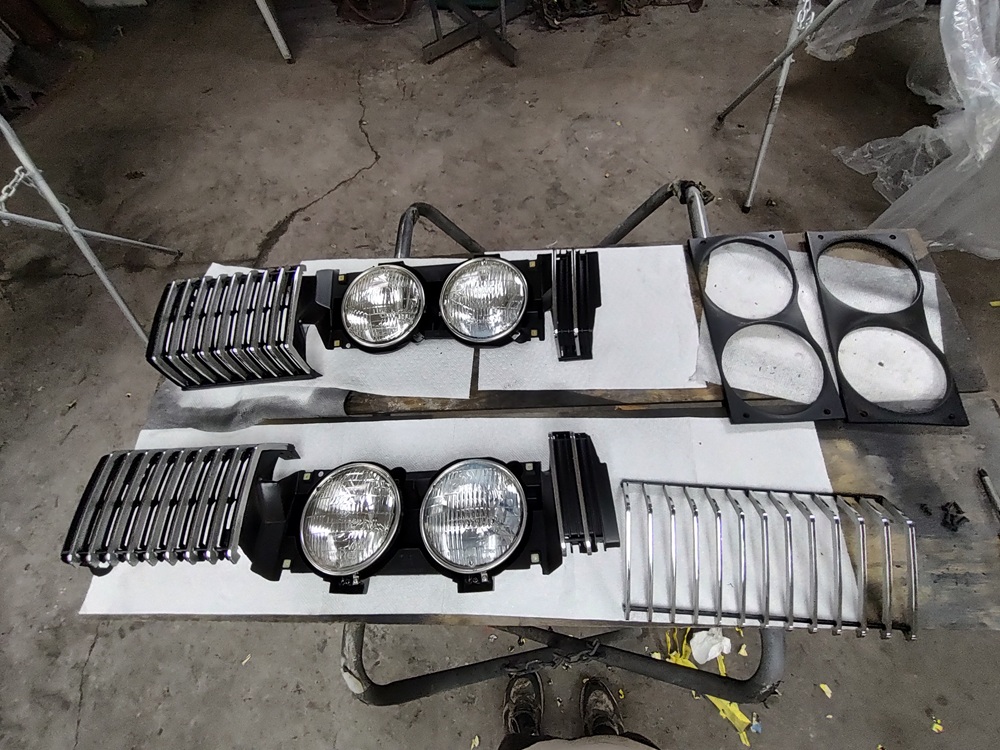
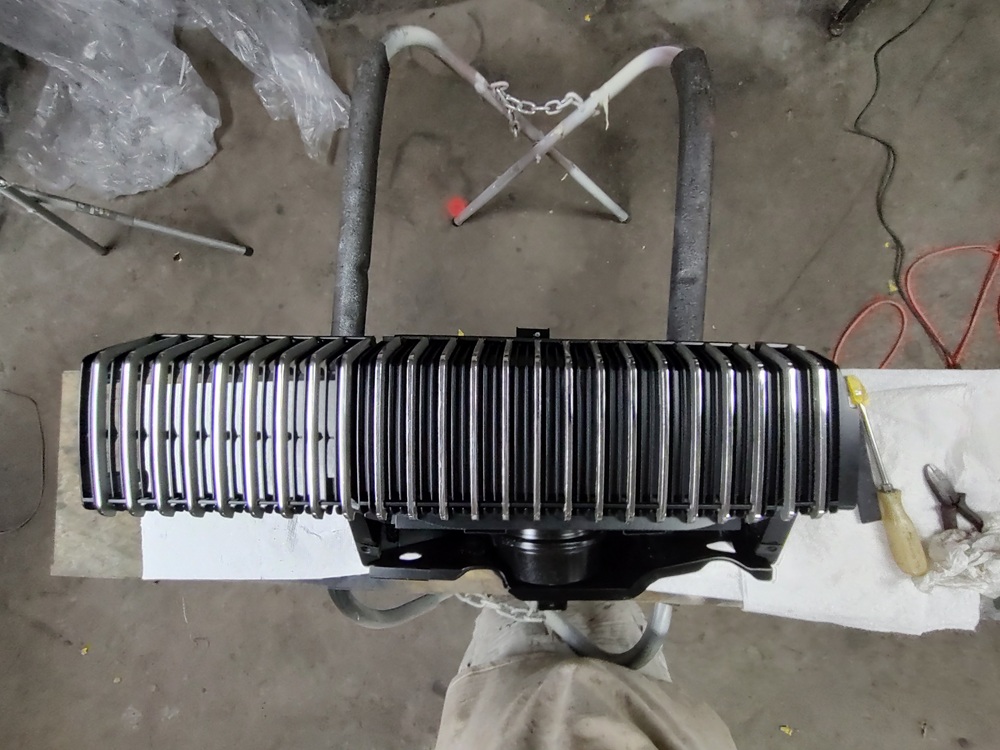
Here is a series of pictures centered around the grills.
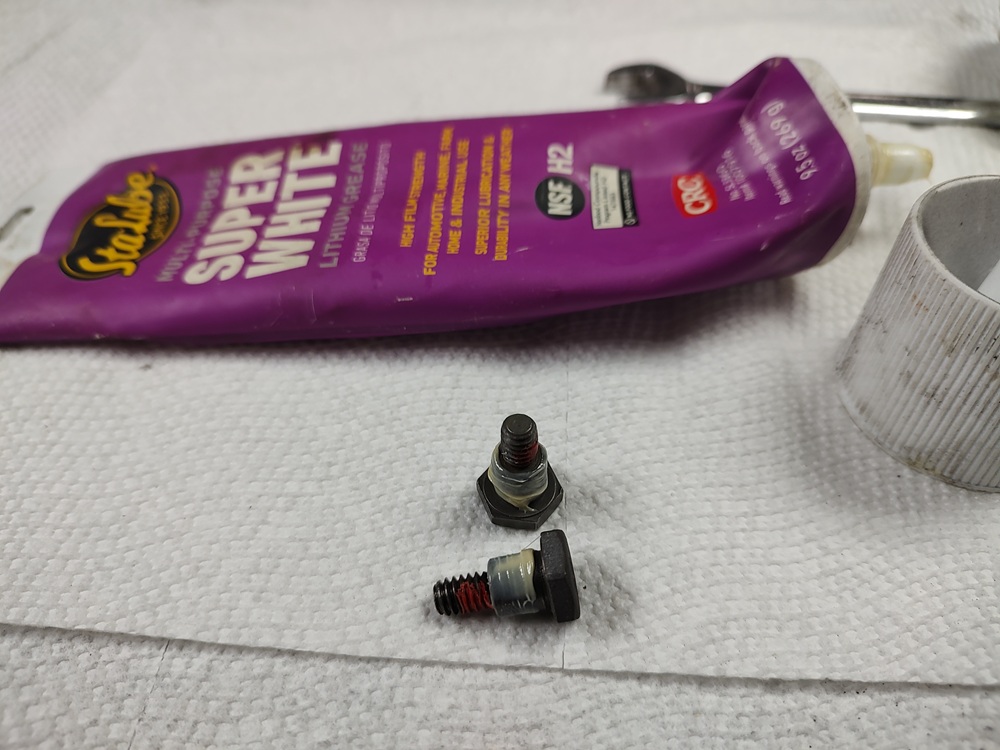
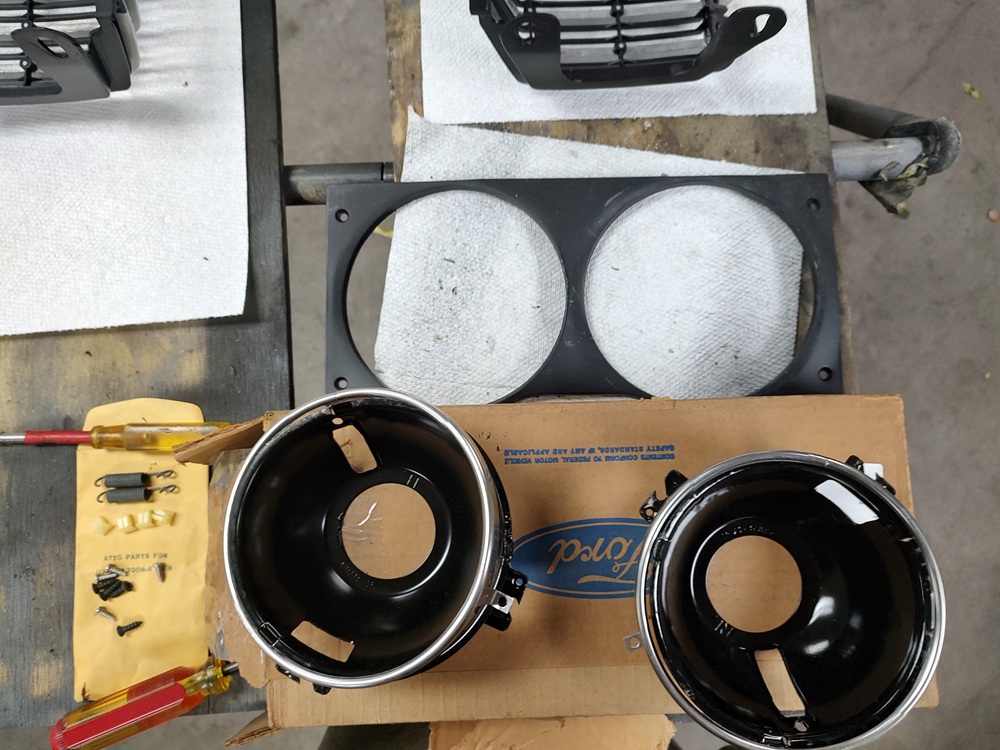
The original buckets were so rusted I had to replace them. I got a nice pair from WCCC for very little money. Here they are after sandblasting, primed/painted and reassembly. I bought a restored pair of vacuum actuators a while back so all I had to do was install them. The vacuum actuators pivot a little bit, so I lubricated the mounting bolt. In fact all pivot points were lubricated.
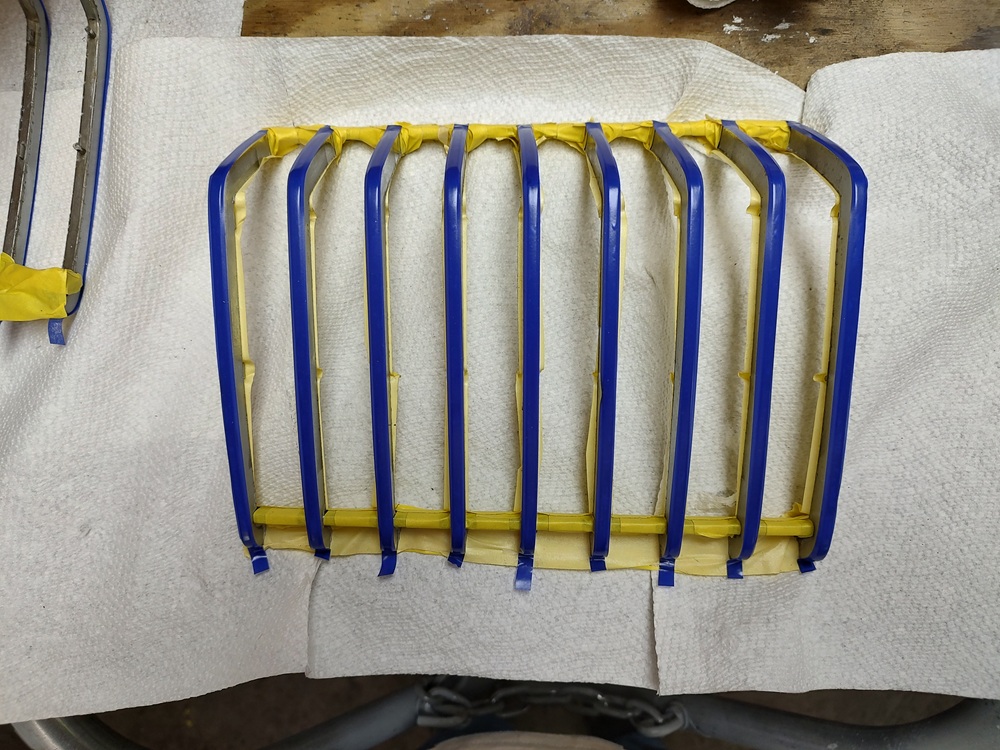
The chrome pieces cleaned up really well. it was just a matter of masking and painting the black and the silver on the sides. For the silver I used Krylon Metallic Aluminum (K02773007) which is a perfect match to the original color. I used a trick that was mentioned on this forum. After spraying the silver I removed the blue tape when the paint was still wet so that there would be no sharp edges to take down after the paint dried.
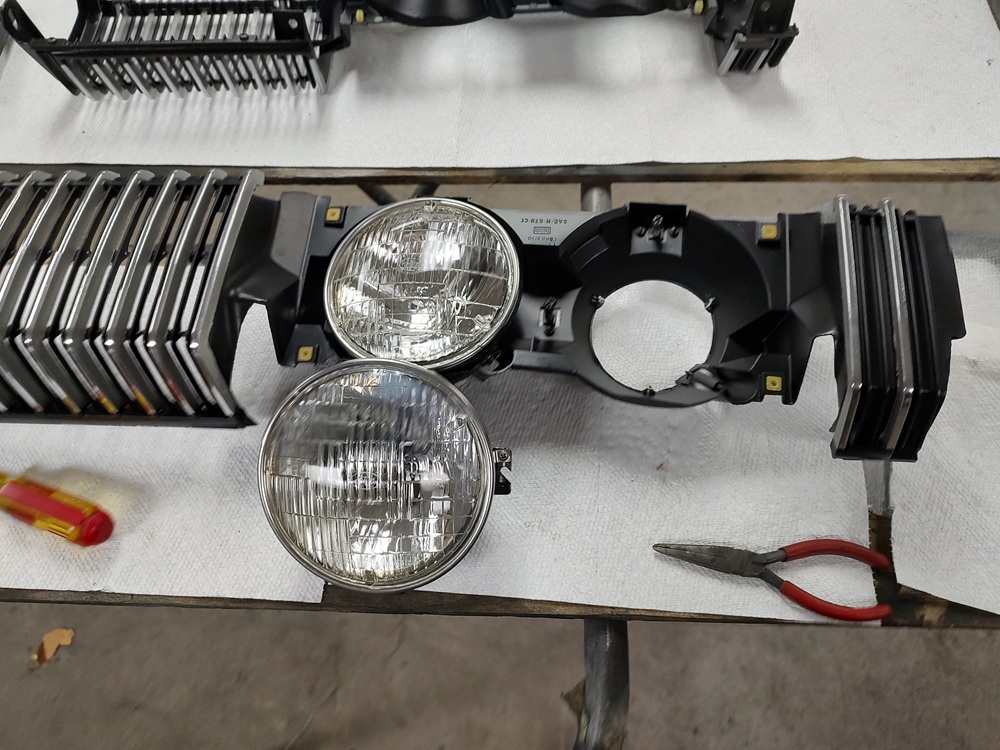
As learned in a previous posting, there were 3 different head light door hinges, which only differ by where the center mounting point is located. These changes had to do with cracking issues with the doors. My car had the early 68 version for some reason, but they were not usable due to the rusted out nuts for the stoppers, so I ended up buying a used set of the 68 version.
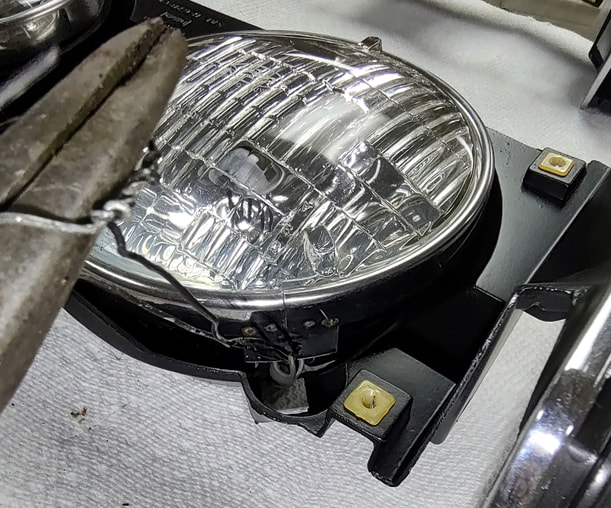
Here is the back side of the completed right headlight door. The grills are screwed in place at the top and bottom. Originally the centers were held in place with pins that were mushroomed over, which had to be ground away to take the grill off. To put it together I put drops of clear epoxy adhesive to make the connection.
A few years ago I got a great deal on ebay for a pair of headlight bucket assemblies. They even came with mounting hardware. The headlight bezels/doors were only primed, so I had to paint them. Otherwise, I was quite happy with the purchase.
I’ve seen a few different ways to install them, but I prefer this method of assembling the buckets, hooking them inside the housing and then pulling the with a piece of wire and hooking them on the buckets.