Comming together and looking nice. Had to laugh at the one photo showing the top from the front windshield view. It looks like you couldn’t decide on RH or LH drive so you put the steering wheel in the middle. In case you’re confused it goes on the left ![]() no comments from Leon
no comments from Leon ![]()
Thanks guys! Feels good to get some of these major steps done and see the car transform.
Haha yeah, it’s just sitting on the floor. I have a kit to restore the steering wheel but am waiting until things are further along, since it will need to be man handled around for a while.
Got the rear window in last night, need to finish sealing though. The fit was not as tight as the windshield was, so I’ll need to use lots of goop around the outside to make sure it won’t leak. Which leads me to a question - do I need to apply sealant from inside the car also, or is it enough to do the outside perimeters of the rubber? This stuff is a beyotch to use / clean up. Also, install trim clips before or after? Seems like before would be easier…
I use the butyl sealant. The polyurethane stuff is a nightmare!
Install the trim clips before you put in the glass. After you install the glass cut a small hole in the end of the tube of sealant (I use a caulking gun) then wedge the tip between the glass and the rubber (from the outside) and apply a small bead all the way around the glass. Then cut the tip larger, apply the sealer between the window frame and the gasket sealing the entire area. Install the stainless trim asap. C
Clean up with mineral spirits.
Looking good!
Not sure I understand the logic. From what I’ve seen, WCCC isn’t afraid to charge a lot of money for good quality products. (Not a criticism even though it may sound that way) Especially after your presentation pointing out how superior that vinyl top is, I would think lots of guys would step up and pay the extra money myself included. Maybe you should at least give people the option, it’s not like you’d have to stock a ton of them.
Yep, I’m right there with ya. I think if we make it clear that it may take a couple months to get them in hand, the people that want the best will be okay with that. Seems like a no brainier to me. I did shoot a video, watching the guy install the vinyl top, so by the time that’s finished hopefully we will have the premium tops order-able.
Thanks for the tips Art, now I wish I would have asked before diving in to it. I’ll have to see if I can get the clips on with the glass in. Front will be hardest as there is already sealant in place over the little mounting pegs and it’s had a couple days of cold weather to harden.
Dunno about with the sealant in, but it’s not impossible with the glass in. Here is a good vid of it being done:
https://www.youtube.com/watch?v=aKZ_FvLd8JA
Wow, looks amazing so far. Thank you for this by the way, something good to go by as you are only a few steps ahead of my and now I can use this for reference. Keep up the great work, almost there! ![]()
Finally, here’s one of the videos I’ve been talking about doing… headliner installation! Other videos in the works are the vinyl top installation, the front end / suspension upgrades, and disc brake conversion. Will post those whenever they are finished and online.
 - 1968 Mercury Cougar")
Thanks for that! I did manage to get them in, but it was kinda messy. Next is to attempt polishing the trim, but I haven’t had much time or motivation to work on it these past couple weeks. Never fear, it will happen.
Thank you! Good luck with your car too…
A real pleasure to watch Adan install your headliner…a true craftsman. As I watched I could only imagine the guys on the assembly line stretching and hand fitting each car as they came through. They either had some sore hands at the end of their shift or …one very firm handshake!
Where would one get the headliner glue our friend was using in the spray gun?
I’ve always used 3M weatherstrip adhesive but that looks much easier.
I was wondering the same thing! How did they do them so well, on a fast paced assembly line? I heard someone say there was a pair of guys in the factory that could do a headliner in 12 minutes. I guess endless repetition helps, but they must have had some special tools or something too. In this case, it took over an hour.
He just called it a contact glue. I don’t know specifically what kind it is, all I know is it’s yellow! Used the same stuff on the convertible top he did on the yellow 69, and on my vinyl top. It’s probably something like 3M Fastbond.
Oh yeah, and I should mention this tip: if possible, install your glass ASAP after doing the headliner, or at least put some clips around the edges to hold it. Mine actually came unglued at the edges (partially due to cold weather, or the stretchiness of the headliner, or the lack of anything holding it in place). He had to partially re-glue it when he came back to do the vinyl top. Right now I have clips on the sides, just in case, since I haven’t yet put on the windlace.
Art, this is what you want: 1 Gal. DAP Weldwood HHR Contact Cement DAP Weldwood landau top and trim spray grade contact cement. ![]()
Thank you XR7-Gry
Blitz, great job on the video and the headliner. The video was about 20 minutes but how long did it take the professional to install it?
Thanks Sal! It took about an hour and a half or something. Hard to remember, wasn’t really keeping track of time!
Here’s a cool “car history” update. When I was back in CA for the holidays, my mom and I sifted through some boxes of old photos and found some with the Cougar in them. I was hoping to find something from when my grandparents first got the car, proudly standing next to it in the driveway or something, but no such luck. These are still pretty cool though.
These first two are probably in the early 70’s, when they took a trip to Yosemite. That’s my grandpa standing next to the car, which you can barely see. He passed in 1977, so I never met him.


This one below is around 1984 (the photo jacket was advertising the 1984 Olympics). So, 4 years before I was born. My mom is on the far left (and yes, I made fun of her extensively for the dorky hair style and glasses), and my grandma (who continued driving the Cougar until she passed in 2001) is in the red jacket. Dunno who the other old ladies are. But there’s the Snowball in the background, in all its glory.

That’s all we found, for the time being. There are probably some others somewhere. But I was glad to see these. It’s cool to have some visual history.
Anyway, I do have some significant progress to report, but haven’t taken pics yet. The engine compartment got painted, and the doors are on. I haven’t been doing much with the car lately, but I think as the days start to lengthen and it’s not quite so cold, I’ll be getting back on it soon.
Always a cool surprise when you find old photo’s like that. Especially when you still have the car.
Very cool Andrew. Having the family tie to your Cougar is great but having the photo history with your family and the car is awesome. Thanks for sharing your photos.
Steven
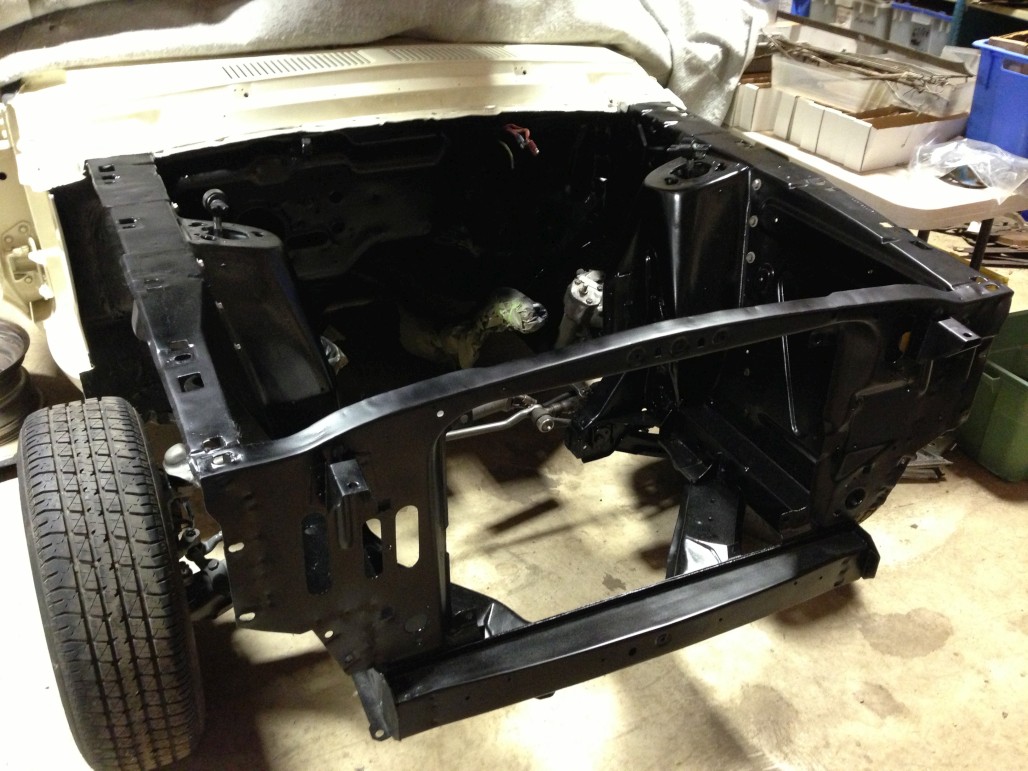
Well, I guess I’d better post some kind of update. It’s been a while. I didn’t do much to the car during the winter months. It was too cold and dark and depressing. But now that the sun is shining and the days are longer, I am much more motivated to get back on it. Here are some of the random things I’ve done since the last update.
One of the more interesting things is that the engine compartment got painted. I had my body / paint guy do it. Really, I’m sure I could have done a good job myself with rattle cans, but I figured it would be worthwhile to have a pro do the prep work and use a high quality paint and spray gun. Currently I just have crappy cell phone pics, but I will get better ones soon.
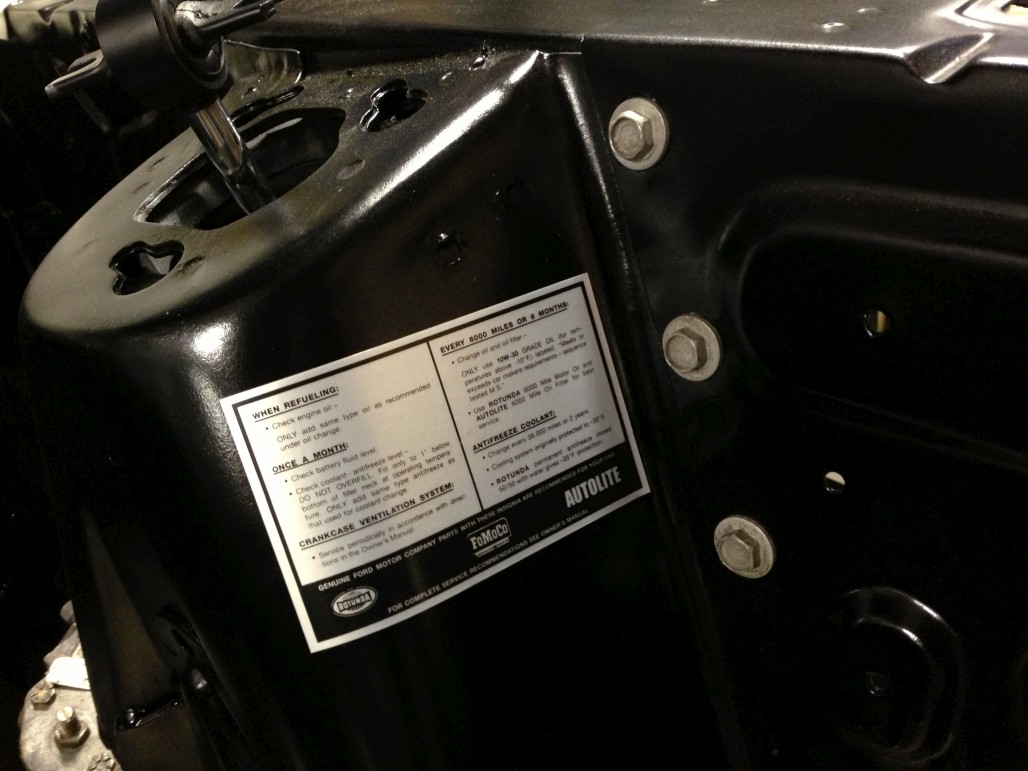
Also went ahead and slapped on the service decal, woohoo! Plus if you notice the bolt heads there, I installed the the spring covers, which I cleaned up, refurbished the original rubber, sprayed with undercoating, and put back together. You’ll probably spot them in a future pic, not that it’s that exciting.
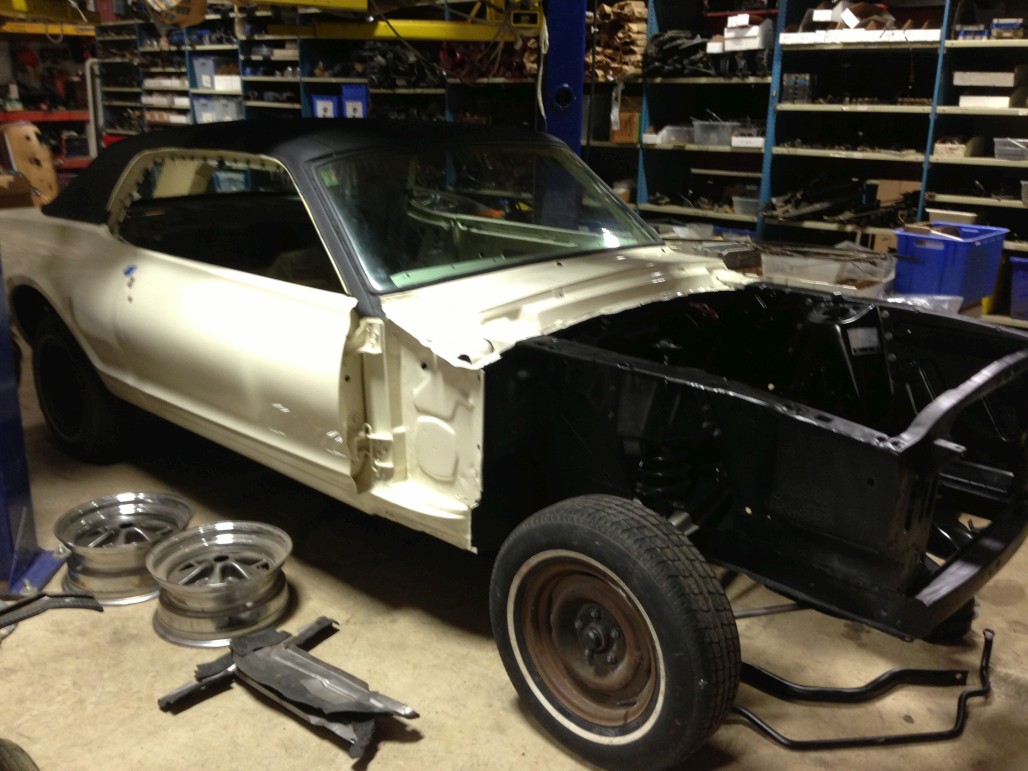
Also, the doors got put on. I need to take a better pic, but this works for now. The bad news is, the body guy didn’t bother to use any masking tape or anything, so he ended up messing up his own paint job in a couple places. There is a chip on the front edge of the RH door, and the door sills took a little damage too. Not happy about that, they will have to be touched up.
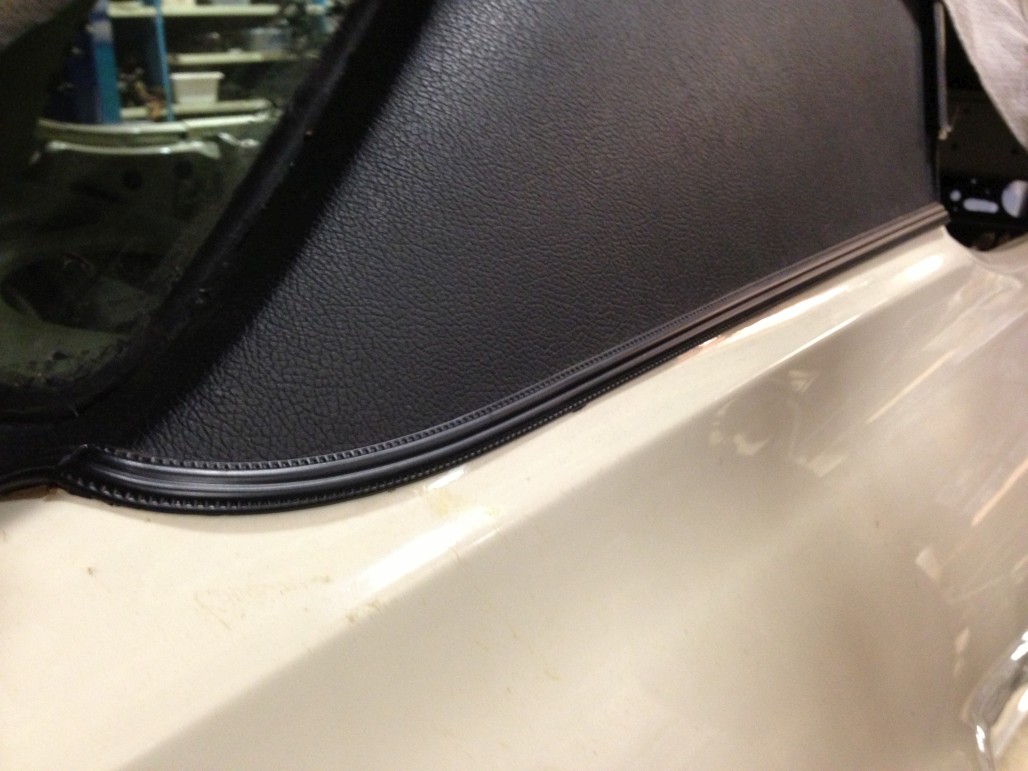
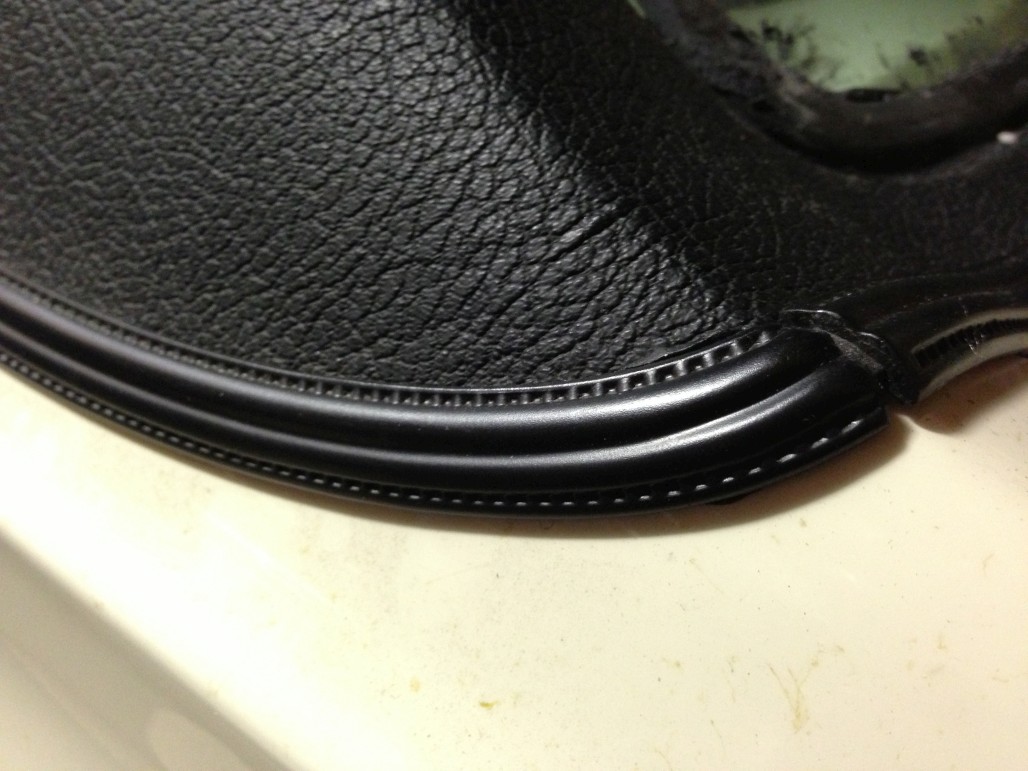
Something else I did was to clean up and paint my vinyl top trim pieces. I actually had to scavenge some other pieces, as mine had mysteriously vanished. I bet Don sold them. That’s the danger of keeping your Cougar parts in a Cougar parts warehouse. ![]() Anyway I used SEM Trim Black for the first time and was surprised by how nicely it smoothed out. The can says to spray medium coats, so I did, and didn’t get any runs at all. I recommend this paint! (Again, cell phone pics…)
Anyway I used SEM Trim Black for the first time and was surprised by how nicely it smoothed out. The can says to spray medium coats, so I did, and didn’t get any runs at all. I recommend this paint! (Again, cell phone pics…)
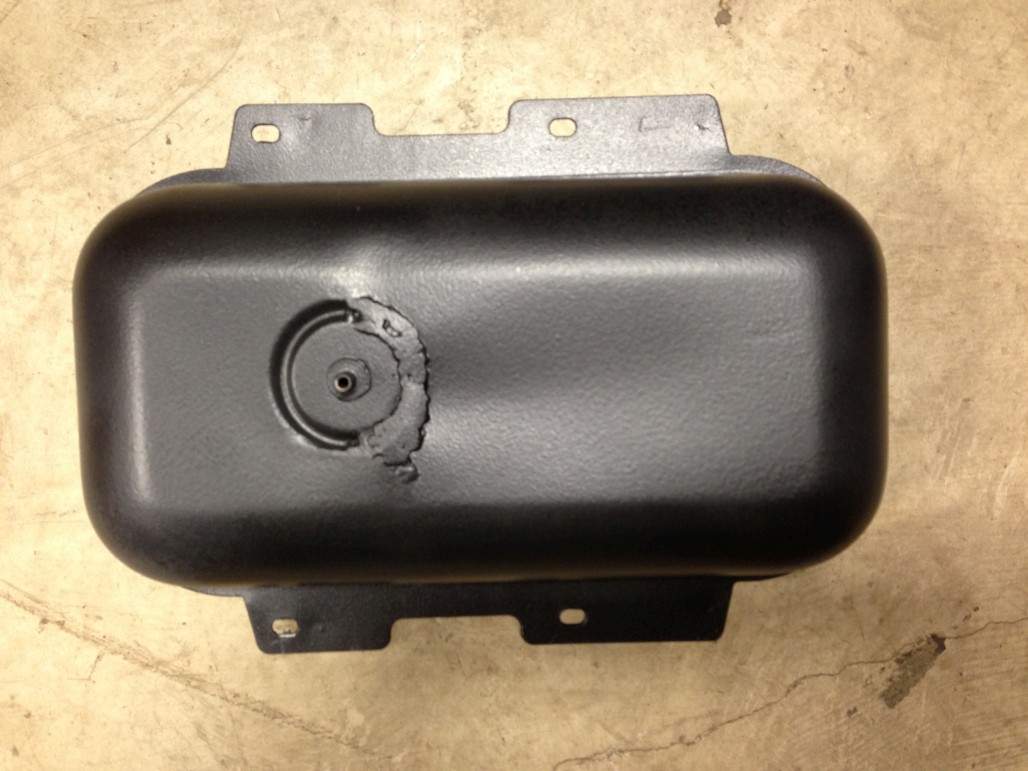
So then I started thinking, hmm I should probably focus on the things I need to clean up / put on the car in the front fender area so that I can get the fenders put on. So one of those things was the headlight vacuum reservoir. Mine was in pretty good shape, as far as not being rusty, but unfortunately it was cracked about halfway around the check valve, and out towards the side. So I sandblasted it and handed it to Felix, the resident mechanic here, and he was kind enough to weld it up for me.
Then, to make sure the repair worked, I hooked up a vacuum tester to see if it would hold 15 lbs for a while. It did.
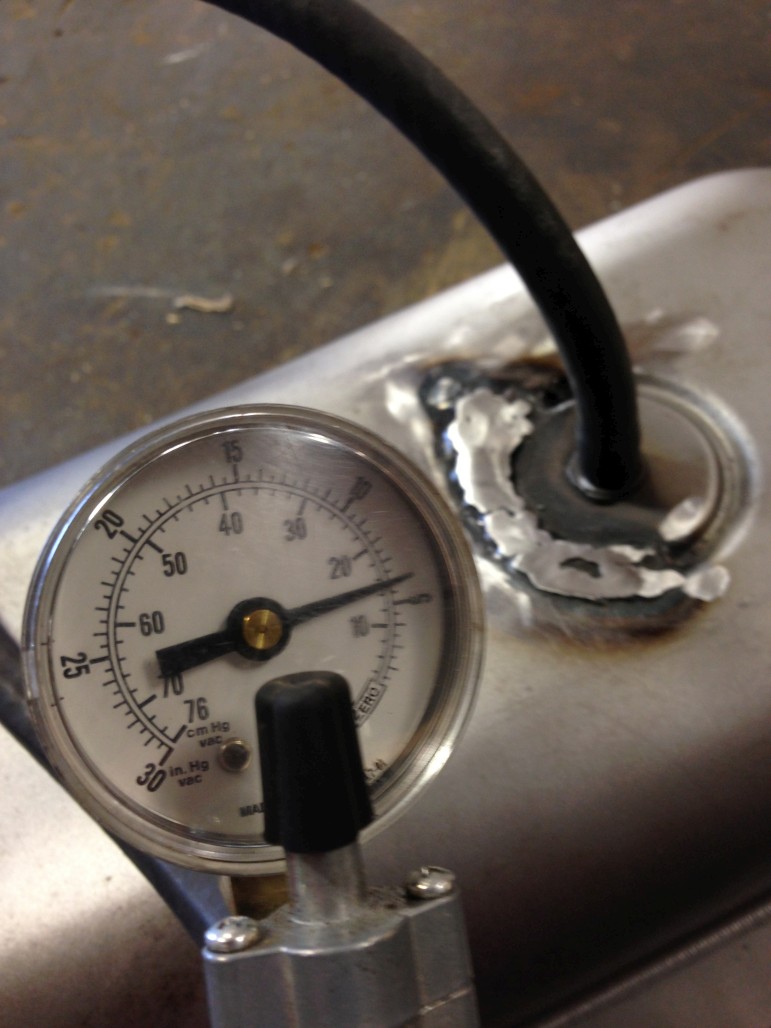
So then I cleaned it, sprayed it with undercoating, and called it good. It may not be pretty but it will work. And it’s not something you can see anyway.
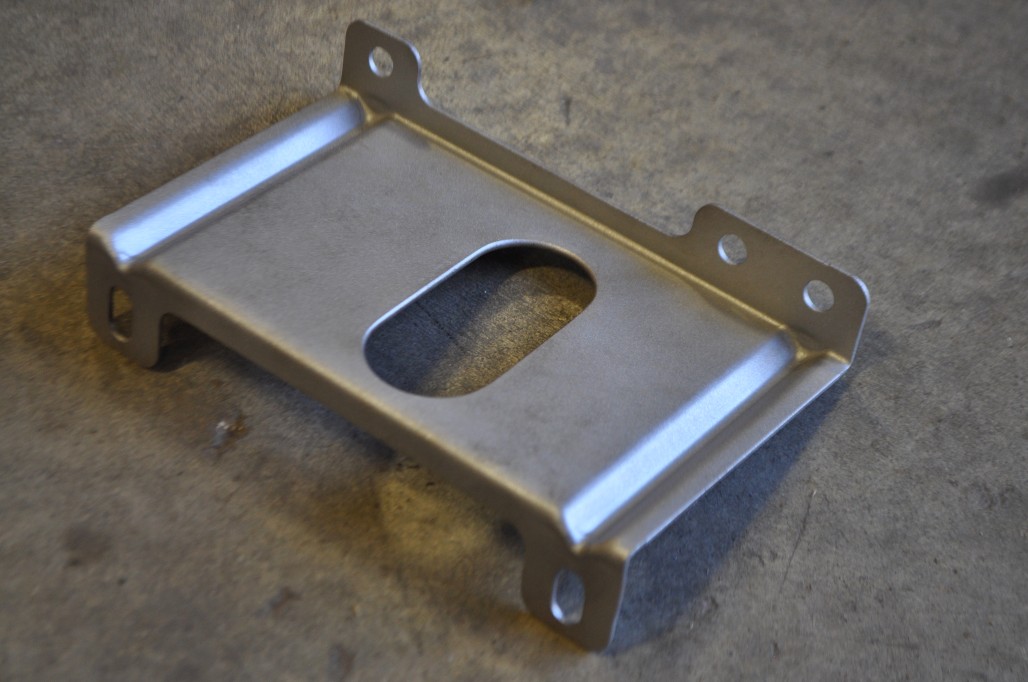
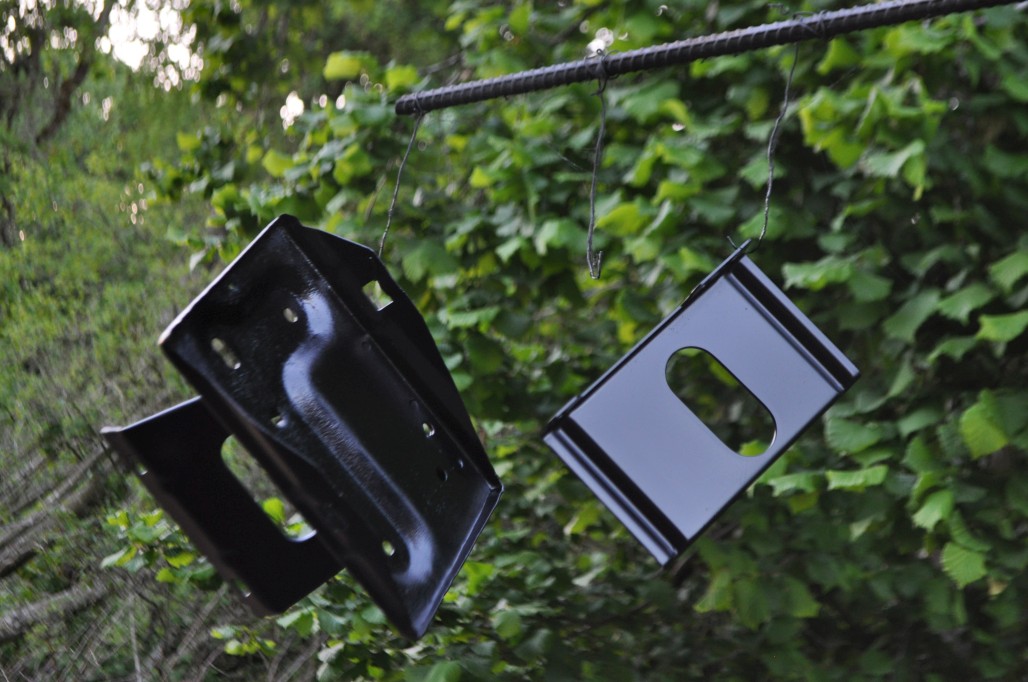
So then of course I had to strip and paint the bracket for the tank, and for some reason grabbed the battery tray at the same time. (Turns out that was probably a waste of time since it was the smaller type of battery originally and it looks like I’ll be upgrading to a bigger one, so I’ll need a different tray. Oh well.)
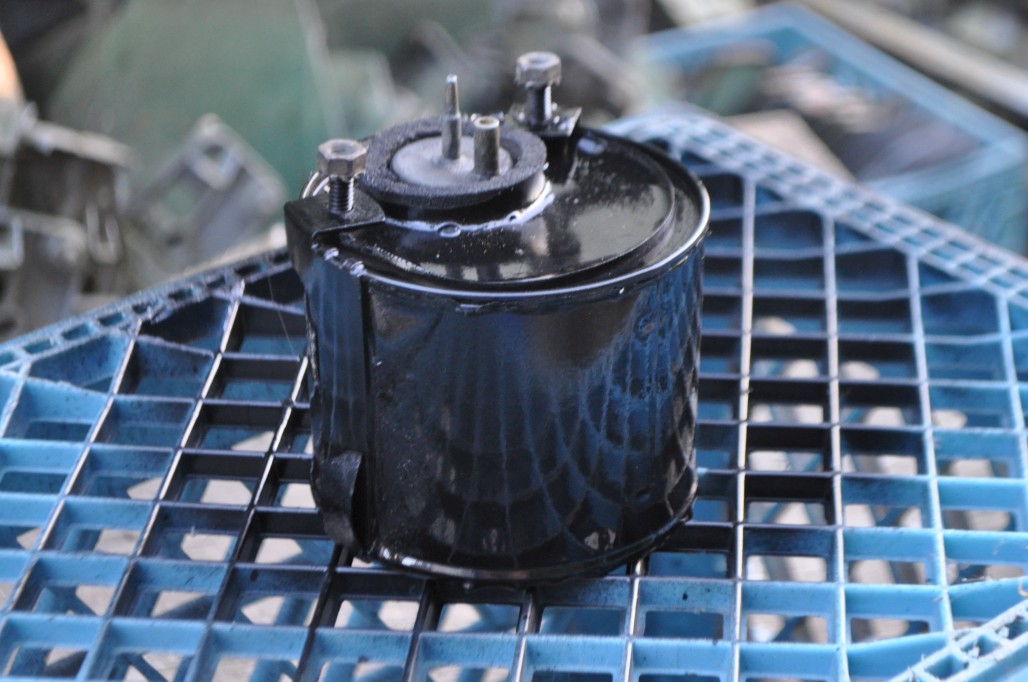
Also, one of those other items that hides under the fender… this A/C vacuum tank thingy. Luckily mine was in pretty good shape, just dirty and tired looking. I tested it to see if it held vacuum (same method as with the headlight vac tank) and it did, so I just cleaned it and sprayed some paint on it just to make it less ugly.
Also stripped and painted my front crossmember (which is now installed, thank goodness I didn’t lose the special tapered bolts) and the 390 GT sway bar Don was kind enough to donate. Still need to locate the hardware / bushing kit I got for it… where did I put that?

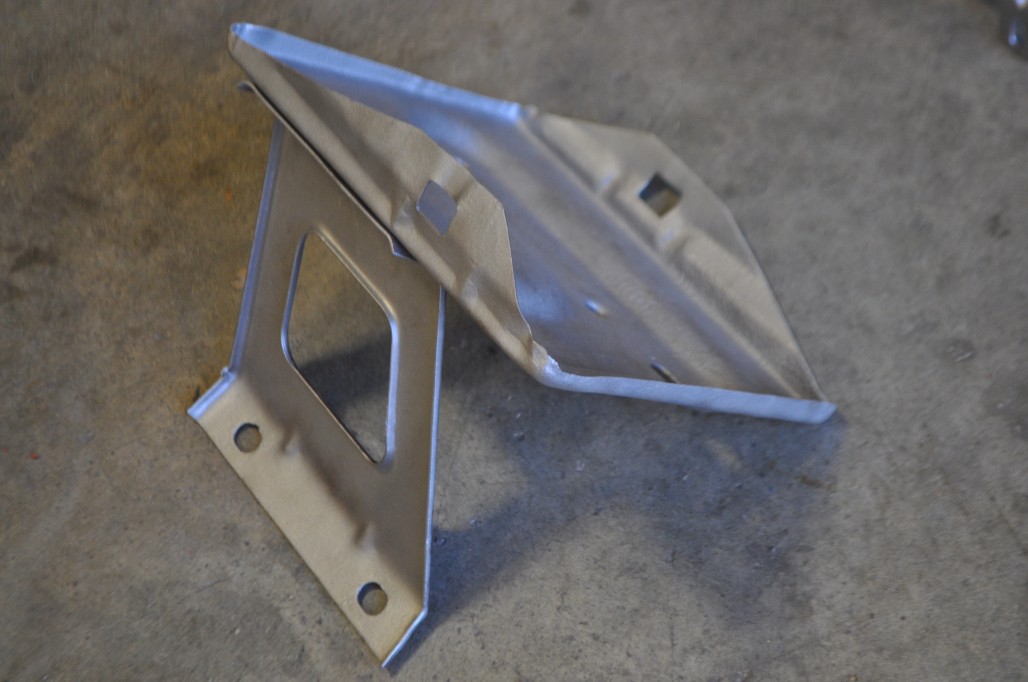
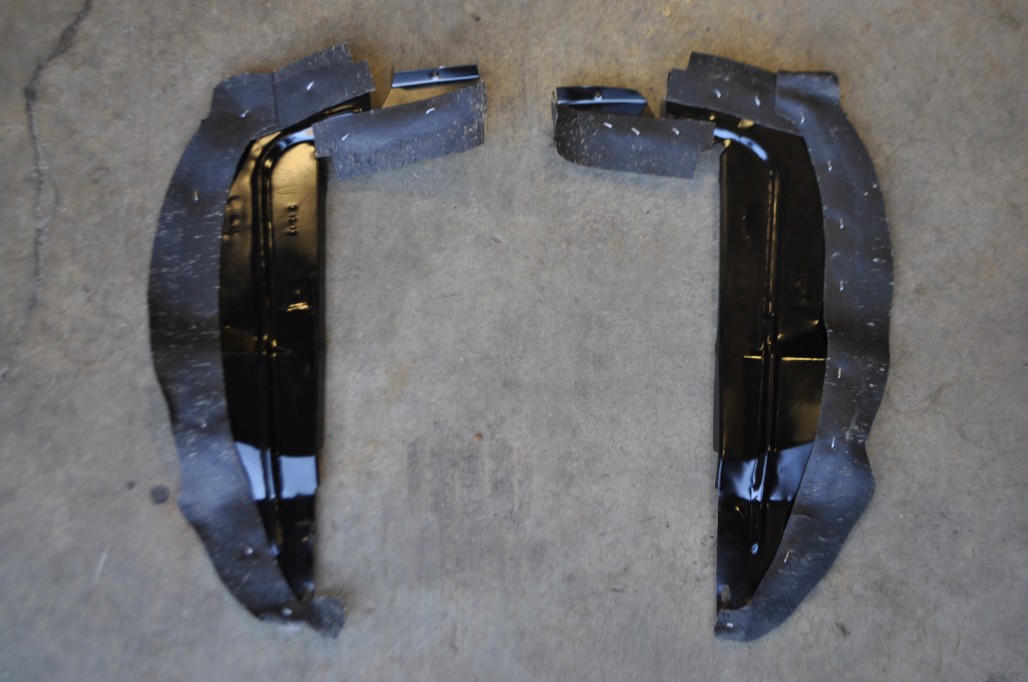
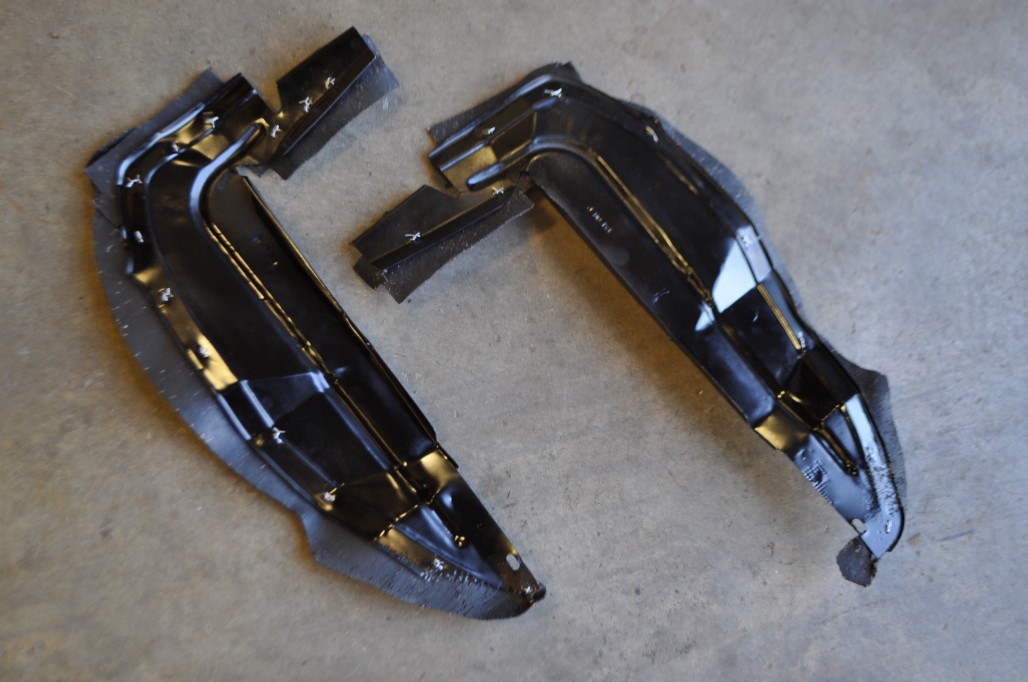
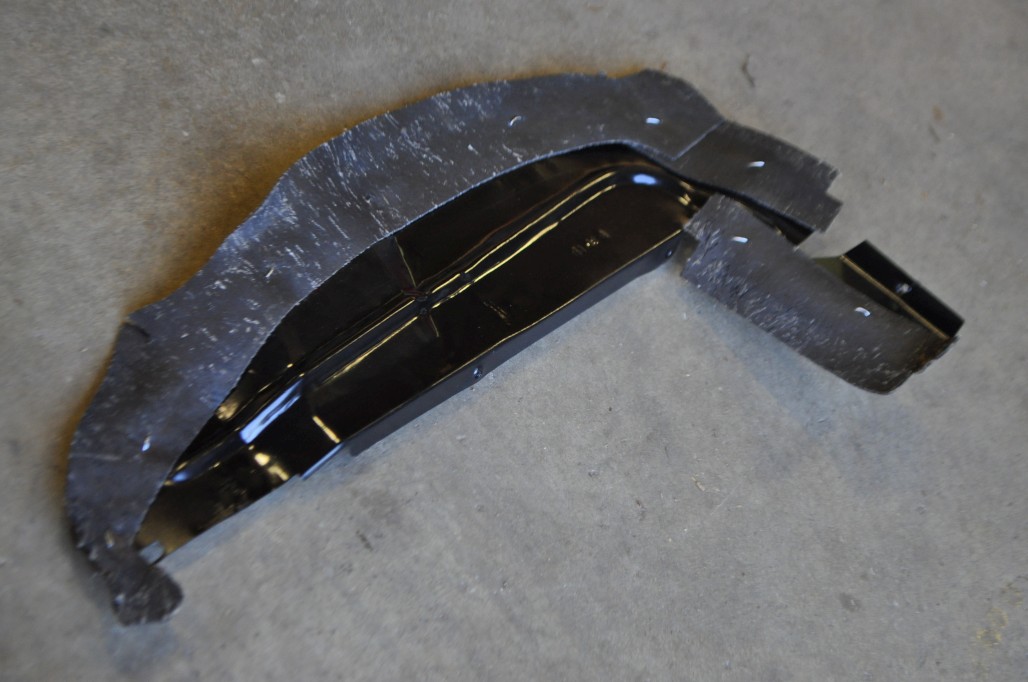
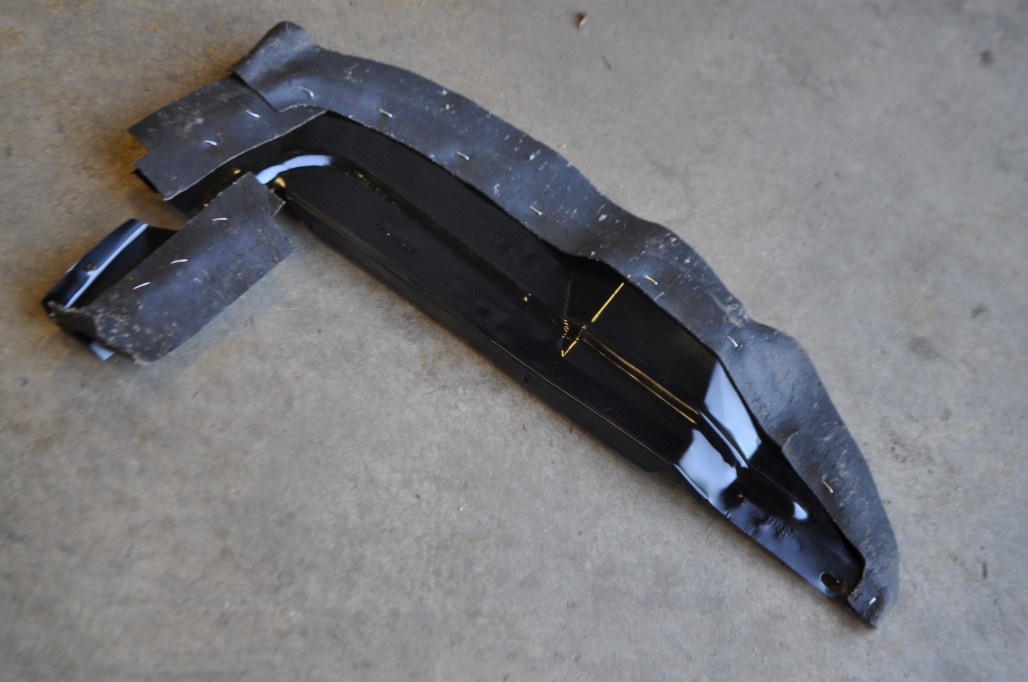
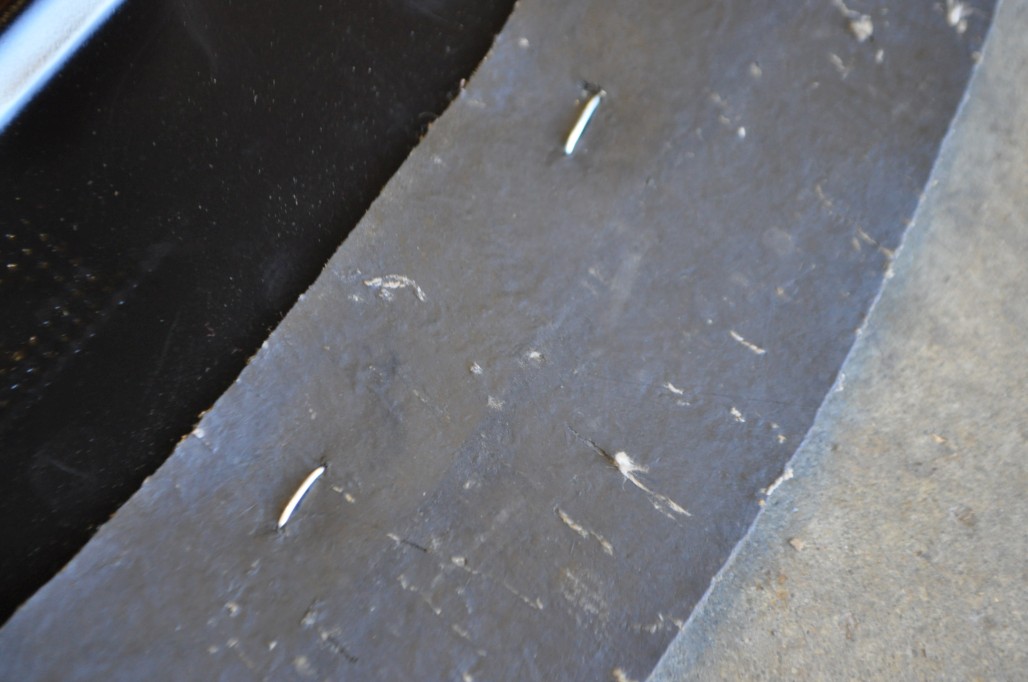
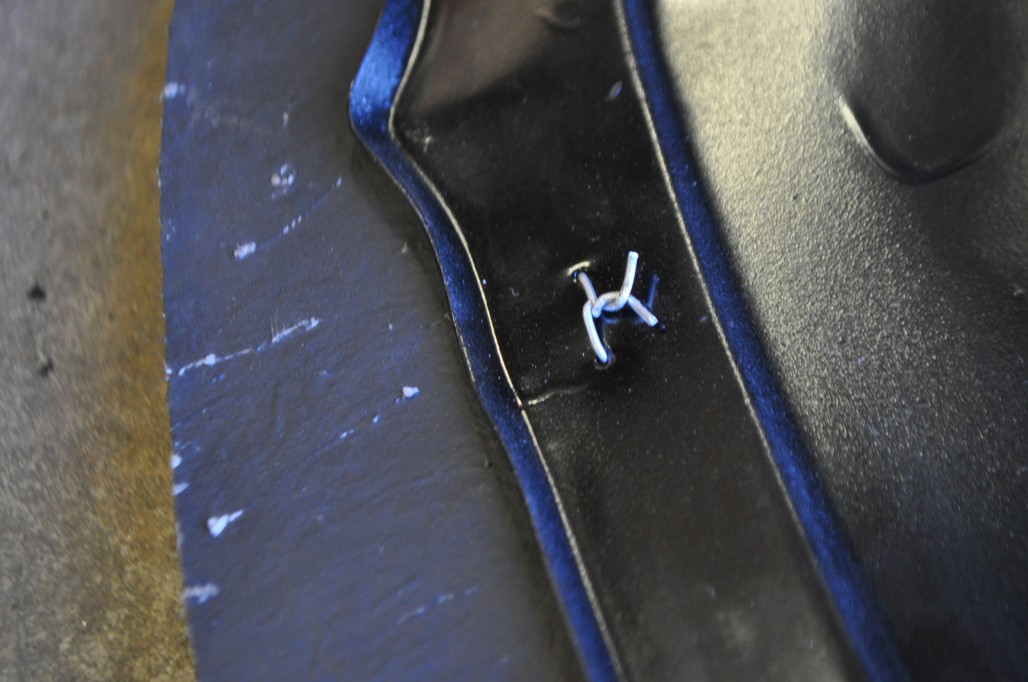
So, other big items that hide under the fenders: the splash shields. Fortunately for me, my original rubber was pretty good. The only bad part is that the bottoms of the metal brackets had some rot. But I decided that it was not bad enough to affect the functionality of the splash shields, so I went ahead and refurbished them. I separated the rubber from the metal (those are some tough staples…) and sandblasted the metal brackets before giving them a fresh coat of black paint. I also carefully sandblasted the rubber strips to clean them up, then continued cleaning them by hand. Once that was done, I used some galvanized steel wire to replace the staples, re-using the existing holes in the rubber and metal. It wasn’t too hard to match up the right pieces to the right place because the staples were done by hand, so they are irregular & unique. Anyway this is the end result. Should have taken “before” pics. Oh well.
Now I just have to find the hardware so I can put them on the car… I didn’t do a great job of bagging + tagging everything, so putting this car back together might be kinda tricky at times. Luckily I’m at the Cougar Mecca.
More to come in next post…