The Snowball Saga - '68 Standard Revitalization Project

Well it’s time for another update. I’m not great at documenting every little thing I do and keeping up with posting here, but it seems like every once in a while I just do a massive post (or two) to bring the thread up to speed. So, time for one of those.

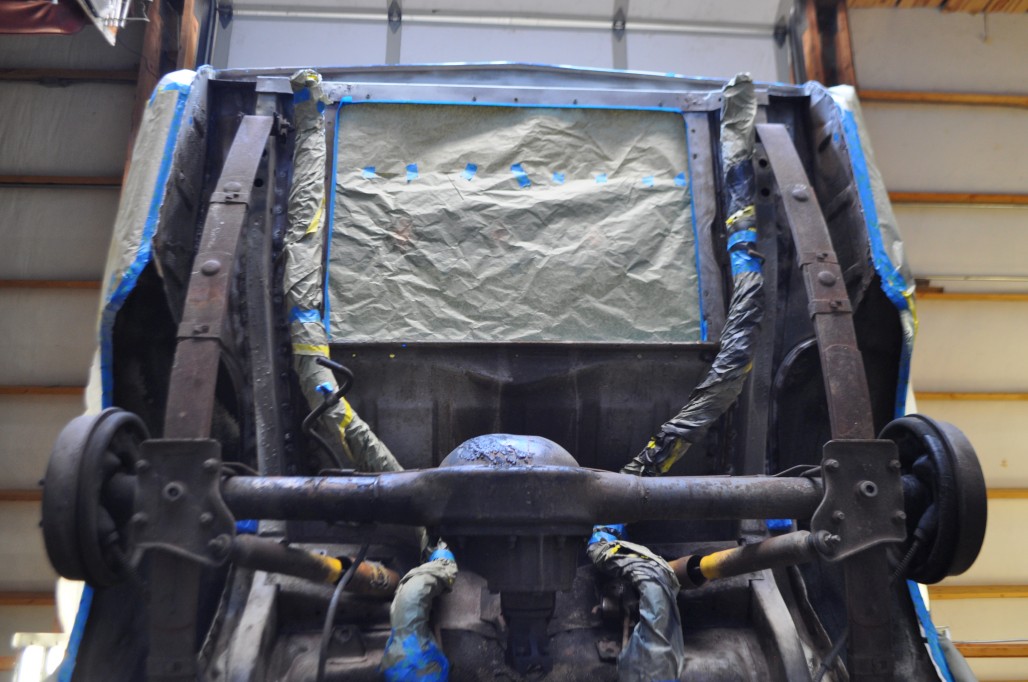
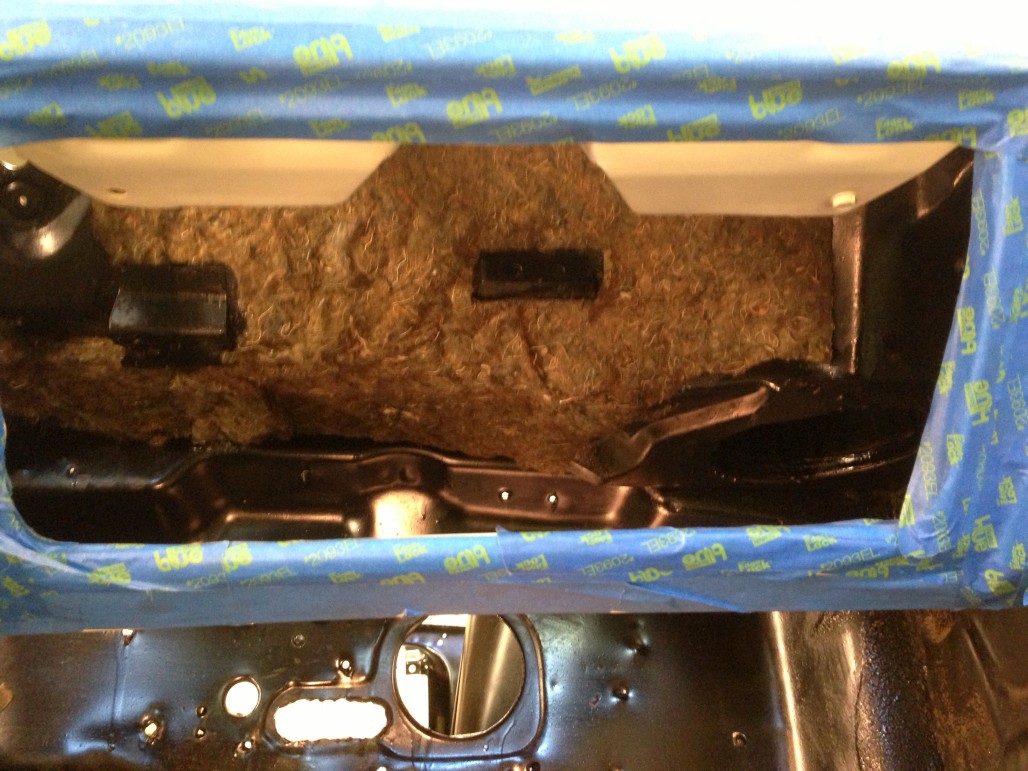
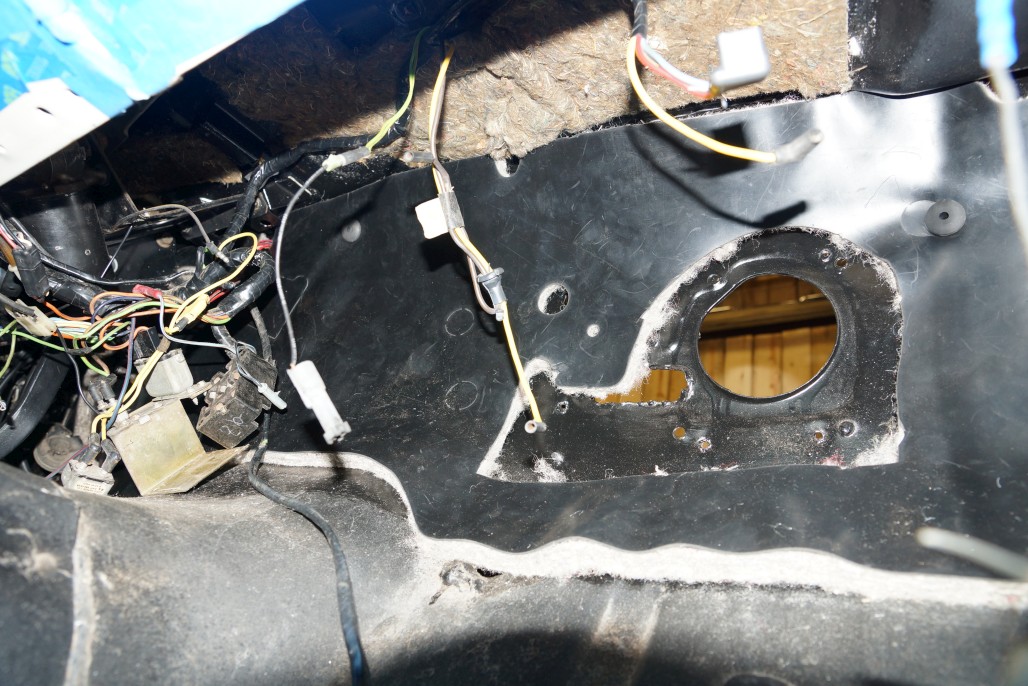
Let’s start with miscellaneous stuff. After I got done with the painting under the dash, I started the process of putting stuff back where it goes. Before I could address wiring, wiper motor bracket, and other stuff, I had to get some insulation in there first. It turned out that my original upper insulation was in decent shape, despite being torn in one place (my fault). So all I really did was give it a good pat-down to get the dust out of it, and glue it back to the car with some trim adhesive.

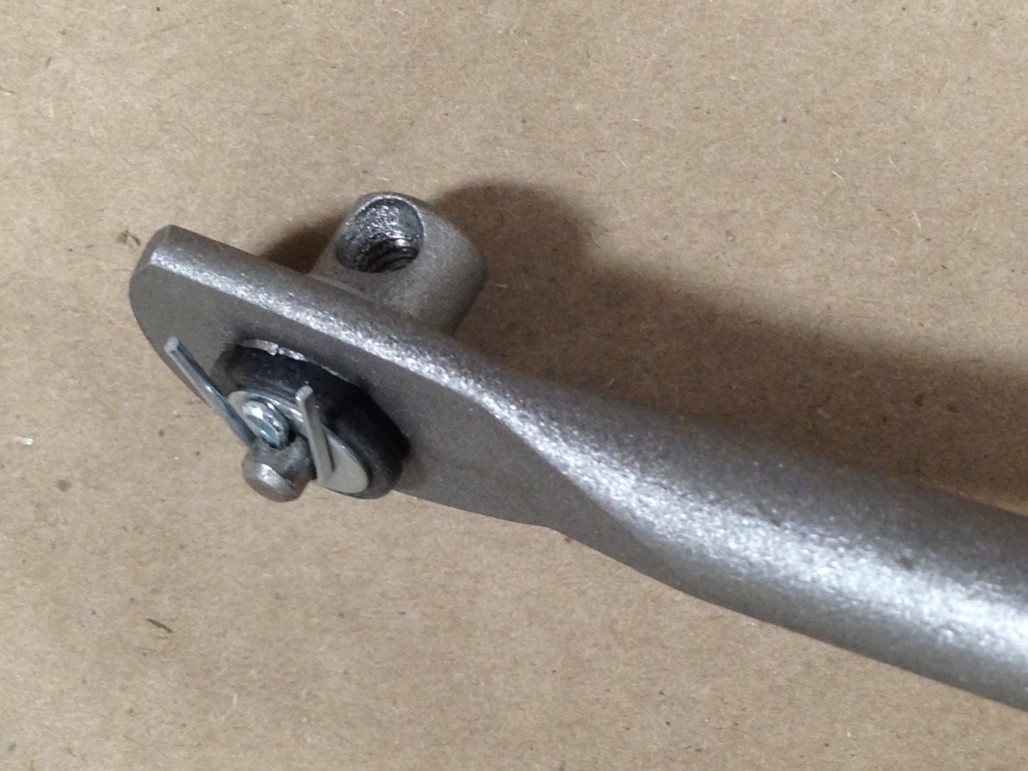
Meanwhile, I’ve been trying to focus on some of the things that are easier to access now before the engine goes in. One of those things is the throttle pedal assembly. Here’s a before shot of the worn-out bushing:

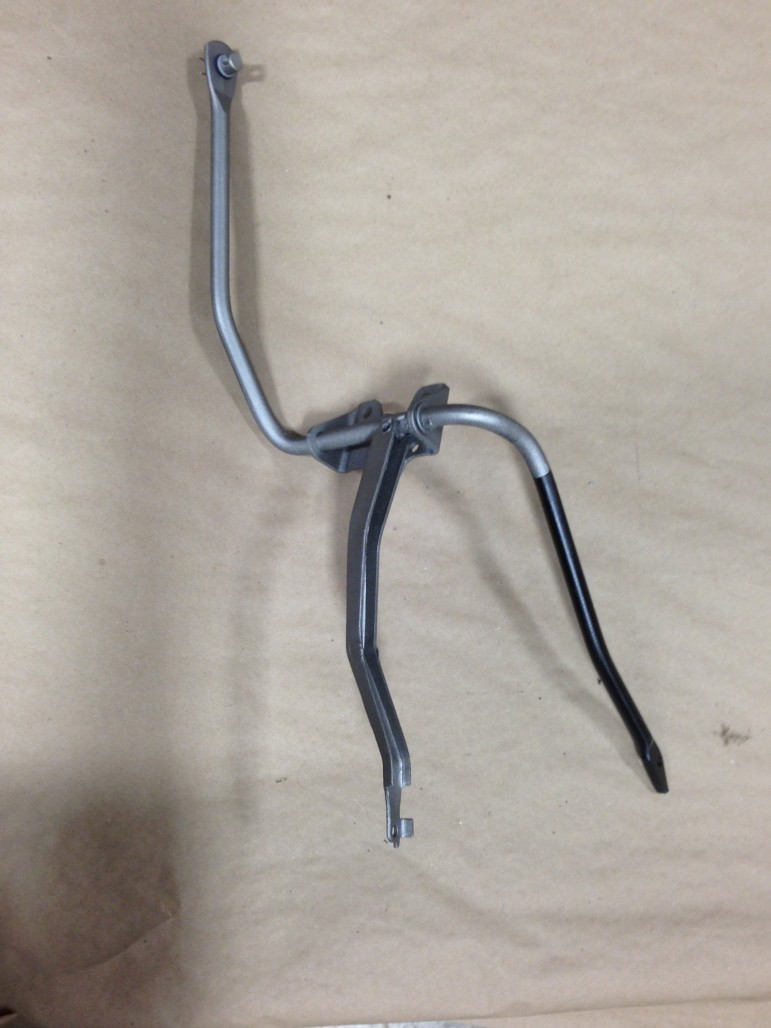
And here’s an after shot, rebuilt with this kit.

And here’s the whole thing. I painted it with the same exhaust manifold paint I used before. It has a great natural bare metal look to it. Then of course I painted the lower section black.

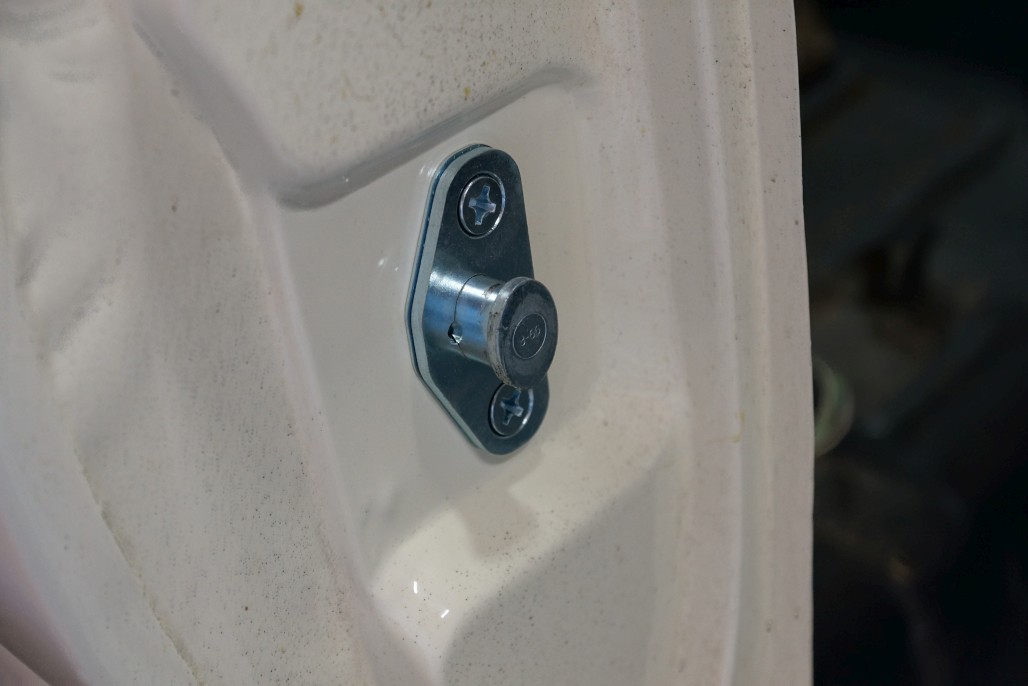
Also finally put in door latches and strikers, so the doors aren’t flopping around dangerously anymore. My passenger side latch is original, but the driver’s side is a replacement. Not a big surprise I guess. I got new strikers, just because the old ones looked kinda ugly.

Now moving on, this shot kinda shows a few things that are happening in the engine bay:

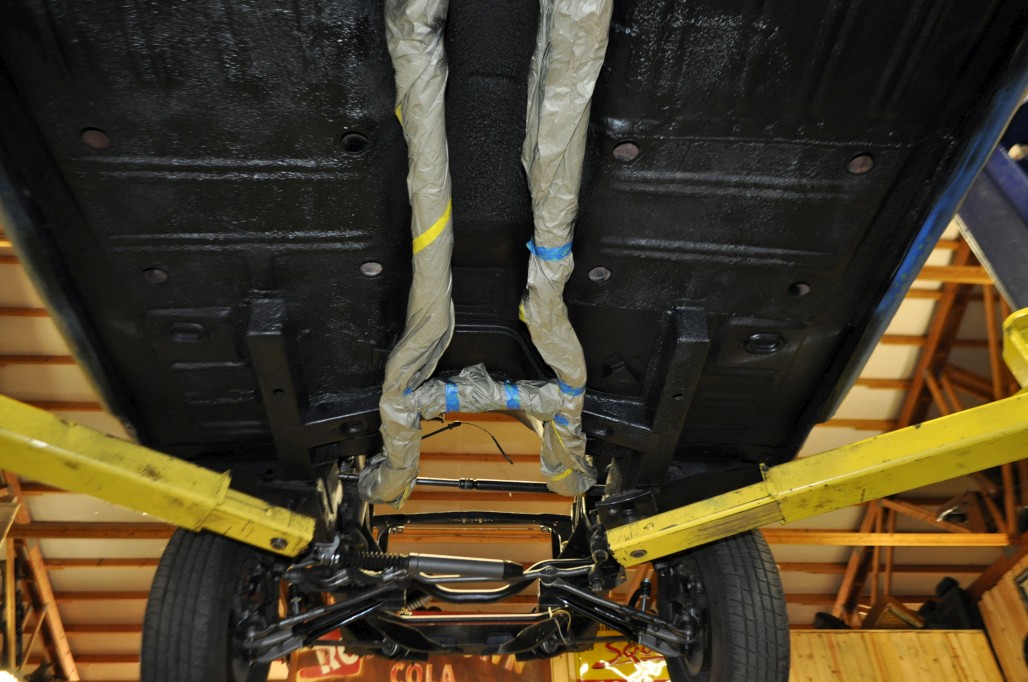
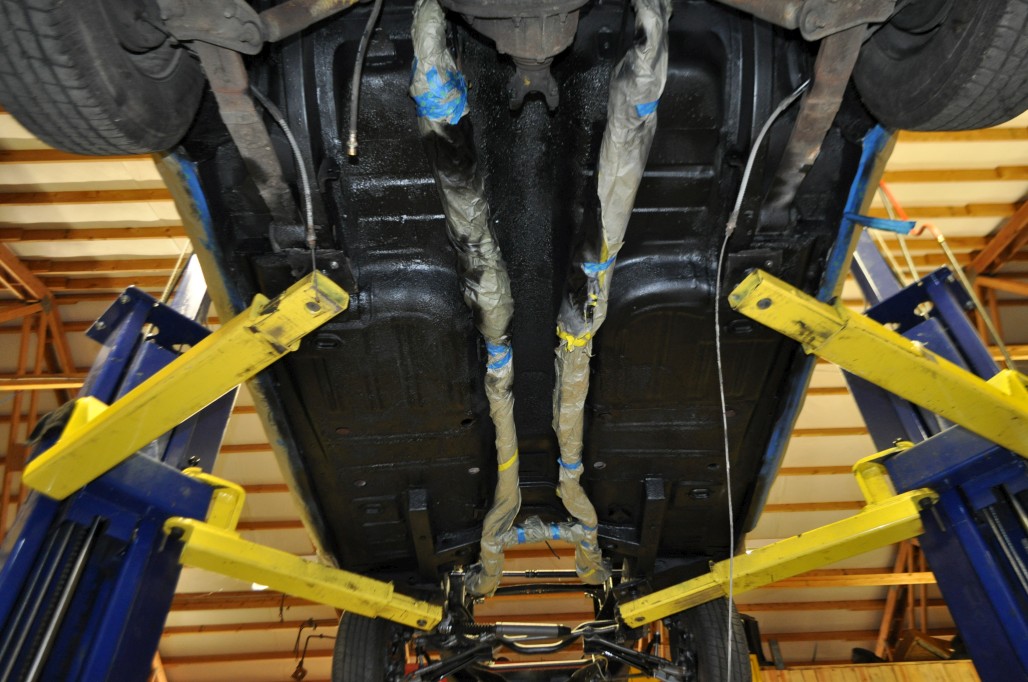
You might notice that I’ve got my rebuilt '70 brake booster in there, and new master cylinder (which I painted the exterior with cast iron grey engine enamel because it was already showing signs of surface rust). Also the front brake lines are in, just need to finish with all the clips and stuff. Also got the throttle rod installed, washer bottle and hoses and new nozzles. I salvaged my old firewall grommet and ran the new hoses through it. I’m using a decent original bottle for now, since it’s a pretty obvious thing and stands out when you have a bright white replacement. I do have a new one in reserve if this one craps out. Also got the headlight wiring harness routed properly with all the clips in place, and though you can’t see it in this pic, I put in a new battery tray with new fasteners, which I had to do since I’m upgrading to a bigger battery than what the car came with.

Here is my '70 distribution block, which I rebuilt with one of these kits. I was pleasantly surprised to find that it fits in the stock location, and the '70 front brake line kit fits perfectly. The only question remaining is what will happen when I try to run a '68 rear brake line to this. Can’t use a '70 line because the fitting is a different size for the rear.

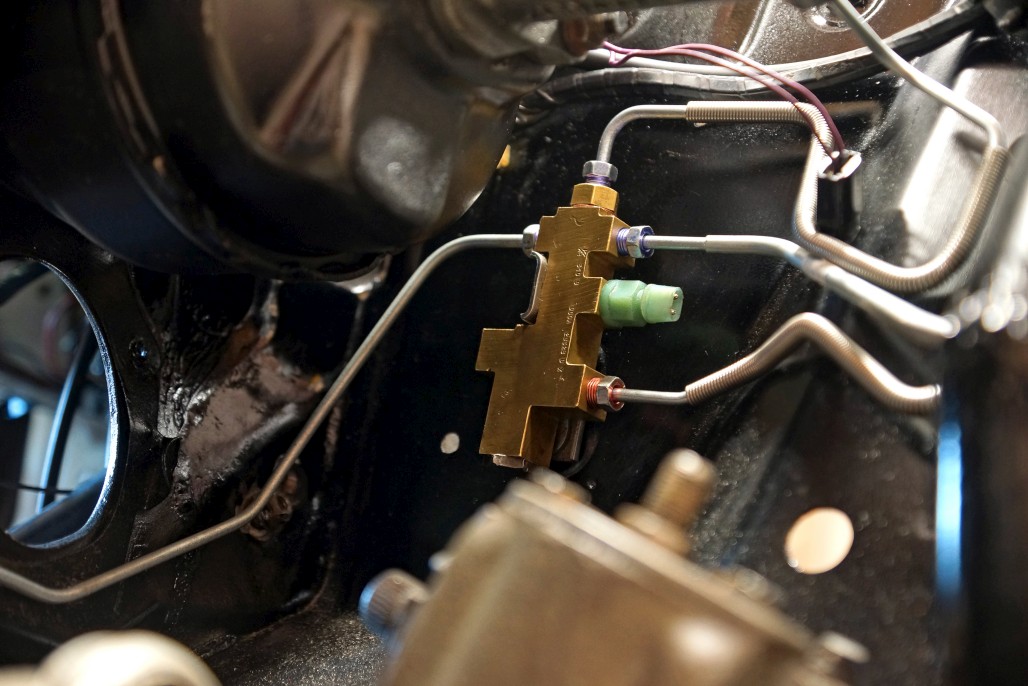
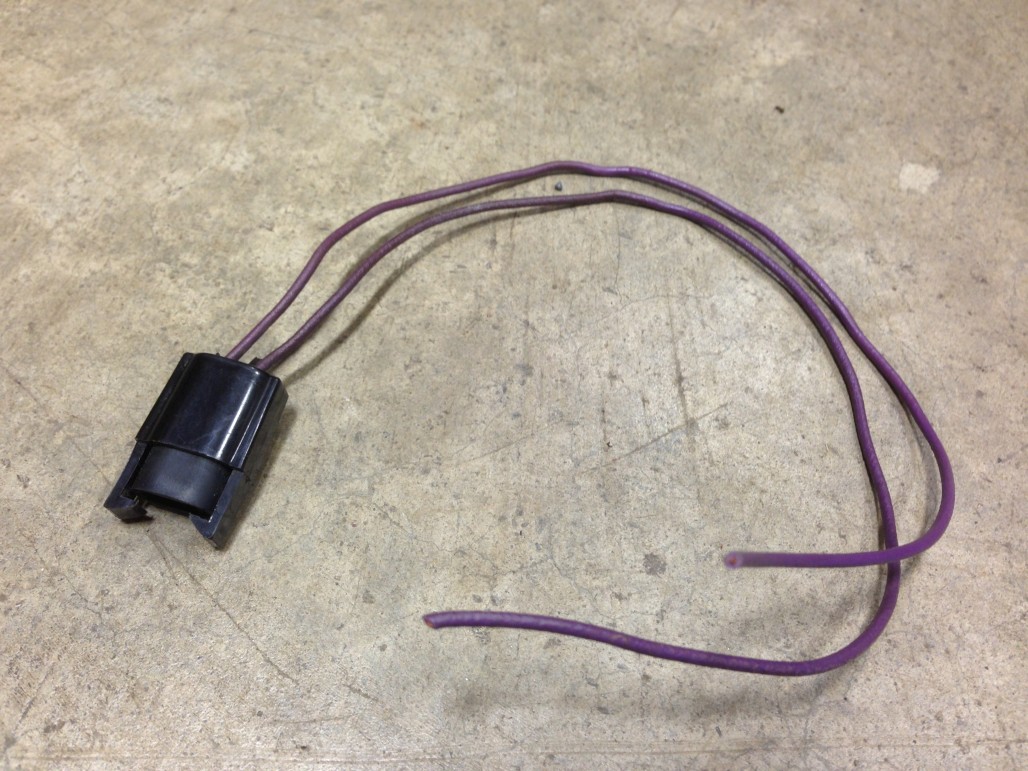
One other thing worth mentioning is that my stock brake warning switch plug did not reach the switch on the '70 distribution block, since it’s rotated 90 degrees compared to the older ones. So, I had to snag a pigtail from another harness, cut my old one and splice this on.

Now, moving back inside for a minute, I continued with the under-dash insulation project, knowing it had to go in before everything else. I got one of these firewall pads and started to install it. First problem is that the rubber plugs that hold it in place are a B!##%^ to get through the holes without breaking them. I think I broke about 3 or 4 before successfully installing any. Second problem is that not all the holes are in the right place, so I had to modify the pad in multiple places to get the plugs into the proper holes in the firewall. I can’t wait to install the heater box now, that will be fun…

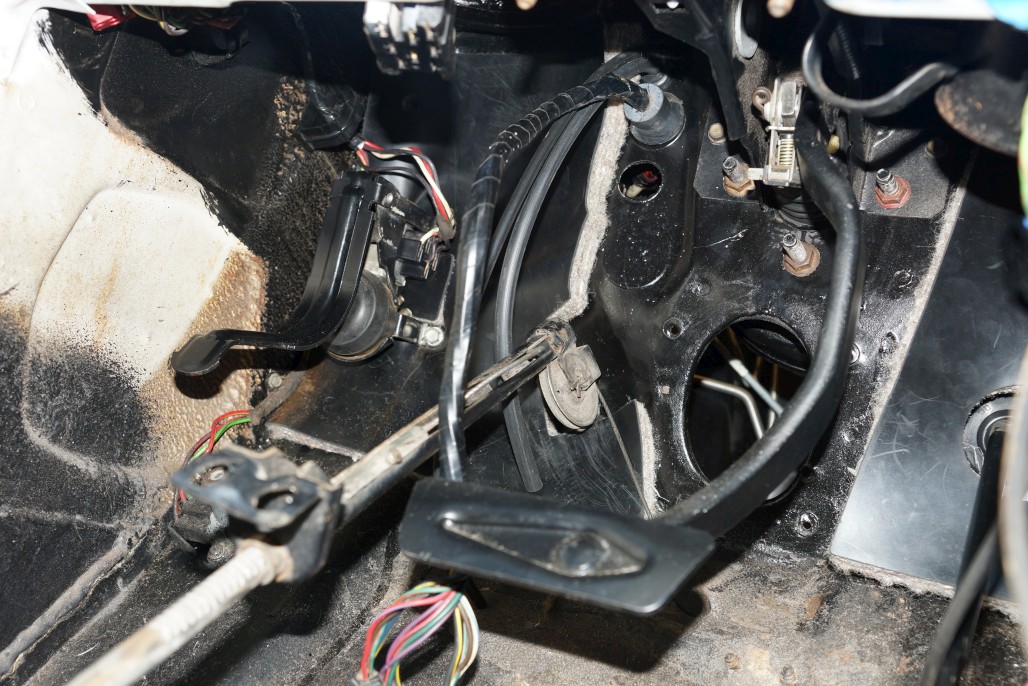
I did manage to install the washer foot pump after some struggling to find the holes, and you might notice that I cleaned and painted the visible front lever portion first. Also in this pic you can see that the brake pedal & hanger are installed (kind of obligatory with the booster).

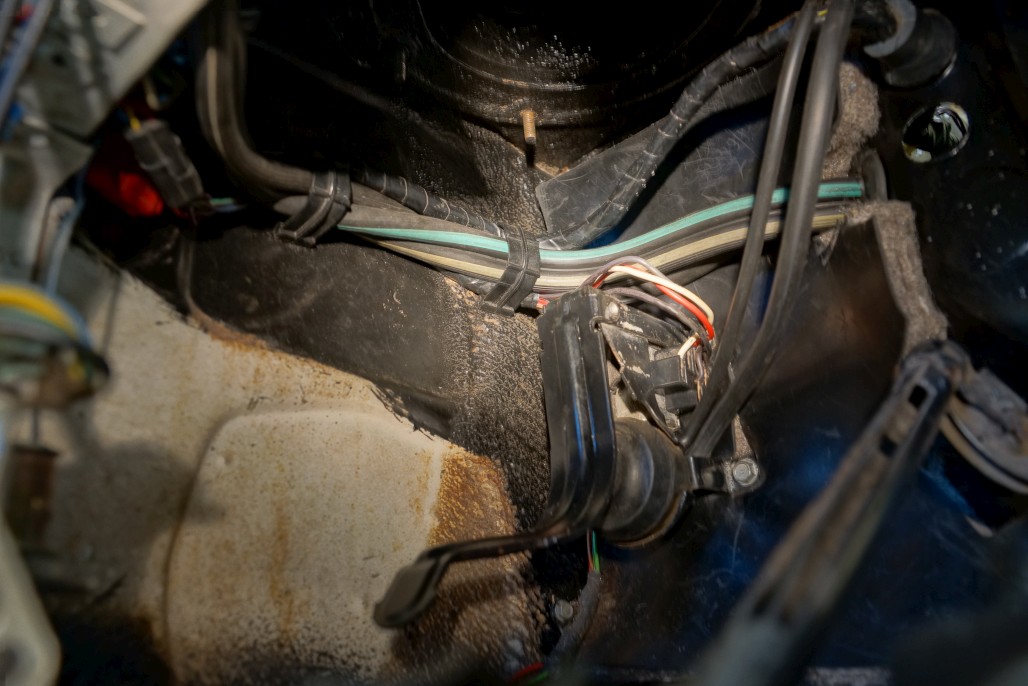
I also routed the wiring and vacuum lines against the kick panel in what I assume is the right configuration, since those 2 black clips were there from the factory. I had to cut a slot in the firewall pad for the vacuum lines to pass through. I’m guessing this pad is meant for Mustangs. But I will say that it seems pretty thick / substantial and should do its job nicely.

Now I was ready to put the fresh air vent back in. I cleaned it up as best I could, and it seems like the rubber around the flapper is still good, as is the cable. So I just put some strip-caulk around the inner perimeter to replace the original sealer and installed it back in place.

(Haven’t taken an installed pic yet)

Well, that brings the miscellaneous things pretty much up to speed. Next is to install the steering column, which will make it a lot easier to move this thing around. Probably going to tackle that tonight. Coming up in my next post: engine progress. :thumbup: Stay tuned.

Ok, now picking up where I left off with the engine. The next thing was to install the heads. Here’s a crappy picture of the bottom side of one head:

Apparently the intake valves were still in good shape so he just replaced the exhaust valves. Also he performed a “valve job” on all of them, whatever that means. I think it has to do with precisely grinding the edges to make them smooth. Also, hardened seats, etc.

Anyway, here they are installed on the block.

Next order of business was lifters, pushrods and rockers.

At this point I was about ready to put the intake on. But first, I had to clean it up. Ta-da.

I also took off this pan on the underside. I’m glad I did because there was a lot of crud in there. Unfortunately in the process of removal, I broke one of the fasteners that held it in place. So I had to drill & tap the holes and put some bolts in there. Cleaned up inside and reinstalled.

Also, this is the type of thing I usually don’t bother showing, but I often spend some extra time trying to clean up and rethread original fasteners. In this case I blasted the intake bolts before rethreading.

Now here’s the intake set in place, and I also had painted the valve covers, so I threw 'em on there just to get a preview of what it will look like. More info on the paint soon.

Finally, I was ready to mask off all the holes and paint the whole thing. I used duct tape because it sticks to the bare metal a lot better than masking tape does. Used some closed-cell foam to fill in holes like the spark plug holes and others. I also bolted on my old oil pan, which I’m not reusing due to a stripped out / shoddily repaired drain plug. I opted to do the new pan separately, just so I could see shiny bolt heads not painted over. Same idea with the valve covers. Silly? Maybe.

Now at last the painting could commence. I switched gears and decided to use Plasti-Kote #224, as suggested by ECI Bob and also multiple people on Mustang forums. I ditched my incorrect VHT “new ford blue,” which means I’ll have to re-do the air cleaner. Oh well, no biggie.

Then I did the new oil pan separately:

After a couple days to let the paint dry, it was time to start putting stuff on. Getting ready to do the exhaust manifolds here. You might notice that I masked based on where the manifolds actually end, not where the flat bosses on the heads end.

Some research told me that you aren’t supposed to use exhaust manifold gaskets for this application, even though the Fel-Pro kit came with them. However, I wasn’t totally comfortable putting them on dry, especially with some of the divots and pitting on the manifold flanges. (At some point in the past, gaskets were used on these)

So after a little more research I ended up going this route: red high-temp RTV silicone sealant. After putting the manifolds on with this stuff, I tried to clean up around the edges so it wouldn’t be visible, or at least not obvious.

Next I put on the oil pan. Used Permatex High-Tack for this.

See the shiny new bolts?

Of course then I thought it looked stupid with the gasket showing, so I carefully painted over the edge with more blue paint. Then I painted the edges of the carb spacer, installed the oil filter and fuel pump, stuck the distributor in there, aaaand this is pretty much how it sits right now.

Parting shot:

That’s all for now! I am liking the way this engine looks so far. Hopefully it will run even better than it looks. I was debating about using chrome valve covers / open air cleaner and such, but I think I’m just going to keep all the stock blue stuff. Since it’s an A/C car, there is plenty going on under the hood to keep it interesting. Well, until next time!

If you ever want to put front speakers in, now is the time to cut those openings.

:thumbup:

Another great update. Looking good.
Steven

Your doing a great job Andrew, looks fantastic!

Great pictures and write up, as usual. I’ll bet you’ll be sitting on a 5 gallon bucket and driving it soon.

I never thought I’d have door striker envy.

Looks great!

Thanks all!

True words. That is on the to-do list. I already bought some generic plastic speaker baffles that i’ll use in place of the unobtanium original pods.

Haha, door striker envy. That’s a good one…


Alright, so it’s update time. One of the major tasks I wanted to accomplish that’s been bugging me for a while is to clean up the underside of the car and throw some undercoating on it. Especially because the floor patches that were done were mostly just bare metal and have been starting to get surface rusty. But also just for aesthetics, so everything under there looks nice and uniform. So here are some “before” shots:

Note that the passenger side is what needed the most work… leaky heater core in front, not sure what the issue was in back.

Next, the most time consuming part: cleaning and masking. I rolled the car outside and jacked up the rear end as high as I could, then hit the floors with a steam cleaner / pressure washer. Then I put it back on the rack and wire wheeled as much of the rust away as I could, while also trying to get rid of loose chunks of old undercoating. I wasn’t worried about removing the stuff that was firmly bonded to the metal, figured it was still doing its job and it wouldn’t hurt to paint over it.
Then, the joy of masking off the whole car for a few hours. I suppose I could have gotten away with less, but…

Finally I was ready to go to town, having gotten as many things out of the way as possible. I left the rear end in place obviously… I’m thinking of tackling that whole project later, after the car is on the road again. But we’ll see how long I can stand to look at the ugliness. Anyway for the undercoating, I started off by using some leftover spray cans of “Dyna Pro” which were at least 3 years old and were kinda weak in the spray department. It took 4 cans just to get from the back of the car to the wheel wells and beginning of the rear seat pan. Then I went and bought 4 cans of Evercoat rubberized undercoating from the paint shop, and that was the perfect amount to finish the whole rest of the car, and much faster since they sprayed a lot better.

Then, to hit the spots that were blocked by the lift pads, I put the car on the ground, crawled underneath and sprayed those areas.

Finally, I had planned in advance to do a little “while I’m at it” project. I peeled of the strategically-placed layer of masking tape to reveal the pinch welds, so I could black them out. Just one of those little details that helps to make the lines of the car look crisp.

And a couple crappy “after” shots where you can’t even see anything… but I guess that’s the point, isn’t it? I used the semi-gloss VHT rollbar & chassis black paint that I’ve been using on a lot of stuff. I really like it.

And now, one stupid little detail / digression. I had taken off the rubber snubber bumper thing that goes directly over the rear end so I could undercoat there and also clean up the snubber & bracket. These are the original bolts after just a little degreasing. It’s always kinda cool when you can reuse original fasteners that are in good shape.

AND NOW… something that happened a long time ago. Finally I can show you the vinyl top installation video. It took forever for [other members of the staff who will remain nameless] to get the premium / concours vinyl tops listed on the website. I figured it would be pointless to release a video raving about a product that isn’t orderable. But now it is! See on our website here. (Available in black & white, with & without sunroof, 67-68 and 69-70) Yes, it’s crazy expensive. But it is the bee’s knees, especially compared to the cheapo one. Once I saw the two side-by-side, I knew I had no choice, even though I’m a poor youngster. But I covered all that before. Here’s the video! (You might notice the lack of a beard on my face. It was a strange time in my life.)

Watch full-size on YouTube

Well done Andrew, looking great!

It really is coming along nicely, Andrew. Keep plugging away, I’m waiting to nominate you!!!

Update time! It’s a good one this time, but I’ll leave the best for last and start with the random stuff first.

After I finished the undercoating, my next little project was to cover up the black anti-rust paint and undercoating that was in the trunk area (backside of quarter panels / underside of package tray). I got some rattle cans of Dupli-color “Perfect Match” in Wimbledon White and went to town. It looks much better now. You can still see a little bit of the black peeking through but I don’t think anyone’s really gonna stick their head in my trunk with a flashlight to see if the color is perfect. So I’m content.

Also started feeding through the taillight wiring harnesses, which had been shoved up over the wheel wells by the painter to get them out of the way. More on the wiring soon.

So, once I started messing with the wiring, I noticed that the original cotton braided sleeving was almost entirely gone.

(Below is a section showing how it should look… interesting. Larger beige threads woven with smaller green ones.)

So, I did a little research and formulated a practical plan to revitalize the wiring. Removed both sides from the car and here’s how they looked. Not much of the sleeving left intact.

Fast forward and…

For the rear section originally wrapped in cloth tape, I simply wrapped some new cloth tape over the old, trying to leave the colored tags visible.

For the rest, I used an expandable plastic wiring sleeve from this place. 25 ft. was enough to do both sides. I got the 3/8" [nominal] diameter one and it worked perfectly, expanding over the plugs and tightening down over the wires when finished.

Obviously it doesn’t look anything like the original stuff, but it’s a good modern solution to achieve the same thing. Anyway, I secured the ends with more cloth tape.

Also made the accessory wire exits where appropriate and secured the plugs kinda like factory.

The RH side harness was a little tricky because I could only go so far in one direction until I ran into rubber plug for the yellow fuel sending unit wire, which was too big. I ended up going from the other side and meeting in the middle and it worked out well.
Anyway, the last thing will be to re-attach these little clips and secure them in their appropriate places. Still on the to-do list.

In other news… I installed a new fuel line. Some thrilling pics of the routing and fasteners… I’ll leave a couple out.

Original protective cover cleaned up and reinstalled over the new line:

NEXT: I was ready to install the fuel tank, finally. I started by putting goop (3M Strip-Caulk) around the perimeter of the mounting area.

Then, before installing the tank I figured it would be easier to install the fuel sending unit first. Here it is ready to go:

Strangely, I ended up having to use the smaller 5/16" filter sock (which is supposed to be for 67 only) because when I tried to fit a 3/8" one, it was clearly not snug enough to stay put for long. Other parts shown above are the gasket and retaining ring, and the brass float. Anyway, here it is installed:

And in goes the tank! The timing was perfect because we had just gotten the proper screws for mounting the gas tank.

Finally, hooked it up to the fuel line:

Then I cleaned up an original filler neck (my original one vanished) with the bench wire wheel and soaked it in WD-40 to hopefully preserve the bare metal. Then I splurged on the new rubber hose, the proper clamps, the gaskets for the neck (got 2 as recommended on the site) and a new cap. Also while I was at it, I installed the trunk latch striker.

Now for some other miscellaneous stuff!

Cleaned up and installed the cigarette lighter assy. New rubber bumper for the lid installed.

Ignition switch retainer blasted & painted. There is a repro one, but why bother when you have a decent original.

Ignition switch installed, using original trim bezel thing for now. It looks fine but I might be tempted to get one of the shiny new ones. Also cleaned up the face of the key slot since it was scratched up. Now it’s just scratched in a uniform direction.

Also, I had to scrounge in the junkyard to find a couple decent wire harness retainers that go on the driver’s side. No idea where mine went…

Managed to get the fuse block attached to the firewall through the insulation pad… Awls poked from the opposite side made it reasonably easy.

More scrounging in the yard resulted in the acquisition of proper fasteners for the wiper arm pivots, so I installed them along with new gaskets.

This next one is major, I managed to install these little bumpers for the glove box door. Pretty amazing accomplishment and I’m glad I documented it.

Now, on to something that actually IS a major accomplishment. Last week I got some help from coworker Darrell and we prepared the engine and transmission to put in the car. When Thursday rolled around, we were ready to drop it in. Here’s me posing by the engine before we married it to the trans.

Here’s the trans. cleaned up and basically ready to install. Darrell went to town cleaning it up with wire wheels + brushes, and blasted the bell housing. Then I degreased it and painted over the outside with a VHT “flame proof” satin clear coat. I like how it turned out, you really can’t tell there’s any clear coat on it at all. Hopefully this will help keep it somewhat clean.

Unfortunately I didn’t get any pics of the marriage of the engine and transmission, which is a bummer because it looked awesome. Kinda had my hands full though. By the time I was able to pick up a camera again, we had the job basically done.

Ta-Da! My first reaction was “wow, it actually looks kinda small in there!” There is more space to work around it than I remembered.

Yes, that’s the moon in the background…

Threw the valve covers and distributor on to make it look more finished…

So that’s the big news! It felt great to get that step done, and I’m grateful for Darrell’s help. After we were done I kinda stood there and looked at it in awe, with a stupid smile on my face. It’s so cool to see a shiny blue engine in there finally. Looking back at my photo files, it’s been 1 year and 1 month since Scott and I removed the engine + trans from the car in the first place.

Well, that’s all for now! Still a ton of stuff left to do, but it’s coming together!

Enjoy this time, it is like Xmas every time you work on it!

Look fantastic Andrew, that grin is not the grin is anything else but accomplishment! Ok it may have had something to do with the full moon. :grin34:

Congrats! Thanks for the photos since I didn’t get a chance to see it the other day.

HUGE progress, and a good archive for when I start putting mine together.

Well done!

Well done Andrew. The expandable wiring loom sleeve is a neat product. What’s next on the list?

Looks great! I wish I had time to do this to my cars (I work too much) I guess I can live vicariously through you. Thank you for the update. Keep up the good work. The car has come a long ways.

Awesome update! That cat will be ready to yowl at the moon soon!

As always Andrew great job on you attention to detail. It’s fun watching your Cougar come together.
Steven