Beautiful work and beautiful car!
Whew! What a monumental project to undertake - I commend you! One thing I must caution about is doing any sanding and/or grinding on leaded body filler - that’s a No No! The health issues from breathing in toxic lead is well documented.
Here’s another tip that you might find useful, or may have helped earlier in the project! ![]() Eastwood sells a product to deal with rust in hard to get places. Only caution I will say is to use it before exterior areas are painted as it does run. http://www.eastwood.com/internal-frame-coating-w-spray-nozzle-qt.html
Eastwood sells a product to deal with rust in hard to get places. Only caution I will say is to use it before exterior areas are painted as it does run. http://www.eastwood.com/internal-frame-coating-w-spray-nozzle-qt.html
I am not afiliated with the Eastwood company but have used their products, including the internal frame coating one and have always had good results. They also make some two stage aerosol paint cans that I am dying to try. These will be much more durable than typical rattle can coatings. http://www.eastwood.com/paints/2k-aero-spray-paints.html
Good luck with your project!
Thanks for the comments & encouragement everyone! I’m hoping to keep up some momentum but the days are starting to get shorter, colder and wetter here, so my motivation to work on it might start slipping. But I refuse to let that stop me.
The short list looks like this:
To Do:
- Everything Else
But to elaborate, I guess I’ll start bolting things to the engine, like pulleys and brackets and vacuum trees and water necks and stuff. Install new starter solenoid and voltage regulator. Attach wires. Procure and install trans cooling lines. Install refurbished trans fluid dipstick tube. Attach fuel line to pump, pump to carb. Determine if I’m going to use my generic replacement carb for now or find a proper '68 Autolite 2100 to rebuild. Attach choke tubes if necessary. Also some things in the cabin like cutting the front speaker holes and finishing things up under the dash. Also need to assemble a heater box and find out if I can re-use my A/C evaporator core, and install the blower fan assembly and vents and ducting… Which reminds me, at some point I’ll have to refurbish / replace the A/C components under the hood. Aaaand I’m thinking about doing the rear seat divider panel, and probably some sound deadener in the interior, maybe start wiring stereo stuff… And of course I need to get the rest of my skins from the painter and start putting them on, do all the weatherstripping for the whole car, install windows & mechanisms, door handles / lock mechanisms, carpeting, upholstery, restore and install dash & gauges, refurbish entire rear suspension, brakes & axle housing, restore front grille and rear taillight grilles, blah blah blah blah blah blah…
Have you even started looking for the proper Autolite for your car? Just asking 'cuz I’ve got a pile of 2100’s that I still need to document and inventory. Seems strange that WCCC lists no 68 carbs on the website. Under construction?!?
Edit: Oops. Had 67 Cougar selected under the ‘Vehicle’ section, then was trying to look at 68 carbs. All better now!
For now I’m using the 1.08 venturi carb I have, which is theoretically the right size for a 289… There’s been some debate around the office, however, about whether I should put on a bigger one (1.14 / 1.23) since the engine is now professionally built / slightly more displacement and might benefit from breathing a little more, with the right jets. Any opinions?
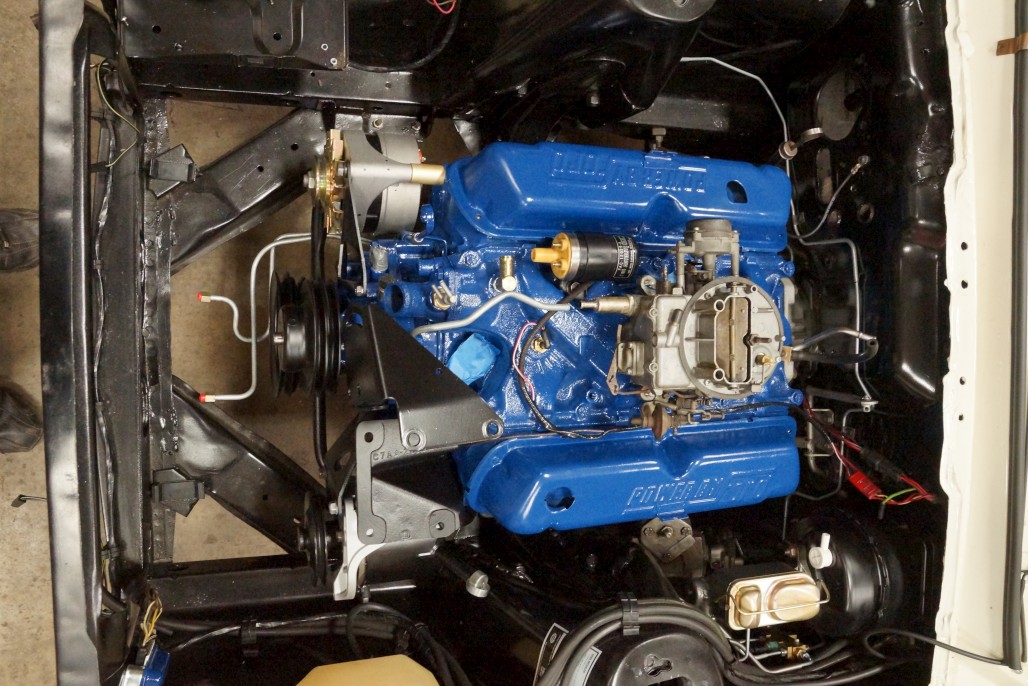
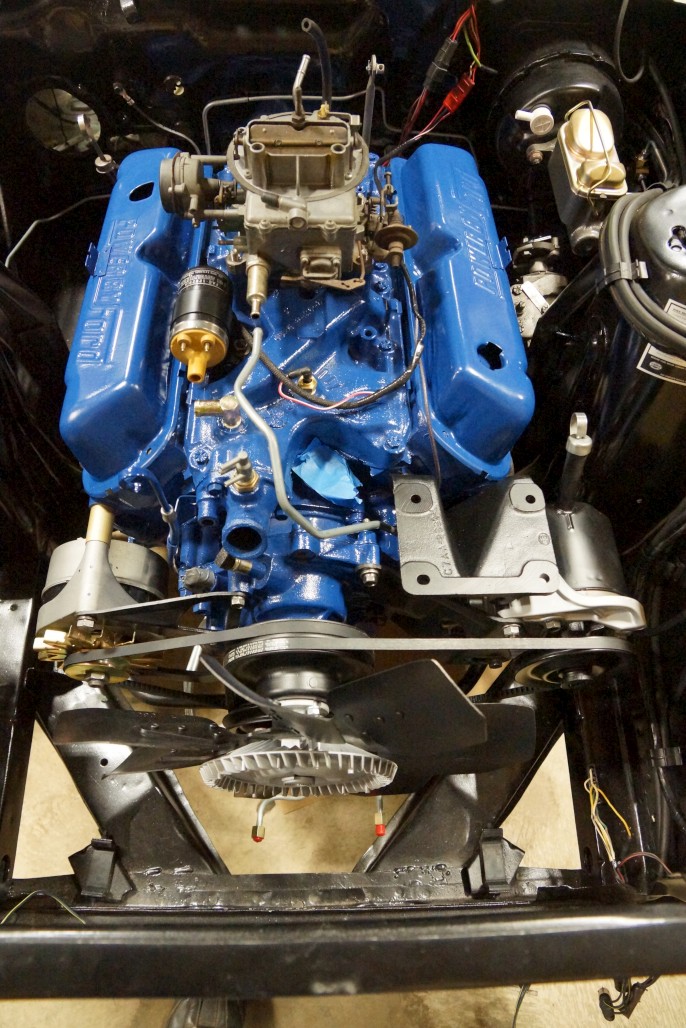
Anyway, time to do an update. First of all, I wanted to post some pics from underneath because it looks cool:
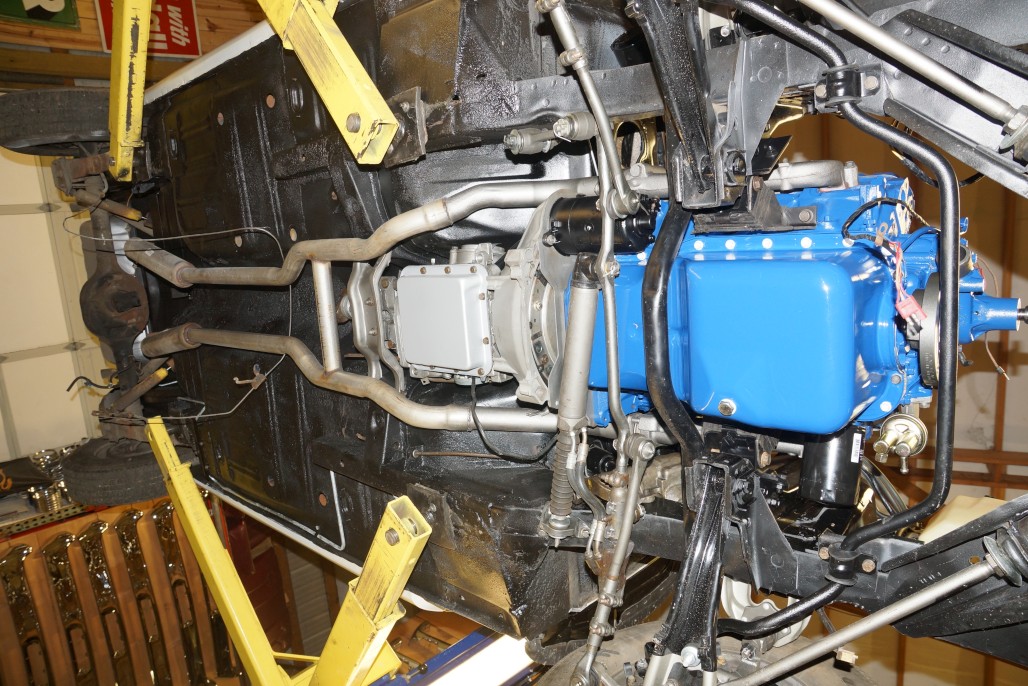

While looking at the underside I couldn’t help but think that this is like a giant toy, especially with the big blue engine and silver transmission, and misc. black stuff. It’s like a Lego set, only it doesn’t just snap together. Also note the starter, which I just gave a cosmetic resto. It’s a fairly recent remanufactured unit and still works like a champ. After this shot was taken I did install the inspection cover for the trans, so don’t worry 'bout it.
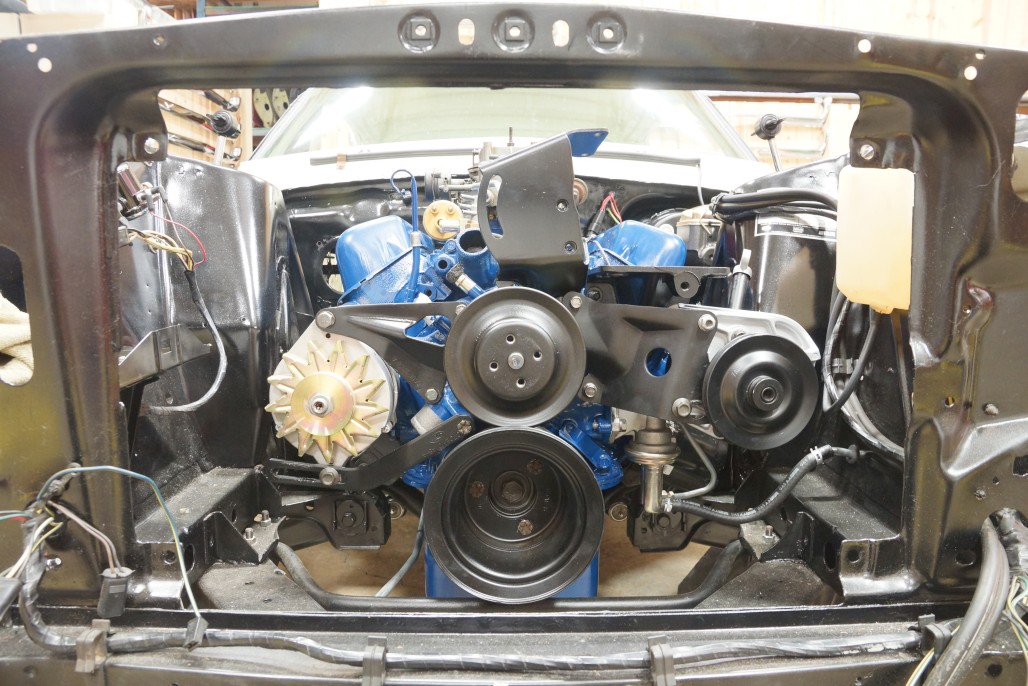
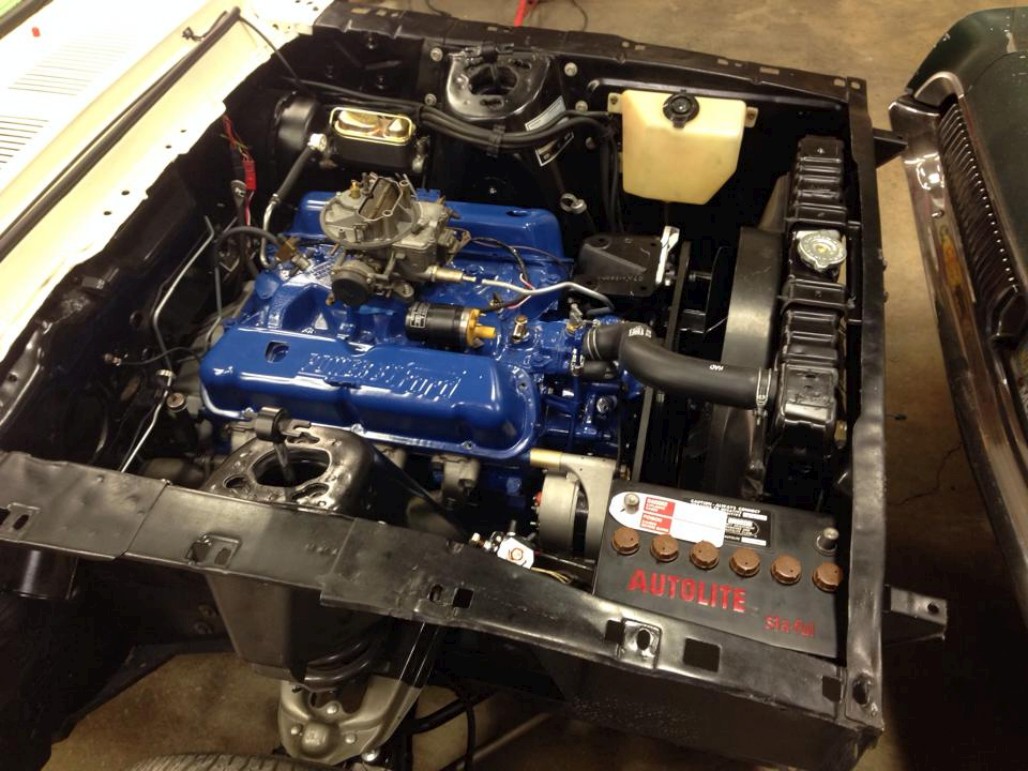
So basically I’ve been busy cleaning up bits and pieces, installing new parts, and generally trying to button up the engine compartment & drivetrain. Here’s a shot after blasting and painting the front brackets & installing them on the block.
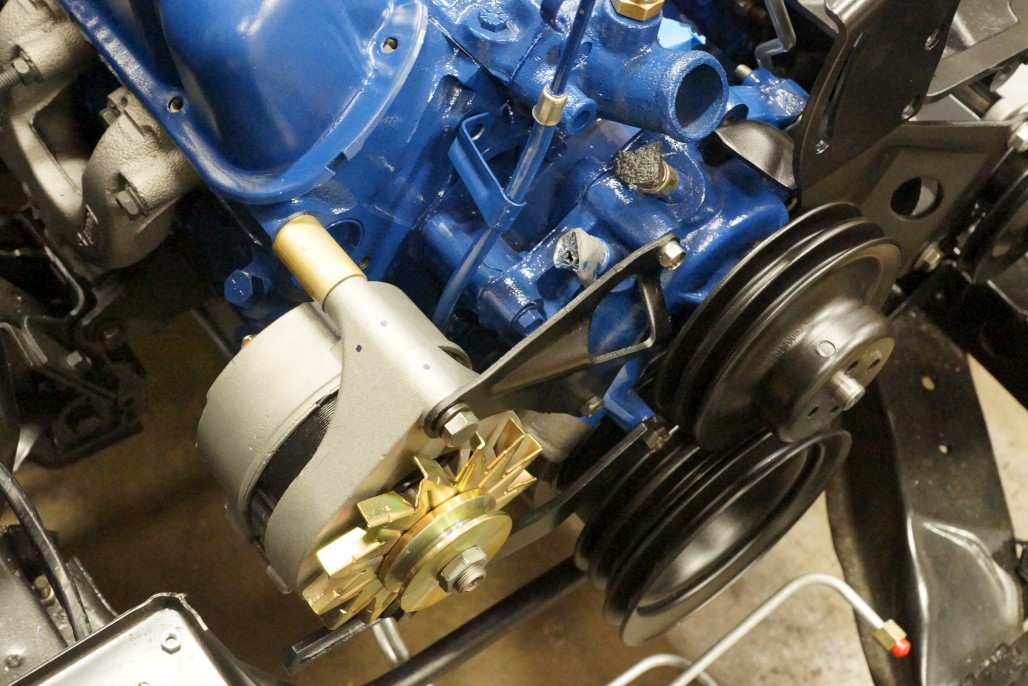
I opted to get a reman alternator from Auto Zone… 65 amp. It came with a black fan, so I replaced it with a more correct looking gold cad fan.
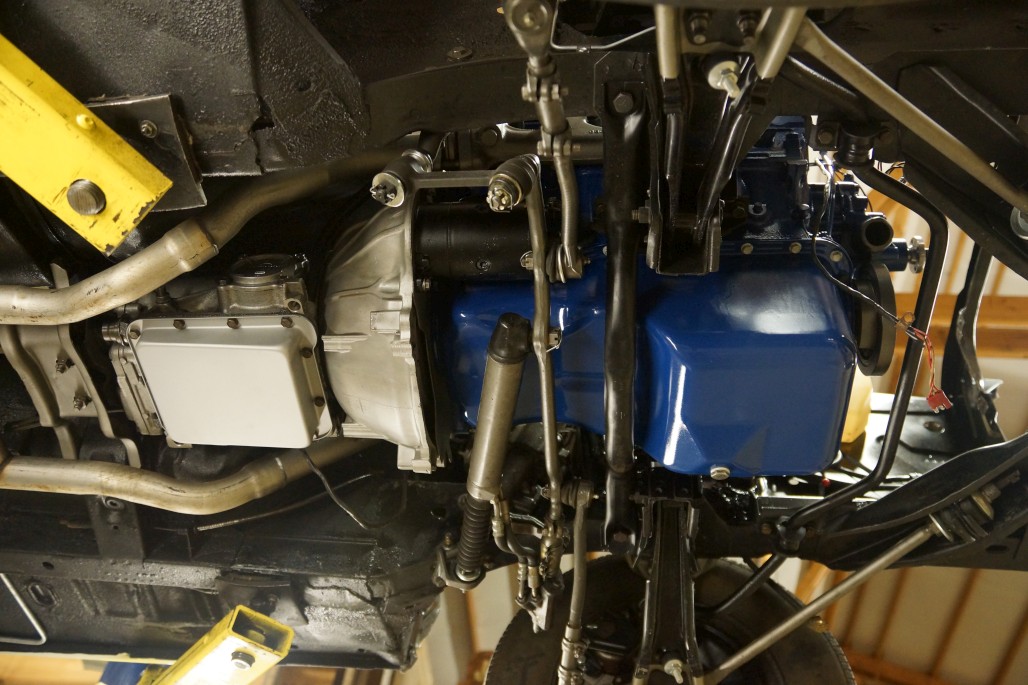
Another view that shows a few of the other additions. Note the new trans. cooling lines - they are a little tricky to install, especially with the sway bar in place. After I installed them the first time I realized that they’re supposed to go OVER the sway bar, not under. The clearance is deceiving with the car in the air… it will be lower when the car is on the ground, giving the lines more space to go over it.
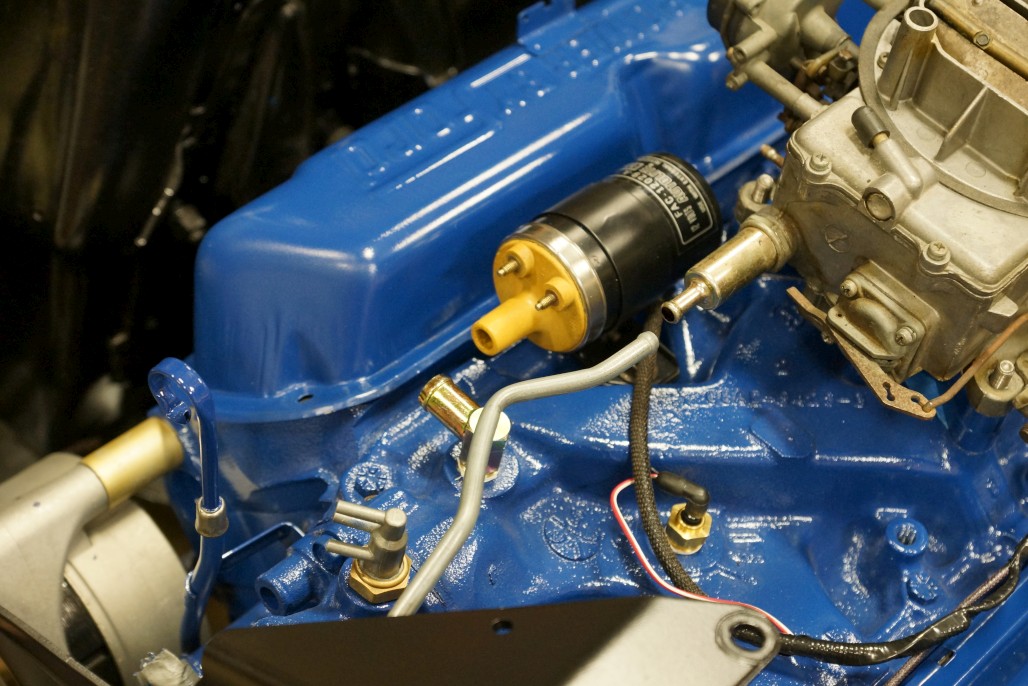
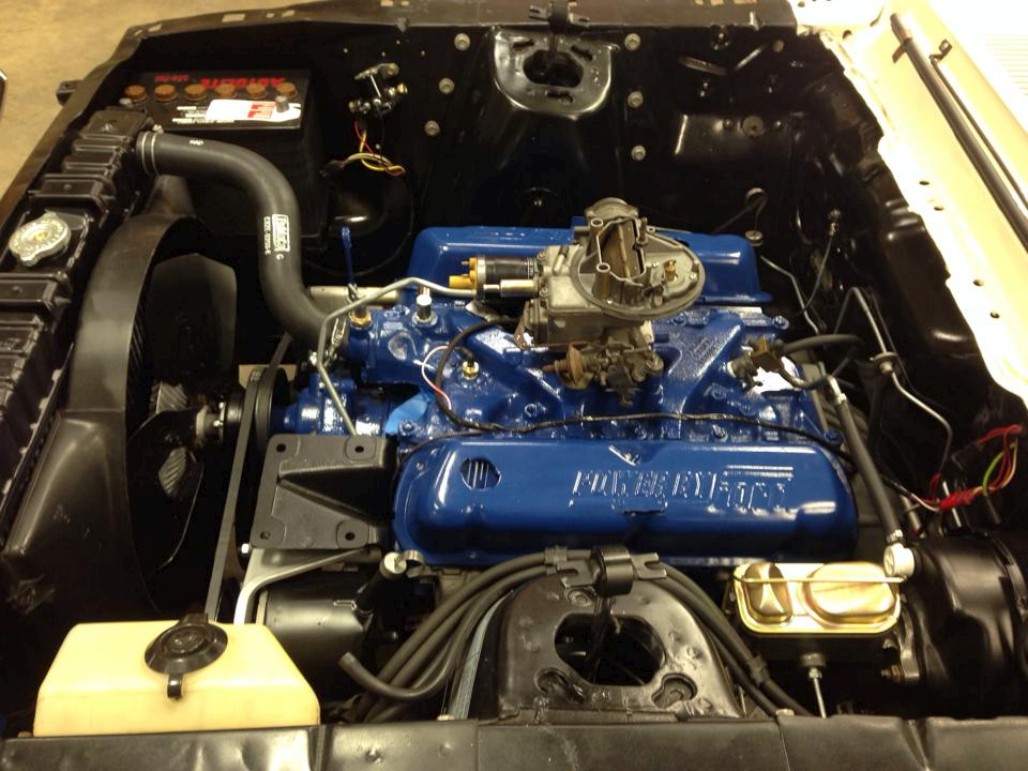
Gave my original coil a cosmetic refurb. with some paint and a decal. Left the collar bare, thinking it looked kinda cool, but it’s supposed to be black like the rest. Still seems to function just fine. I may cave in and replace it with a new one at some point. Other new parts in this shot include the water elbow, engine feed wiring harness (used the XR7 version because of the red plug and slide-on oil sending unit plug, which is how mine was equipped. This is the one: here.), new water temp sensor, and new fuel pump to carb steel line… etc.
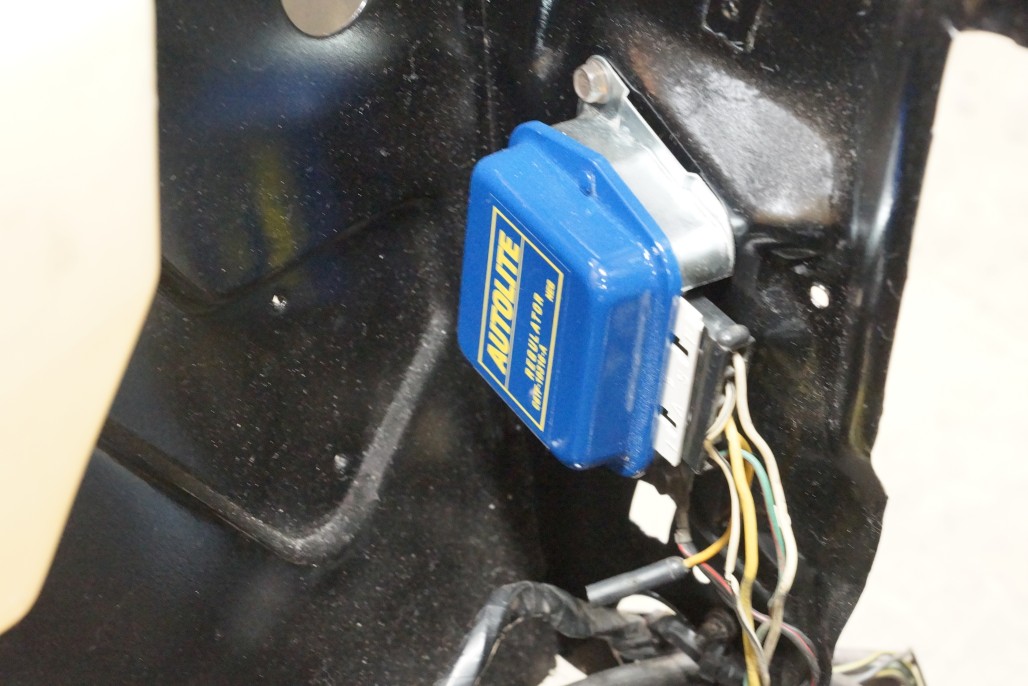
Got a new solid state voltage regulator and painted the cap blue and stuck a decal on it. I could have bought the whole repro cover with the correct stamp, but the new regulator was totally sealed with a hardened gel-like substance, so I opted for the easy and cheap method.
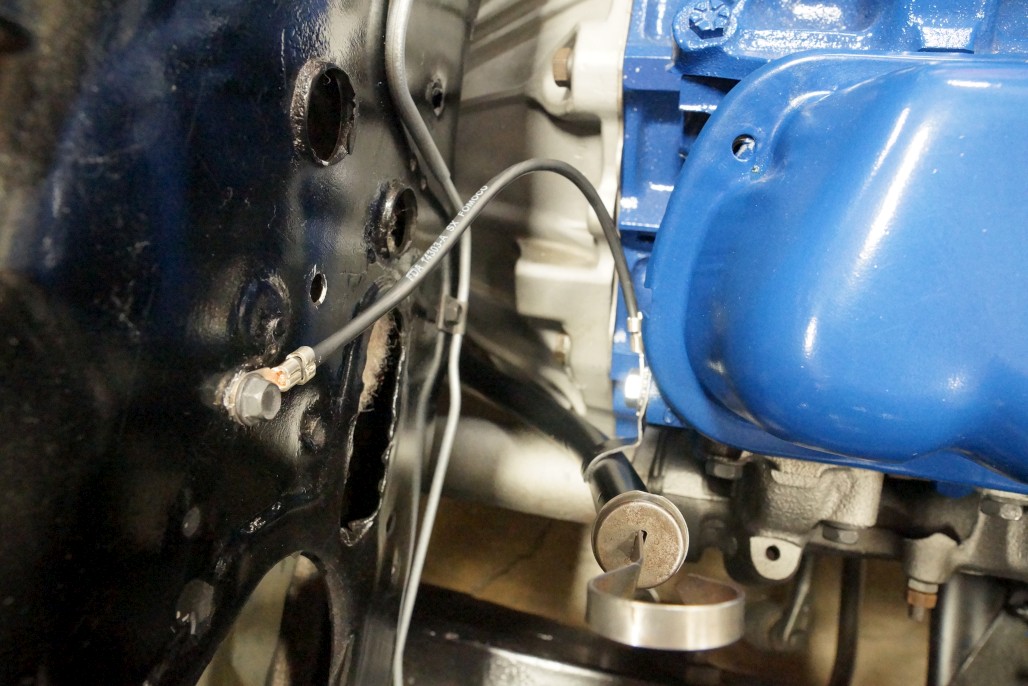
New ground wire. Just for reference in case anyone forgets where this goes…
Next was to put the fan / clutch / pulley on, which of course are all cleaned up and repainted:

Also installed a couple of the belts. The PS pump I didn’t do much other than remove the reservoir to repaint it, clean the inside, and paint the bracket natural cast aluminum color. It had a “remanufactured” tag on it, so hopefully it’s still good. I later took the belt back off it since it wasn’t yet hooked up to anything.
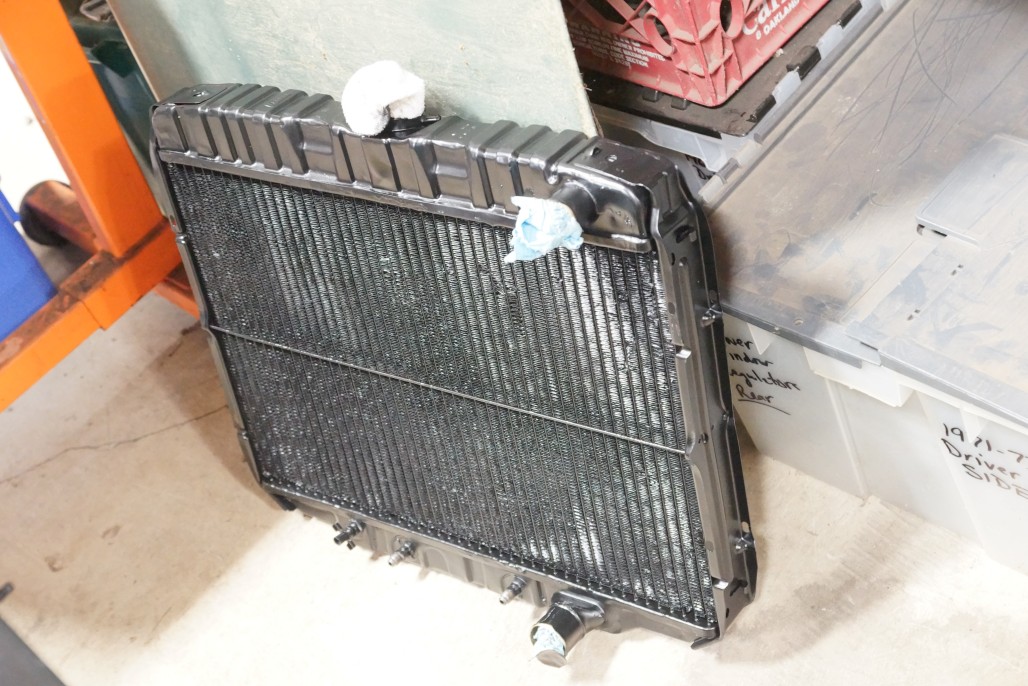
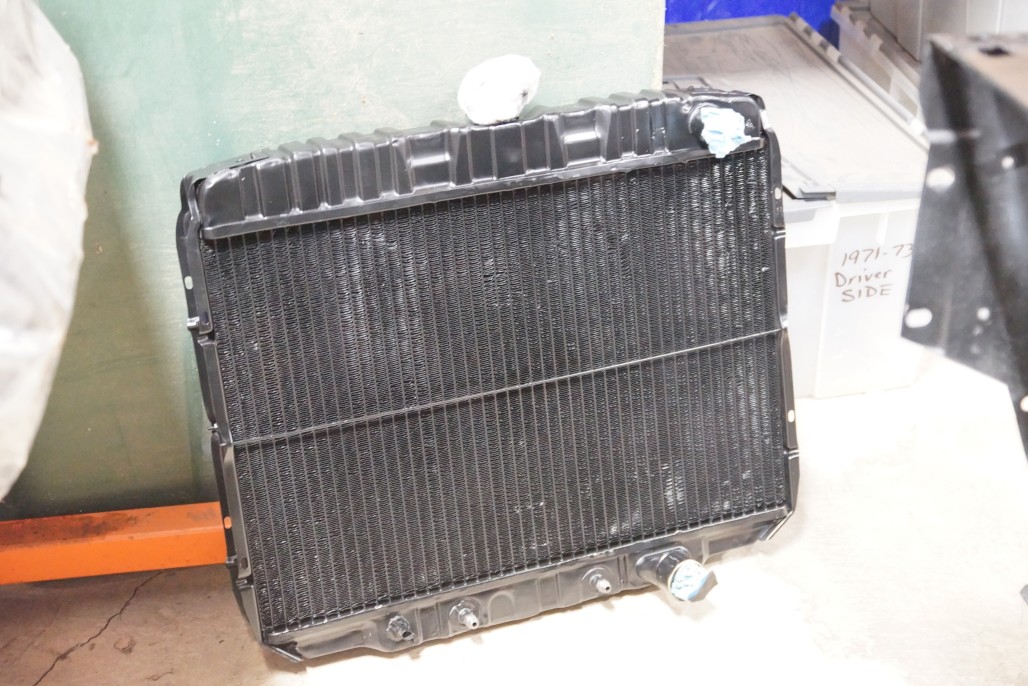
The next logical step was to install the radiator. Luckily for me, my original 24" radiator was in good shape. Just a handful of acorns inside, but clean other than that. I boldly decided to clean it by bead blasting it, which was a little iffy but I was careful to keep some distance and not too much pressure. I managed to do this without hurting anything, although some of the fins may have gotten slightly bent on the edges. Here’s what it looked like after blasting:
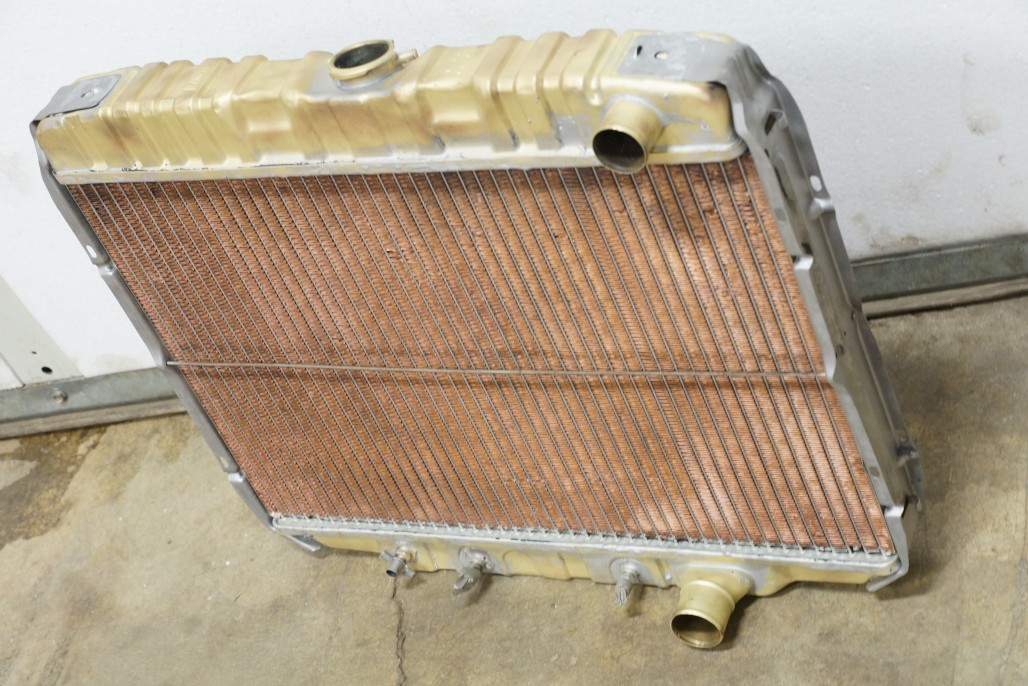
Then I painted it with some VHT Engine Enamel in semi-gloss black. Should be able to withstand high temp, hopefully.
Next, I needed to fix a crack in my original fan shroud. It was in good shape overall, but there was a crack along most of the seam on the top passenger side. I ended up using some JB Weld “Clear Weld” 2 part epoxy that seemed to work really well. Here are some “after” shots. Looking at it in the car, you wouldn’t notice anything had been repaired. I just used enough so that it didn’t seep out on the visible side.
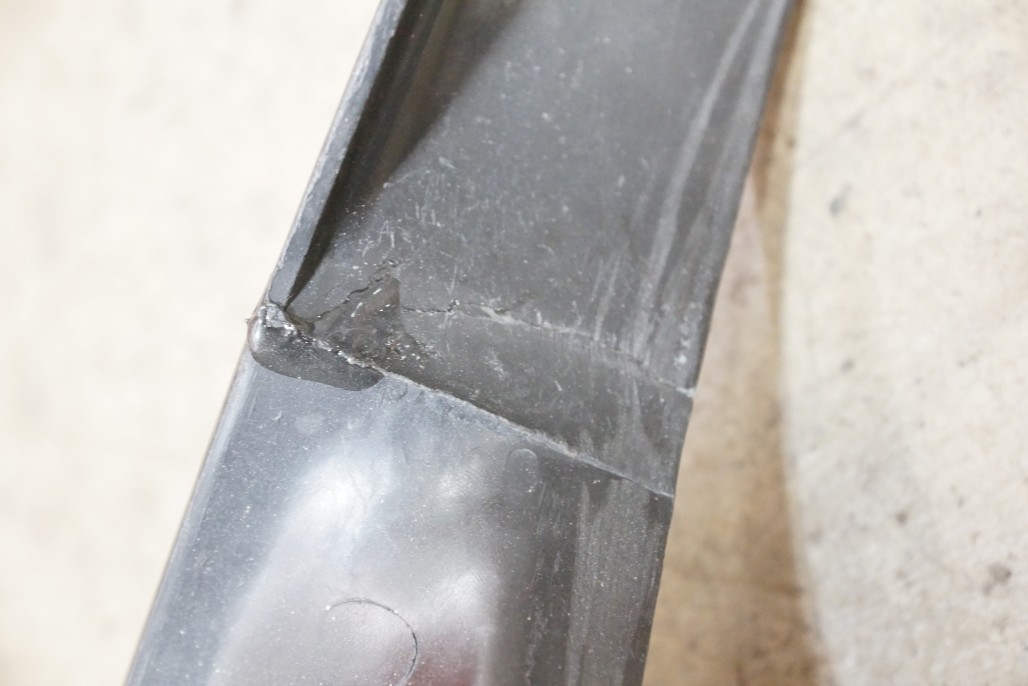

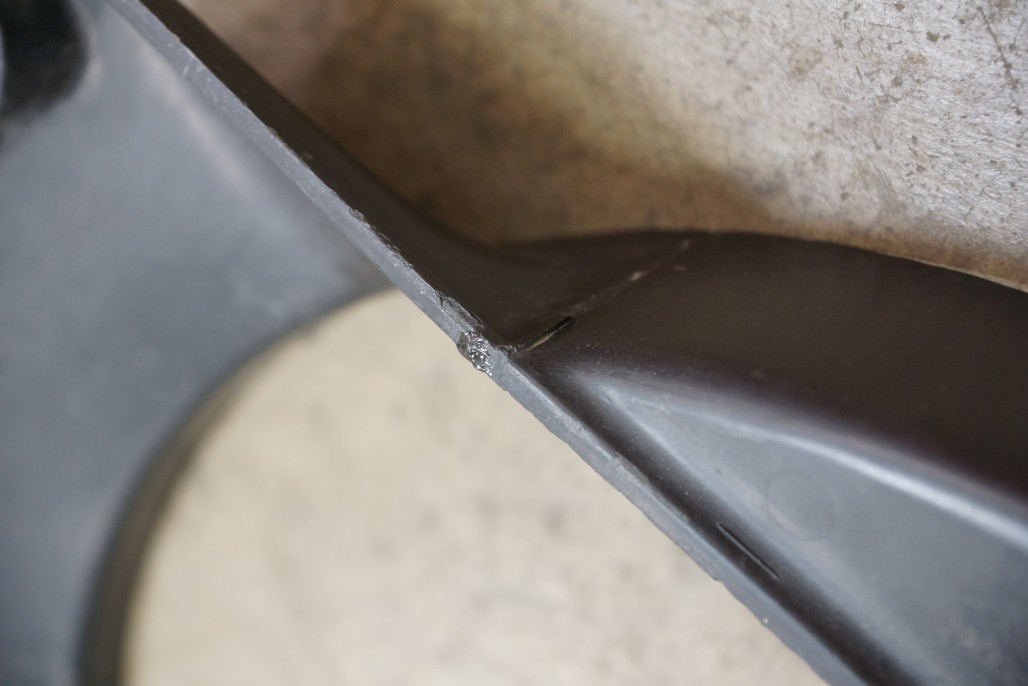
Ta-da… ready to install
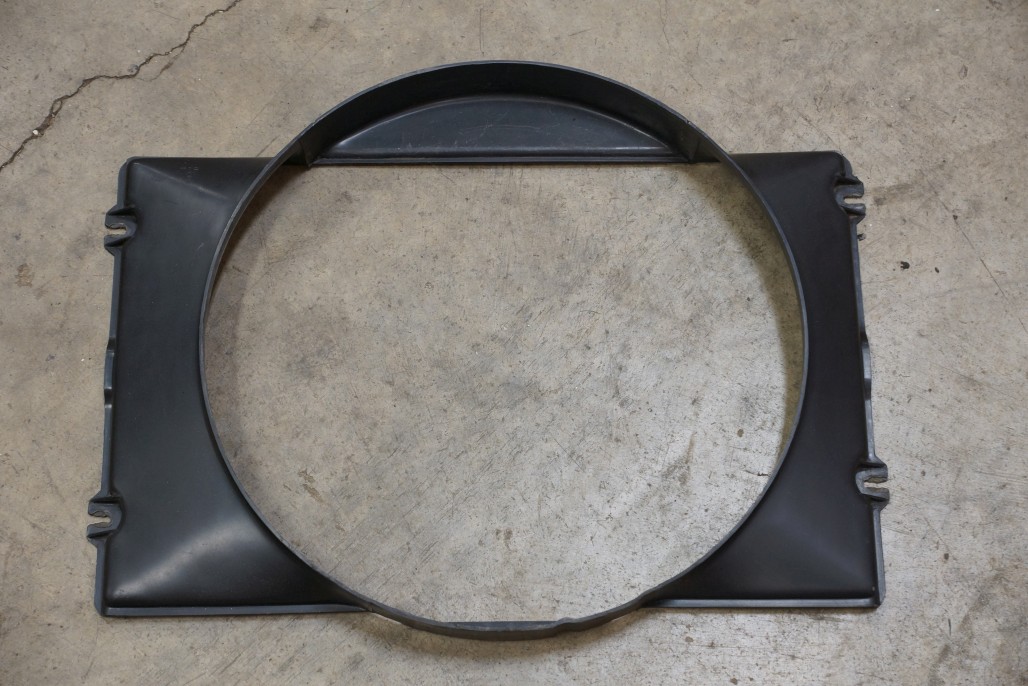
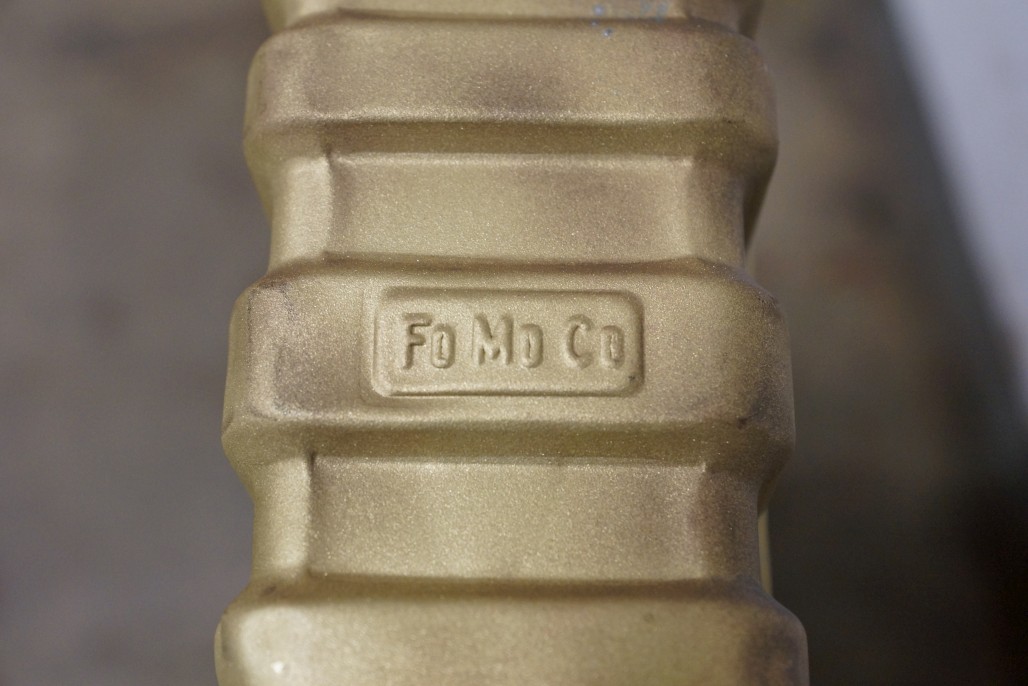
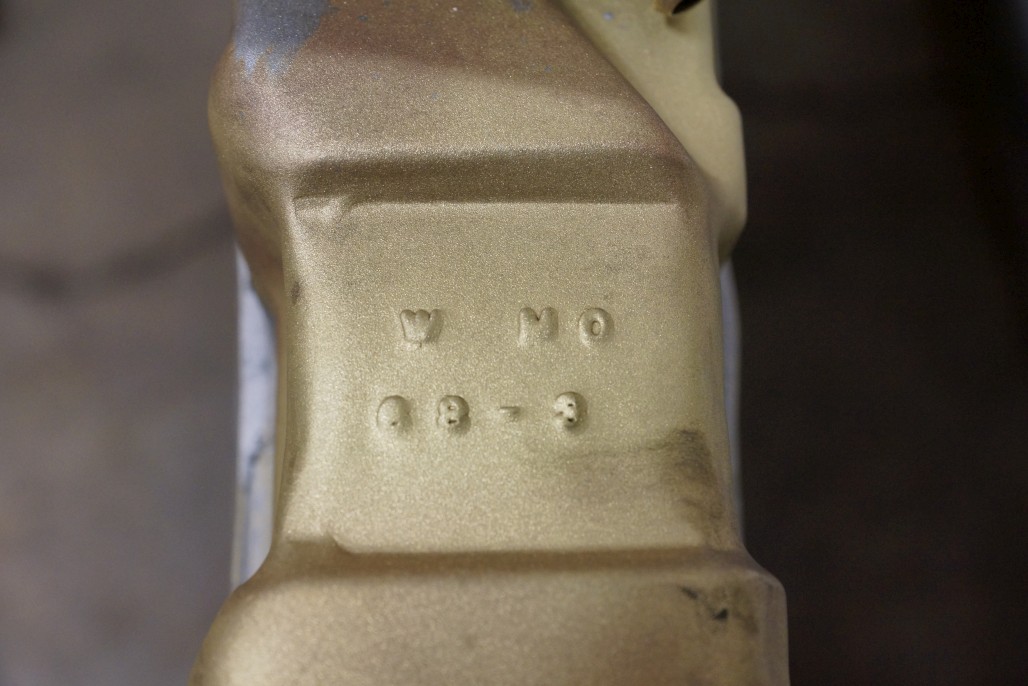
Part number just because:

Fast forward, and things are really coming together. These are cell phone pics but they work.
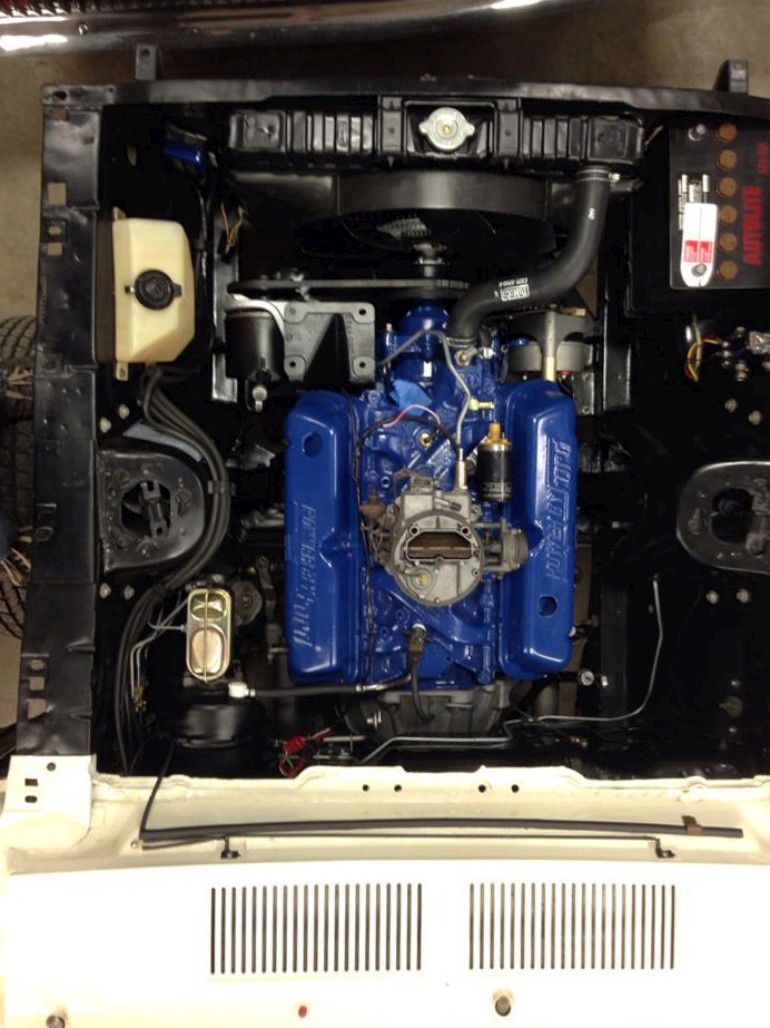
It really looks a lot more complete with the radiator / shroud in there. Also I may as well mention that I used new hardware for the radiator and for the shroud. Also put new rubber pads in the lower and upper mounts for the rad. And of course the hoses, clamps, and cap are new too. The battery is an old-ish repro of the original Autolite, but I’ll have to fill it with acid and stuff. Don traded it to me when he stole my like-new Duralast battery for his beater Honda. I’m not sure if I want to use it yet, or get a new modern battery and just use the fake Autolite cap. But anyway…
At this point it was finally time to pour some life blood into the engine. 5 quarts of Joe Gibbs break-in oil, straight down the distributor hole. Then a long extension on a cordless drill enabled us to spin the oil pump (counter-clockwise of course) until drops of oil started to seep from the lifters and over the rockers. I then turned the engine over with the starter for the first time, hoping to circulate the oil a little more. Next, antifreeze and water into the radiator. Then I installed the driveshaft, which I haven’t cleaned up yet but just needed it to seal the back of the trans so I could put fluid in it as well. And on it goes… hooking up wiring, installing Pertronix unit into dist., seating dist. in the right place, installing spark plugs and wires, running a short hose from the water pump to the neck on the intake (no heater box yet) etc etc. Finally, it was time to pour some gas in the tank and see if she would fire up. Here’s a brief video compilation of what took place:

To give a brief synopsis of what happened: The first night we tried to start it, it actually fired up the first time and seemed to run great for a few moments. Probably thanks to the initial dose of starting fluid. But then we couldn’t seem to keep it running, and it didn’t seem like it was getting enough fuel. The fuel pump was fairly new, so I was hesitant that that would be the problem. But by the end of the night, that seemed to be the most likely culprit. So I came in over the weekend and installed a new fuel pump, buttoned up a few other things, and tested some of the electrical components to make sure they weren’t the problem. Then after work on Monday, with Darrell’s help again, we made another attempt. It was definitely getting fuel, but wouldn’t fire - no spark. That turned out to be simple, the spark plugs were drenched with gasoline from the previous attempts. We just had to remove them, dry them off and reinstall. After that, it fired up, but wouldn’t stay running smoothly. We tried a different coil and bypassed the wiring from the ignition switch to the coil. It would run, but for some reason it kept surging in an almost rhythmic way… would rev up, almost die all the way down, then rev up again. So finally we took off the top half of the carburetor and discovered that it was kinda gunked up, just from sitting for a year or two. So we cleaned it as best we could and dug into a rebuild kit to replace some of the parts. That helped immensely, and we were then able to fire up the engine and run it smoothly, allowing the 20 min / 2000 rpm cam break in period to happen. Finally, it runs!
So that’s the big news of the week. It was pretty exciting to hear it run. I’ve been itching to start it up again for no good reason, just to hear it. But for the next couple weeks it will hide under a car cover while I’m on vacation for the holidays. When I get back, I need to pester my body guy, as he still hasn’t painted the fenders, hood, trunk lid, extensions, valences, and other misc items. Also need to assemble a heater box and get that in the car, put together the entire A/C system, do all the ducting under the dash, cut the kick panels for speakers, install new dash speaker, refurbish dash components, restore steering wheel, do sound deadening, carpeting, upholstery, lights, wiring, trunk mat, weatherstripping for the whole car, find some good glass (some of mine was lost in the shuffle), start restoring the grille and taillight bars, etc etc etc… one thing at a time…
One more parting video clip… basically the same thing but just a short clip I did on my phone for facebook bragging purposes. Video
Onward and upward! Hope you all have a great Xmas & New Years & stuff.
1 Like
Looks like a fine job Andrew, Very nice!
Beautiful work, I admire your attention to detail. A few thoughts about starting a fresh motor;
NEVER use starting fluid with a new motor, ether is explosive and will damage engine parts. Gasoline has always worked for me.
Fill the carburetor with gasoline through the vents before you begin to attempt to start the engine.
As you assemble the motor, when you align the marks on the timing chain, that is #1 firing. Stab the distributor in at this point with the rotor button pointing to #1 distributor cap terminal.

Use this procedure to set the valves. No futzing around with cut valve covers, no oil on the manifolds. Build the motor, set the valves and bolt the covers on to stay;
**_Adjusting Hydraulic Lifters for Proper Preload
In order to adjust the preload the lifter must be properly located on the base circle or “Heel” of the lobe. At this position the valve is closed and
there is no lift taking place. You will need to watch the movement of the valves to determine which lifter is properly positioned for adjusting.
- Remove the valve covers, and pick a cylinder you are going to set the preload on.
- Hand rotate the engine in its normal direction of rotation and watch the exhaust valve on that particular cylinder. When the exhaust
valve begins to open, stop and adjust that cylinder’s intake rocker arm. (Why? Because when the exhaust valve is just beginning to
open, the intake lifter will be on the base circle of the lobe, the correct position for adjusting the intake.) - Back off the intake rocker arm adjuster and remove any tension from the pushrod. Wait a minute or two for that hydraulic lifter to
return to a neutral position. The spring inside the lifter will move the pushrod seat up against the retaining lock if you give it time to do
so. (If you are installing brand new lifters they will be in the neutral position when they come in the box.) - Now spin the intake pushrod with your fingers while tightening down the rocker arm. When you feel a slight resistance to the turning
of the pushrod, you are at “Zero Lash”. Turn the adjusting nut down one half to one full turn from that point. Lock the adjuster into
position. The intake is now adjusted properly. - Continue to hand turn the engine, watching that same intake. It will go to full open and then begin to close. When it is almost closed,
stop and adjust the exhaust rocker arm on that particular cylinder. (Again, when we see the intake almost closed, we are sure that
exhaust lifter is on the base circle of the lobe.) Loosen the exhaust rocker arm and follow the same procedure described before in
steps 3 and 4 to adjust this rocker arm. - Both valves on this cylinder are now adjusted, and you can move on to your next cylinder and follow the same procedure again._**
The goal is to start the rebuilt motor with the least amount of cranking.
Edit-better photo
I did think the same thing as Art. With fuel in the carb when you go to first start the car, I will help it run while it give the fuel pump the time to pump the gas to the carb. I can’t see the numbers on Arts diagram, but what I have done with the timing is this. Set your timing, lets say between 6 to 10 degrees with the pointer and the vibration damper. Then go to the distributor and position or rotate the distributor to #1. The one thing to remember though is the rotor does not allow a spark until the rotor has just passed the #1 wire. The spark occurs on the trailing edge of the rotor, so the rotor will be just a tad passed #1. Make sure you also have a timing light hooked up to make a fine adjustment and a tach for doing a quick adjustment to the carb.
I know you have the car running now, but for the future, this may help. Again, nice work. ![]()
Shoot, you guys always have such good advice after the fact. Maybe I should start asking more questions BEFORE I start doing something critical! Oh well, hopefully nothing was damaged by the many attempts to start it. And I may still pull the valve covers again to do more fine tuning on the valves, especially if I can wrap my mind around the technique Dr Art mentioned. But at least we put the distributor in properly, and we did fill up the carb bowl with gas. The bad fuel pump kinda put a damper on having a simple first start.
This whole thread is car porn!!! Got me itching to get mine done. Beautiful work…
Sent from my DROID4 using Tapatalk
It’s nice to see that your “roof replacement” is coming along so well. I know how excited I was to start my motor the first time, and mine doesn’t even have the significant history that yours does. Congratulations on one of the biggest steps in your project.
I prefer stacking the firing order (first four on top, second four on the bottom) and then turning the engine until the valves of the cylinder opposite the one you want to adjust are rocking (one valve opening, the other closing), make them even. Then, do your adjustment (the cylinder of interest will be at or near TDC). Go on to the next in the firing order and repeat until you have adjusted all eight cylinders.
For example: Cylinder 1: Make cylinder 6 rockers rock (and make them even), adjust cylinder 1. Cylinder 5: make 3 rock and adjust. When you get to Cylinder 6, you make cylinder 1 rock, etc. This example assumes a 15426378 firing order, change/interpret as needed for 351/400 (13726548 firing order).
With my method, you adjust 2 valves at a time and will be turning over the engine half as much.
Having said that, Art’s method would work fine as well.
When this topic comes up, I always like to mention this fun fact:
Did you know that small/big block Chevrolet firing order is in fact the same as Ford (except 351/400)? If you change the cylinder numbers on a Ford to Chevy numbering and then interpret the firing order with the new cylinder numbers, 15426378 ends up being 21843657 which is 18436572 shifted by one (shifted because of the difference in the way the cylinders are numbered: cylinder 1 for Ford is 2 for Chevy).
You are doing great work on that car. I read the whole post last night, you’ve been busy. Great pics of your Grandparents with the car too.
I didn’t know that, good info on the valve adjustment too.
Yup, that’s because Chevy numbers their cylinders based on Distributor rotation, and not cylinder placement. Except the Windsor blocks have a different firing order than all other small block fords. Which is why there is a 302, and a 302HO. The HO has the Windsor firing order.
Sent from my DROID4 using Tapatalk
Not quite. More than just Windsor’s, 351C and 400M too (see Art’s firing order diagram for example).
Although the 302HO may have the 351/400 firing order (and here’s why: old 302 firing order vs. 302 HO and 351 order. | Ford Mustang Forums), there is a lot more than that which differentiates the two.
That’s true. However; the 351C, 351M, and 400M are not small blocks.
Sent from my DROID4 using Tapatalk
LOL, wrong again! The 351C most certainly is, the 351M/400M are also unless one defines big or small block by the bellhousing bolt pattern alone (even then, not so fast, there were dual bolt pattern 351M/400M blocks). They are all 335 series engines, small block.
Anyway, back on topic, looking great Andrew!
hi Andrew ,
very nice job
Just catching up Andrew. Your progress is astounding. And … Funny thing is, I feel good that I got my Rally clock working…kinda puts the enormity of you project in perspective, ehhh? Keep the faith!!!
![]()